You can define the identity, purpose, and inputs for your first avatar.
Reading: about 15 minutes. Practice: 10 active minutes. Avatar creation, queues, and extra production need separate sessions.
An animated photo and a digital version of you may look similar, but they need different inputs. Choose before recording.
In 1 minute
Identity: real Otávio or fictional Nina
Purpose: a short, clearly identified explanation
Inputs: face, voice, and movement kept separate
1An avatar represents someone in a scene
Avatar is a visual representation used as a presenter or character.
It can start from a photo, a recorded person, or an invented character.
A digital twin uses material from a real person.
A fictional character needs a consistent appearance but does not represent a lived experience.
At Oficina Clara, Otávio wants to explain a technique using his own identity.
Bia is also planning Nina, a fictional presenter.
These paths should not be mixed up.
An invented character can present information, but should not be given a real story they never lived.
Bia, a 32-year-old producer, keeps Nina separate from the teacher’s identity.
Prompts to compare · teaching example
PromptAsk for a copy of anyone using a photo found online.
There are no observable limits to check the work against.
PromptChoose your own identity or an invented character and record the inputs.
There are clear criteria for checking the decision.
Compare the two instructions. They are examples written for this lesson, with no simulated tool response.
2Three inputs, three review criteria
The face sets the appearance, the voice provides speech, and movement guides the performance.
A feature may combine these parts, but each still needs review.
In HeyGen, III, IV, and V label system generations; your account shows which fit your avatar type.
Do not choose based only on the higher number.
Check the required input and displayed cost.
A path that accepts a photo does not necessarily accept a full performance reference.
Record the feature used so you can repeat the test later.
Limit = cost per attempt times the maximum number of attempts.
Fictional example: 10 credits per attempt, up to three attempts, for a 30-credit limit.
Otávio, a 59-year-old instructor, chooses to teach a technique using his own image.
Completed brief · lesson example
1Identity: real Otávio or fictional Nina
2Purpose: a short, clearly identified explanation
3Inputs: face, voice, and movement kept separate
Use this sheet as a reference. Replace the example with your own project.
3Check the decision against its use
Photo, voice, and movement are different inputs; one reference does not automatically replace the others.
Otávio uses the sheet to check: inputs: face, voice, and movement kept separate.
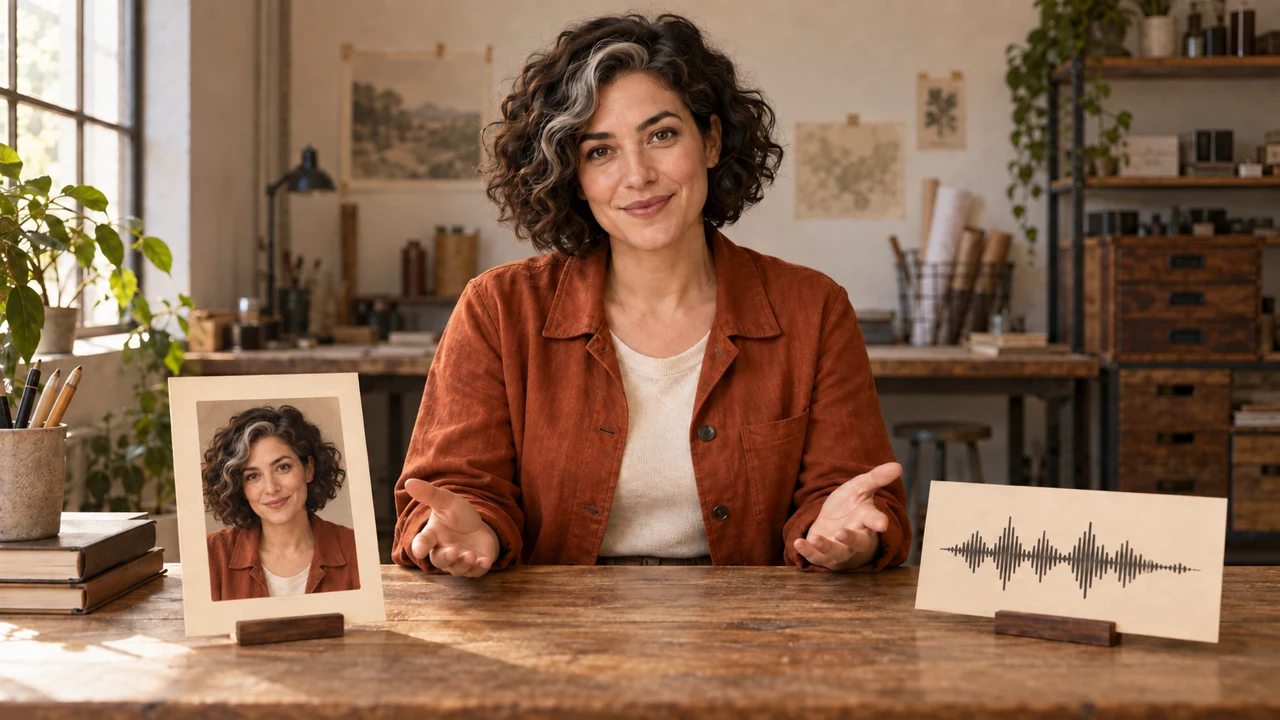
Didactic illustration created in Codex: The table shows reference planning. No portrait in this illustration was turned into a real avatar by a tool.
Test yourself
You want to represent yourself. Which set of inputs is a clear place to start?
It’s normal to get stuck hereFor a simpler start, use your own photo and a short recording of your voice.
Practice now 0/3
Choose who presents and which path to use
About 10 minutes of active work. Generation queues do not count. You’re done when the sheet distinguishes identity, purpose, files, and access.
Use files you own or are allowed to use. Generation may require an account and credits. Leave tasks you have not done marked as pending, and keep the originals.
Presenter: <me or fictional character>
Purpose: <short explanation>
Public identification: <real or virtual>
Photo / voice / movement: <source and status>
Tool and mode: <current screen>
Cost and limit: <account values>
After these steps, you can define the identity, purpose, and inputs for your first avatar.
Lesson cheat sheet
Choose who presents and which path to use
Identity: real Otávio or fictional Nina
Purpose: a short, clearly identified explanation
Inputs: face, voice, and movement kept separate
Your next step
You now have criteria for defining your first avatar’s identity, purpose, and inputs.
Save this lesson’s deliverable in the project folder. You will use it in the next step.
Next: Record a reference the tool can read
Production follow-up and documentation · Module 1Production notes and safeguards for continuing after the short practice.
An avatar represents someone in a scene
Experiment at your own pace
Write who appears, what message they deliver, and how you will identify them.
What to observe
Use your own image or verifiable permission. The real person must complete the confirmations required by the tool.
Three inputs, three review criteria
Experiment at your own pace
List available image, audio, and video files, with the source and purpose of each.
What to observe
Tool guides change and may differ. Check the mode shown before committing to a batch.
Check features and costs in your current account. Guides may show different paths depending on avatar type and mode.
Lesson 1 · AI Avatars v6.2 · INEMA.CLUB PRO
Module 1 · Lesson 2 of 12
Record a reference the tool can read
You can capture your own photo and video with your face and gesture visible.
Reading: about 15 minutes. Practice: 10 active minutes. Avatar creation, queues, and extra production need separate sessions.
A dark or choppy recording does not improve by being sent to a generator. The input needs to show what should be preserved.
In 1 minute
Photo: clear face, mouth uncovered
Video: simple gesture, camera supported
Requirements: check the chosen feature
1Set up light, framing, and camera support first
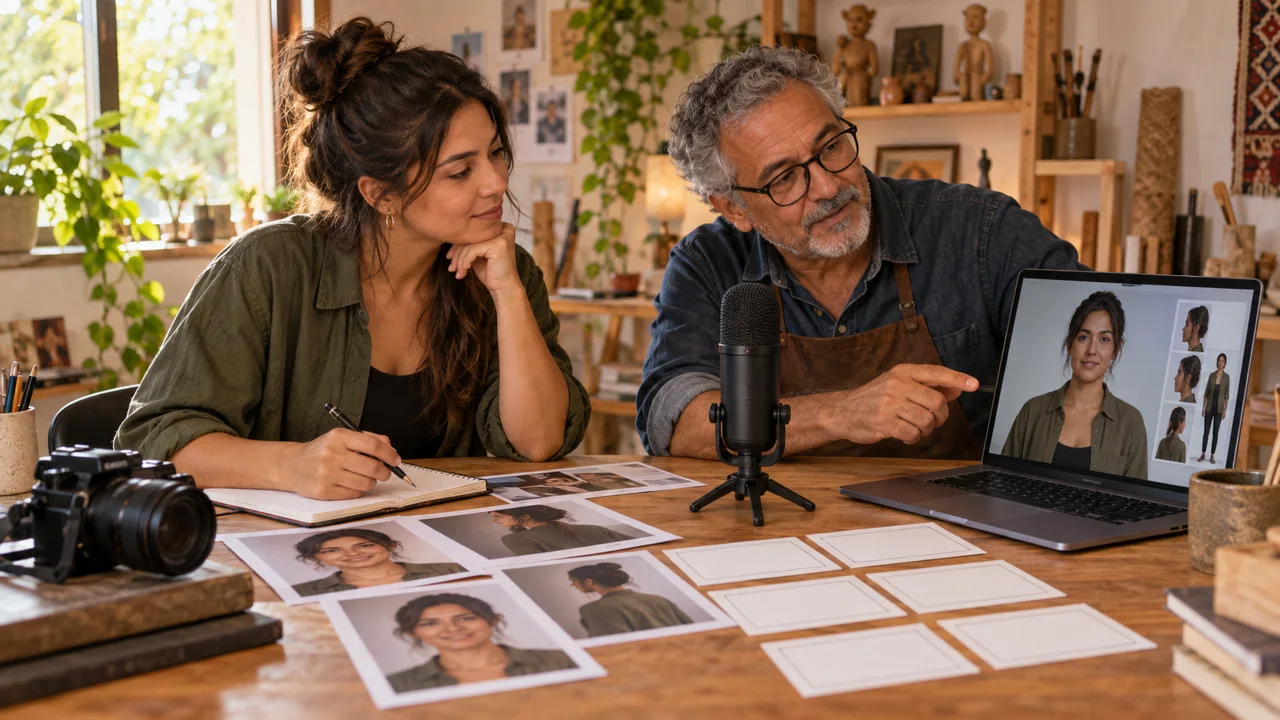
Place your phone on a tripod or firm support, with the lens near eye level.
Use soft light in front of you or slightly to one side.
Avoid a bright window behind your head.
Clean the lens, look at it, and keep your mouth visible.
Make a short test before the main recording.
For a waist-up shot, keep your head and hands in frame during the gesture.
For a full-body shot, include your feet too.
The photo you use later should match this framing.
Stay in the same place during the first test.
Bia checks the test before asking for a longer recording.
Prompts to compare · teaching example
PromptPhone in hand, light behind you, several cuts, hands out of frame.
There are no observable limits to check the work against.
PromptTripod, soft light, face visible, one continuous shot.
There are clear criteria for checking the decision.
Compare the two instructions. They are examples written for this lesson, with no simulated tool response.
2The file must fit the path you chose
A digital twin recording may require speech and expression.
A motion reference needs one continuous shot and a readable gesture.
Check the feature requirements before the final recording.
Do not assume one file works for every mode.
In HeyGen, creating a digital twin includes confirmation by the person represented.
Follow the text and process shown by the platform.
An external written permission does not replace this step.
Keep original files separate from edited versions.
Otávio realizes he needs room above his hand when he waves.
Completed brief · lesson example
1Photo: clear face, mouth uncovered
2Video: simple gesture, camera supported
3Requirements: check the chosen feature
Use this sheet as a reference. Replace the example with your own project.
3Check the decision against its use
The test video can be used as final material only if it meets the requirements shown by the tool.
Otávio uses the sheet to check: requirements: check the chosen feature.
Didactic illustration created in Codex: The tripod and light show preparation. A still photo cannot prove focus or framing throughout a recording.
Test yourself
Strong backlight hides the face. Which adjustment should come first?
It’s normal to get stuck hereStart with a waist-up shot and a small wave. If your hand leaves the frame, move the phone back a little and try again.
Practice now 0/3
Record a reference the tool can read
About 10 minutes of active work. Generation queues do not count. You’re done when the photo and test video are saved and reviewed, with additional requirements noted.
Use files you own or are allowed to use. Generation may require an account and credits. Leave tasks you have not done marked as pending, and keep the originals.
Photo: <file>
Test video: <file>
Framing: waist-up / full body
Face and hands visible: <yes or redo>
Feature requirement: <duration and type>
Final recording: ready / pending
After these steps, you can capture your own photo and video with your face and gesture visible.
Lesson cheat sheet
Record a reference the tool can read
Photo: clear face, mouth uncovered
Video: simple gesture, camera supported
Requirements: check the chosen feature
Your next step
You now have criteria for capturing your own photo and video with your face and gesture visible.
Save this lesson’s deliverable in the project folder. You will use it in the next step.
Next: Write a short, easy-to-say line
Production follow-up and documentation · Module 1Production notes and safeguards for continuing after the short practice.
Light, framing, and camera support come first
Experiment at your own pace
Record ten seconds and check the light, focus, and visible body parts.
What to observe
If you rest the phone on books, check that it is stable before recording. The reference should not wobble.
The file must fit the path you chose
Experiment at your own pace
Follow-up: record the duration and material type required for your chosen path.
What to observe
Do not use an avatar generation to imitate a real person’s confirmation.
Check features and costs in your current account. Guides may show different paths depending on avatar type and mode.
Lesson 2 · AI Avatars v6.2 · INEMA.CLUB PRO
Module 1 · Lesson 3 of 12
Write a short, easy-to-say line
You can rehearse a 5-to-15-second message without rushing.
Reading: about 15 minutes. Practice: 10 active minutes. Avatar creation, queues, and extra production need separate sessions.
An avatar needs a line a person could actually say. A paragraph full of instructions will not fit a short video.
In 1 minute
Purpose: explain one decision
Text: one or two short sentences
Rehearsal: measure the audio duration
1One line, one purpose
Choose one purpose: introduce, explain a step, answer a question, or invite people to continue.
Use short sentences with words you would really say.
Write numbers the way you want them spoken.
Read names aloud to catch unclear pronunciations.
For Oficina Clara: Today we’ll choose a paintbrush.
Look at the shape of the tip before you begin.
This line guides one simple action.
It does not need to tell the workshop’s story or promise a result.
Bia writes performance directions outside the text the voice will read.
Weak decision
Hi, I’ll explain everything about painting and all the materials in one short video.
Verifiable decision
Today we’ll choose a paintbrush. Look at the shape of the tip before you begin.
Notice which characteristics make the second decision easy to check.
2The pause is part of the message
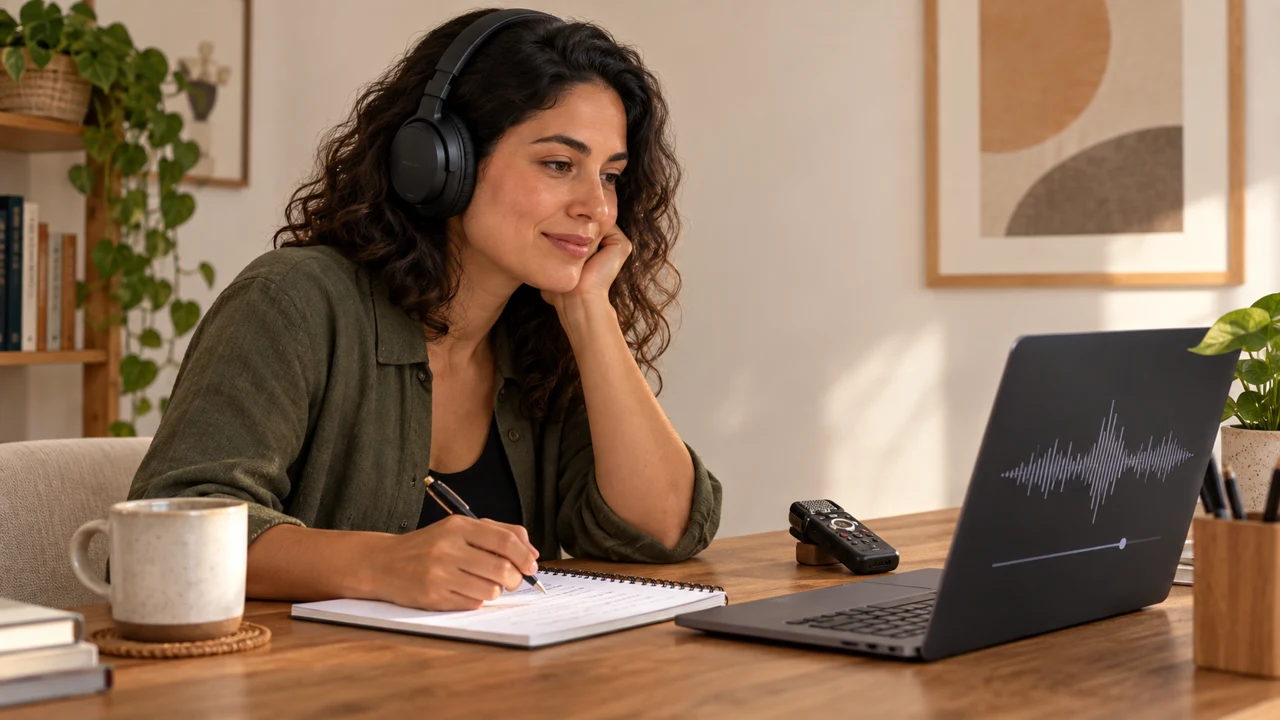
Record in your phone’s Voice Recorder app. Listen and check the time shown in the recording app.
If it runs longer than fifteen seconds, cut one idea.
If it is too short, leave a natural pause instead of filling it with adjectives.
Keep spoken text separate from performance directions; those belong in another field.
A small smile is a performance direction, not a phrase for the avatar to say.
If you put directions in the spoken text, the voice may read them aloud.
Review the audio before spending on animation.
Otávio records a rehearsal to find where he needs to breathe.
Completed brief · lesson example
1Purpose: explain one decision
2Text: one or two short sentences
3Rehearsal: measured audio duration
Use this sheet as a reference. Replace the example with your own project.
3Check the decision against its use
Listen to the file before animating; written preview text does not confirm pronunciation.
Otávio uses the sheet to check: rehearsal: measured audio duration.
Didactic illustration created in Codex: The five blank cards represent alternative messages. They do not show generated speech or prove its duration.
Test yourself
The system said “small smile” out loud. What should you review?
It’s normal to get stuck hereIf reading feels difficult, replace a hard word with a familiar one. The line should sound like you.
Practice now 0/3
Write a short, easy-to-say line
About 10 minutes of active work. Generation queues do not count. You’re done when the saved rehearsal fits the time and separates speech from performance directions.
Use files you own or are allowed to use. Generation may require an account and credits. Leave tasks you have not done marked as pending, and keep the originals.
Purpose: explain one step
Speech: Today we’ll choose a paintbrush. Look at the shape of the tip before you begin.
Performance: calm tone, look at the camera, small gesture.
Rehearsal: <file and duration>
Final text: <your version>
After these steps, you can rehearse a 5-to-15-second message without rushing.
Lesson cheat sheet
Write a short, easy-to-say line
Purpose: explain one decision
Text: one or two short sentences
Rehearsal: measured audio duration
Your next step
You now have criteria for rehearsing a 5-to-15-second message without rushing.
Save this lesson’s deliverable in the project folder. You will use it in the next step.
Next: Choose a voice by listening to the audio
Production follow-up and documentation · Module 1Production notes and safeguards for continuing after the short practice.
One line, one purpose
Experiment at your own pace
Write one message and remove anything that does not serve its main purpose.
What to observe
Do not promise a speaking time by counting words alone. Record a rehearsal and measure it.
The pause is part of the message
Experiment at your own pace
Create introduction, tip, and invitation versions using the same voice for comparison.
What to observe
Do not speak so fast that the words are hard to understand.
Check features and costs in your current account. Guides may show different paths depending on avatar type and mode.
Lesson 3 · AI Avatars v6.2 · INEMA.CLUB PRO
Module 2 · Lesson 4 of 12
Choose a voice by listening to the audio
You can generate and review a short line in Portuguese.
Reading: about 15 minutes. Practice: 10 active minutes. Avatar creation, queues, and extra production need separate sessions.
A voice that sounds pleasant in a demo may mispronounce your lesson terms. Test your real text before animating the face.
In 1 minute
Text: the line rehearsed in the previous lesson
Voice: chosen by listening in Portuguese
Review: words, pacing, and final file
1Text to speech turns writing into audio
Text to speech reads a message using a selected voice.
In ElevenLabs, open Text to Speech, paste your line, and choose a voice and model that support Portuguese.
Check the cost before generating.
Listen to the whole output and save the approved file.
Choose a voice that fits the purpose.
For teaching a technique, clarity and pauses help more than exaggerated acting.
Do not assume a Brazilian accent based on the page language.
Listen for names, numbers, and words from your topic.
Bia tests the workshop name before animating a whole series.
Weak decision
Choosing a voice from its catalog photo and animating without hearing it.
Verifiable decision
Generate a real sentence, listen for words and pauses, and save the approved audio.
Notice which characteristics make the second decision easy to check.
2Review in three passes
First check the words: is anything missing or added? Is the name pronounced correctly?
Then assess pacing and pauses.
Finally, listen on your phone at a comfortable volume to catch noise and cuts.
Note the section to change before generating again.
Keep the text, voice, and settings with the audio.
If the workshop has access to INEMAVOX, it may be a supervised alternative.
Confirm access and the saved voice with the person responsible.
The course does not assume this local service is available online.
Otávio prefers clear speech to a delivery that rushes.
Completed brief · lesson example
1Text: the line rehearsed in the previous lesson
2Voice: chosen by listening in Portuguese
3Review: words, pacing, and final file
Use this sheet as a reference. Replace the example with your own project.
3Check the decision against its use
Listen to words and pauses before judging the face. Fix audio problems at their source.
Otávio uses the sheet to check: review: words, pacing, and final file.
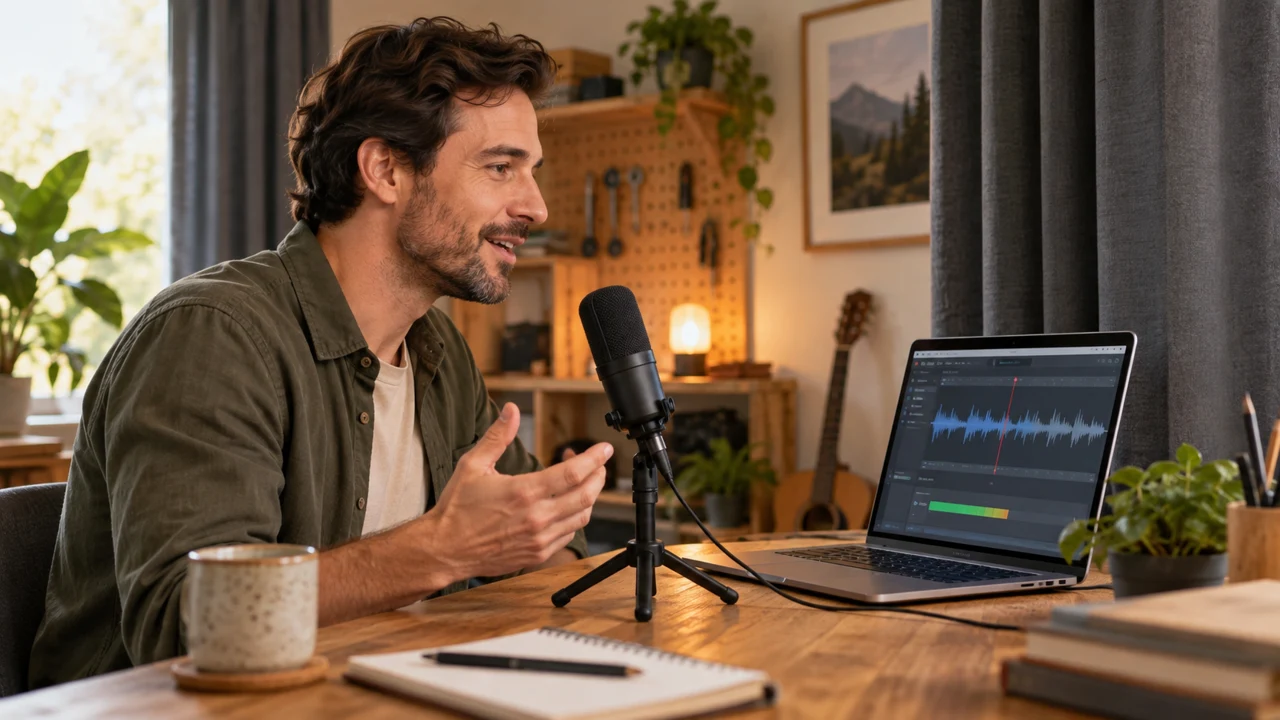
Didactic illustration created in Codex: The overlaid sound wave represents listening. It is not a service screenshot or proof of audio quality.
Test yourself
The voice sounds good but says the name wrong. What should you do first?
It’s normal to get stuck hereIf you cannot access a generator, use your own recording to keep preparing. Mark the synthetic voice test as pending.
Practice now 0/3
Choose a voice by listening to the audio
About 10 minutes of active work. Queues do not count. If you lack access, record why and leave the practice pending. You’re done when generated audio has been heard and saved.
Use files you own or are allowed to use. Generation may require an account and credits. Leave tasks you have not done marked as pending, and keep the originals.
Text: <final version>
Service/model/voice: <settings>
Expected cost: <screen>
Words correct: <yes or passage>
Pacing: <observation>
Approved file: <name or pending>
After these steps, you can generate and review a short line in Portuguese.
Lesson cheat sheet
Choose a voice by listening to the audio
Text: the line rehearsed in the previous lesson
Voice: chosen by listening in Portuguese
Review: words, pacing, and final file
Your next step
You now have criteria for generating and reviewing a short line in Portuguese.
Save this lesson’s deliverable in the project folder. You will use it in the next step.
Next: Prepare your own voice for cloning
Production follow-up and documentation · Module 2Production notes and safeguards for continuing after the short practice.
Text to speech turns writing into audio
Experiment at your own pace
Compare the same sentence in two available voices, within your usage limit.
What to observe
Do not reuse a public sample as if you had recorded the person the voice resembles.
Review in three passes
Experiment at your own pace
Test a punctuation change or a shorter sentence, then compare the two files.
What to observe
A voice name does not guarantee another service has the same identity or settings.
Check features and costs in your current account. Guides may show different paths depending on avatar type and mode.
Lesson 4 · AI Avatars v6.2 · INEMA.CLUB PRO
Module 2 · Lesson 5 of 12
Prepare your own voice for cloning
You can record and evaluate your own sample for a voice clone.
Reading: about 15 minutes. Practice: 10 active minutes. Avatar creation, queues, and extra production need separate sessions.
Cloning a voice does not fix a poor recording or remove service rules. Start with the source and sample quality.
In 1 minute
Source: the learner’s own voice
Recording: no music and a steady distance
Comparison: a new sentence, not the reference
1A voice clone approximates vocal traits
Cloning uses a recording to approximate tone, rhythm, and pronunciation.
Record your own voice in a quiet place, with no music or other people talking.
Keep a steady distance from the microphone and avoid clipped sounds.
Listen carefully before you submit it.
If the voice crackles or sounds harsh on louder parts, move the microphone a little farther away or speak more softly.
Record it again and compare.
On ElevenLabs, instant voice cloning lets you record or upload audio and confirm your rights to the voice.
Professional voice cloning has a separate verification process for the voice owner.
Do not treat the two processes as equivalent.
For this exercise, use only your own voice.
Bia asks for a new sentence to compare the clone with the reference.
Prompts to compare · teaching example
PromptUpload someone else’s voice with music and expect a perfect match.
There are no observable limits to check the work against.
PromptRecord your voice clearly, check the requirements, and evaluate a new sentence.
There are clear criteria for checking the decision.
Compare the two instructions. They are examples written for this lesson, with no simulated tool response.
2Check the resemblance without confusing accent with identity
After creating a clone, use a sentence that is different from the reference recording.
Check whether the voice sounds recognizable, clear, and natural.
A change in accent or emotion can reduce the resemblance.
Keep the original audio so you can make a direct comparison.
Other services, such as MiniMax, also offer voice cloning.
Check that service’s own requirements and controls; steps from one service do not automatically apply to another.
The simplest alternative is still to record your own narration, when that works for the video.
Otávio records his own voice and checks that the last word was not cut off.
Completed brief · lesson example
1Source: the learner’s own voice
2Recording: no music and a steady distance
3Comparison: a new sentence, not the reference
Use this sheet as a reference. Replace the example with your own project.
3Check the decision against its use
A recorded sample, a created clone, and synthesized speech are three different deliverables.
Otávio uses the worksheet to check: comparison: a new sentence, not the reference.
Teaching illustration created in Codex: The microphone recording illustrates the recording step. The screen is illustrative and does not prove that a clone was created.
Test yourself
You recorded the sample but did not upload it to the service. What is complete?
It’s normal to get stuck hereIf cloning is unavailable, continue with a recorded voice or one from the catalog. Record your choice without claiming you created a clone.
Practice now 0/3
Prepare your own voice for cloning
About 10 minutes of active work. Generation queues do not count. You are done when you have saved and reviewed your own sample and recorded the requirements and a follow-up test.
Use files you own or are allowed to use. Generation may require an account and credits. Leave tasks you have not done marked as pending, and keep the originals.
Your sample: <file>
Duration: <measurement>
Noise or cutoff: <review>
Account requirement: <check>
Clone: created / pending
New test sentence: Tomorrow we’ll sort the workshop materials.
Result: <file or pending>
After these steps, you can record and assess your own sample for a voice clone.
Lesson cheat sheet
Prepare your own voice for cloning
Source: the learner’s own voice
Recording: no music and a steady distance
Comparison: a new sentence, not the reference
Your next step
You now have criteria for recording and assessing your own sample for a voice clone.
Save this lesson’s deliverable in the project folder. You will use it in the next step.
Next: Generate and review your first presenter in HeyGen
Production follow-up and documentation · Module 2Production notes and safeguards for continuing after the short practice.
A voice clone approximates vocal traits
Experiment at your own pace
Check the required duration and formats on screen before making the final recording.
What to observe
A clone does not prove that the person said the new message; identify synthetic speech when relevant to the context.
Check the resemblance without confusing accent with identity
Experiment at your own pace
Next: Create a clone using the available option, generate a new sentence, and compare it with your real voice.
What to observe
Do not mark cloning as complete just because you recorded the sample.
Check features and costs in your current account. Guides may show different paths depending on avatar type and mode.
Lesson 5 · AI Avatars v6.2 · INEMA.CLUB PRO
Module 2 · Lesson 6 of 12
Generate and review your first presenter in HeyGen
You can make a short avatar video with reviewed audio.
Reading: about 15 minutes. Practice: 10 active minutes. Avatar creation, queues, and extra production need separate sessions.
Adding a photo to a scene may create only a still image. For it to speak, it must be added through the avatar feature.
In 1 minute
Presenter: created in the avatar area
Speech: approved recorded or synthesized audio
Output: video watched and saved
1Choose the avatar in the right feature
In HeyGen, use Avatars to create or select your presenter.
For a photo, follow the Photo Avatar steps; for a video-based version of yourself, follow Clone a Real Person and complete the required confirmation.
Check the visual style and compatible systems in your current account.
HeyGen guides describe different steps for different features.
Some describe Single Scene; others, AI Studio.
Choose an available presentation mode and record its name.
Do not assume every avatar supports the same system: III, IV, or V.
Bia confirms the avatar selection before approving the cost.
Weak decision
Put an ordinary photo in the scene and assume it will speak.
Verifiable decision
Select the avatar, attach reviewed audio, and check the generated video.
Notice which characteristics make the second decision easy to check.
2Approve the voice before generating
In the presentation project, select the avatar and upload the reviewed audio using the audio-file option, when available.
If you use the service’s text and voice, listen to the preview.
Choose a format and simple performance.
Check the duration and cost before generating.
When the file is ready, watch it all the way through.
Compare the words, mouth, eyes, and hands.
An audio preview does not confirm the final movement.
Download the approved version and save the settings.
If the face distorts or the speech gets cut off, note where it happens before trying again.
Otávio watches the entire file to check mouth movement and pronunciation.
Completed brief · lesson example
1Presenter: created in the avatar area
2Speech: approved recorded or synthetic audio
3Output: video watched and saved
Use this sheet as a reference. Replace the example with your own project.
3Check the decision against its use
An audio preview and a still image do not prove the quality of an animated avatar.
Otávio uses the worksheet to check: output: video watched and saved.
Teaching illustration created in Codex: The character and references are illustrations. This image does not show a generation made in HeyGen.
Test yourself
The photo appears, but the face is still in the output. What should you check?
It’s normal to get stuck hereCreating the avatar and waiting in the queue may take another session. Prepare the inputs now, then resume generation using the same record.
Practice now 0/3
Generate and review your first presenter in HeyGen
About 10 minutes of active work. Queues do not count. If you lack access, record why and leave the practice pending. You are done when an avatar video has been saved and reviewed.
Use files you own or are allowed to use. Generation may require an account and credits. Leave tasks you have not done marked as pending, and keep the originals.
Avatar and type: <name in the account>
Mode/system: <setting>
Audio: <approved file>
Format and duration: <screen>
Cost: <screen>
Video: <file>
Review: speech / mouth / face / hands
Status: approved / redo / pending
After these steps, you can make a short avatar video with reviewed audio.
Lesson cheat sheet
Generate and review your first presenter in HeyGen
Presenter: created in the avatar area
Speech: approved recorded or synthetic audio
Output: video watched and saved
Your next step
You now have criteria for making a short avatar video with reviewed audio.
Save this lesson’s deliverable in the project folder. You will use it in the next step.
Next: Write five literal prompts for short speech
Production follow-up and documentation · Module 2Production notes and safeguards for continuing after the short practice.
Choose the avatar in the right feature
Experiment at your own pace
Before continuing: finish creating the avatar before starting speech generation.
What to observe
A photo added only to the scene files is not the same as an avatar with lip sync.
Approve the voice before generating
Experiment at your own pace
Repeat only the section that failed, changing one thing at a time and staying within your limit.
What to observe
If the avatar is not ready or you cannot access the mode, leave production pending; do not present the photo as a talking video.
Check features and costs in your current account. Guides may show different paths depending on avatar type and mode.
Lesson 6 · AI Avatars v6.2 · INEMA.CLUB PRO
Module 3 · Lesson 7 of 12
Write five literal prompts for short speech
You can prepare five lines and choose a test you can verify.
Reading: about 15 minutes. Practice: 10 active minutes. Avatar creation, queues, and extra production need separate sessions.
A vague instruction like “speak well” leaves many decisions open. Write the exact line, language, and a simple performance direction.
In 1 minute
Scene: face forward, mouth visible
Speech: one clearly marked sentence
Review: compare the words in the audio
1Clearly mark the spoken text
Separate the scene, exact speech, and performance direction.
For a presenter facing forward, ask for a still camera, a visible mouth, and one short sentence in Portuguese.
Use quotation marks to mark what will be said, when the mode accepts speech in a prompt.
This makes review easier, but it does not force the generator to reproduce every word.
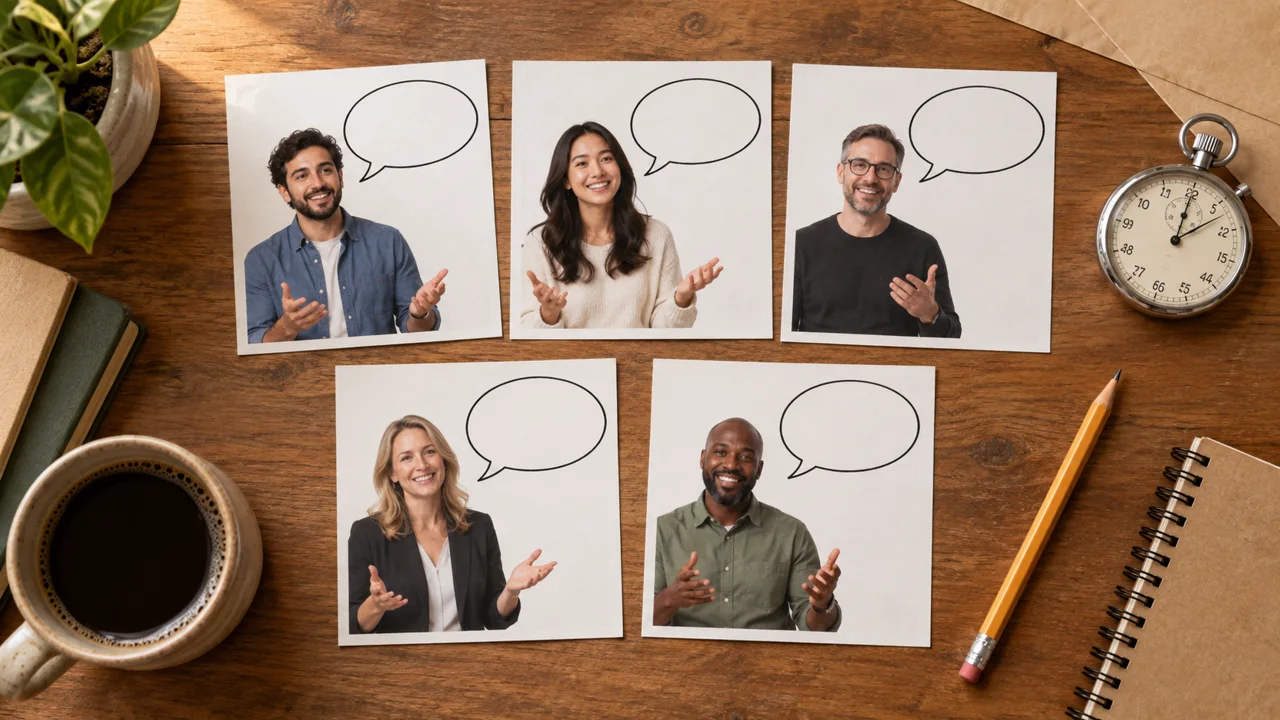
The course offers five purposes: greeting, tip, explanation, answer, and invitation.
Choose one for each test.
Asking for all of them in a short generation mixes goals and makes it harder to find what failed.
Check the audio that was produced; do not assume it follows the text.
Bia uses one sentence per attempt to pinpoint the error.
Weak decision
Make an avatar speak incredibly well about the workshop.
Verifiable decision
A presenter faces forward and says one exact sentence in Portuguese, with a still camera and a small gesture.
Notice which characteristics make the second decision easy to check.
2Choose the tool based on the control you need
Kling offers options for native audio, avatars, and later lip sync, depending on the mode and account.
Grok Imagine can also create video with audio in compatible settings.
A feature documented for programmatic integration may differ from the app.
Check what your screen actually accepts.
When you need to use an approved voice file, choose an option that accepts that audio, such as a compatible avatar mode.
If the speech is only meant to explore an idea, a native-generation test may work.
Do not present an exploratory attempt as final narration.
Otávio compares the audio word by word before approving the test.
Completed brief · lesson example
1Scene: face forward, mouth visible
2Speech: one clearly marked sentence
3Review: compare the words in the audio
Use this sheet as a reference. Replace the example with your own project.
3Check the decision against its use
Only listening and comparing the output lets you say whether the text was spoken correctly.
Otávio uses the worksheet to check: review: compare the words in the audio.
Teaching illustration created in Codex: The five portraits represent presenter options. The empty speech bubbles are not transcripts or speech outputs.
Test yourself
You need to keep exactly one approved audio file. Which choice makes the most sense?
It’s normal to get stuck hereIf the feature does not offer the audio control you need, leave this test pending and use the avatar steps in the next lesson.
Practice now 0/3
Write five literal prompts for short speech
About 10 minutes of active work. Generation queues do not count. You are done when you have written five lines and one has a prompt and a test criterion.
Use files you own or are allowed to use. Generation may require an account and credits. Leave tasks you have not done marked as pending, and keep the originals.
1 Greeting: Hello, let’s start the workshop.
2 Tip: Notice the shape of the brush tip.
3 Explanation: This wide brush covers a larger area.
4 Answer: You can test it first on a separate sheet.
5 Invitation: Set aside the materials for the next exercise.
Base prompt: presenter facing forward, still camera; say in Portuguese: "<one sentence>"; small gesture.
Mode and cost: <account>
Check: words, language, and mouth
After these steps, you can prepare five lines and choose a test you can verify.
Lesson cheat sheet
Write five literal prompts for short speech
Scene: face forward, mouth visible
Speech: one clearly marked sentence
Review: compare the words in the audio
Your next step
You now have criteria for preparing five lines and choosing a test you can verify.
Save this lesson’s deliverable in the project folder. You will use it in the next step.
Next: Test the speech in Kling Avatar and review the mouth
Production and documentation continuation · module 3Production and follow-up steps after the short practice.
Clearly mark the spoken text
Experiment at your own pace
Adapt the five lines in the worksheet to your topic and rehearse the one you chose.
What to observe
A literal prompt does not turn a mode without audio into a speech generator.
Choose the tool based on the control you need
Experiment at your own pace
Next: Test a line in the available feature and transcribe what you actually hear.
What to observe
Do not promise Portuguese or support for your own audio in every mode; confirm before generating.
Check features and costs in your current account. Guides may show different paths depending on avatar type and mode.
Lesson 7 · AI Avatars v6.2 · INEMA.CLUB PRO
Module 3 · Lesson 8 of 12
Test the speech in Kling Avatar and review the mouth
You can make a short talking avatar and assess its sync.
Reading: about 15 minutes. Practice: 10 active minutes. Avatar creation, queues, and extra production need separate sessions.
A moving mouth does not mean it matches the message. Review the sound alongside what appears on the face.
In 1 minute
Input: reviewed image and audio
Performance: one small gesture
Review: words, mouth, and pauses
1Use an image and audio to make an avatar
In Kling Avatar, select an image of yourself or your character, then add the approved audio.
The Avatar 2.0 guide also lets you direct expression and performance.
Start with a small gesture and an unobstructed face.
Check the cost and make a short attempt.
This option starts with an image and audio.
The separate Lip Sync feature can start with an existing video and adjust the mouth to the speech.
If your account offers this second option, also provide a clip with the face visible.
Record which operation you used.
Bia separates an audio pronunciation error from a facial movement error.
Prompts to compare · teaching example
PromptApprove it because the mouth moves and the voice sounds pleasant.
There are no observable limits to check the work against.
PromptListen to the words, look for defects, and check the sound and image together.
There are clear criteria for checking the decision.
Compare the two instructions. They are examples written for this lesson, with no simulated tool response.
2Listen, watch, then combine
Listen without watching to check the words.
Then look at the face, teeth, and edges of the mouth.
Finally, follow the sound and image together.
Look for noticeable delays, a cut-off sentence, or a mouth moving in silence.
Record the moment when the problem occurs.
A line with a clear pause makes this check easier.
Do not expect one fixed mouth shape for each letter: movement depends on neighboring sounds.
The first goal is to spot clear mismatches and decide whether the piece can be used.
Otávio marks the moment when the mouth keeps moving after the last word.
Completed brief · lesson example
1Input: reviewed image and audio
2Performance: one small gesture
3Review: words, mouth, and pauses
Use this sheet as a reference. Replace the example with your own project.
3Check the decision against its use
A sequence of photos cannot show sync; you need to watch the video with its audio.
Otávio uses the worksheet to check: review: words, mouth, and pauses.
Teaching illustration created in Codex: The three mouth positions are still studies. They do not represent specific sounds or demonstrate video synchronization.
Test yourself
The audio ends, but the mouth keeps moving. What should you record?
It’s normal to get stuck hereIf you cannot access Avatar, leave generation pending. Use the worksheet to prepare the inputs and resume when the feature is available.
Practice now 0/3
Test the speech in Kling Avatar and review the mouth
About 10 minutes of active work. Queues do not count. If you lack access, record why and leave the practice pending. You are done when a talking video has been saved and reviewed.
Use files you own or are allowed to use. Generation may require an account and credits. Leave tasks you have not done marked as pending, and keep the originals.
Operation: Image + audio Avatar / video Lip Sync
Image or video: <file>
Audio: <approved file>
Performance: face forward and make a small gesture
Correct words: <review>
Mouth and pauses: <observed moments>
Output: <file and decision>
After these steps, you can make a short talking avatar and assess its sync.
Lesson cheat sheet
Test the speech in Kling Avatar and review the mouth
Input: reviewed image and audio
Performance: one small gesture
Review: words, mouth, and pauses
Your next step
You now have criteria for making a short talking avatar and assessing its sync.
Save this lesson’s deliverable in the project folder. You will use it in the next step.
Next: Transfer a gesture using a motion reference
Production and documentation continuation · module 3Production and follow-up steps after the short practice.
An avatar can use an image and audio.
Experiment at your own pace
Next: Compare an Avatar output with a Lip Sync test, if both are available within your limit.
What to observe
Do not call image plus audio an edit of an existing video when no video was provided.
Listen, watch, then combine
Experiment at your own pace
Test the opening for a few seconds with an avatar, then continue with supporting images if they serve the message.
What to observe
Using an avatar only in the opening shortens the section to review, but it does not automatically fix poor sync.
Check features and costs in your current account. Guides may show different paths depending on avatar type and mode.
Lesson 8 · AI Avatars v6.2 · INEMA.CLUB PRO
Module 3 · Lesson 9 of 12
Transfer a gesture using a motion reference
You can test a wave using a photo and video with compatible framing.
Reading: about 15 minutes. Practice: 10 active minutes. Avatar creation, queues, and extra production need separate sessions.
A motion reference shows the action, while the photo shows the appearance. If either one hides an important part, transfer becomes harder.
In 1 minute
Video: one continuous wave
Image: compatible framing and room to move
Review: gesture, face, hands, and clothing
1One person, one gesture, steady camera
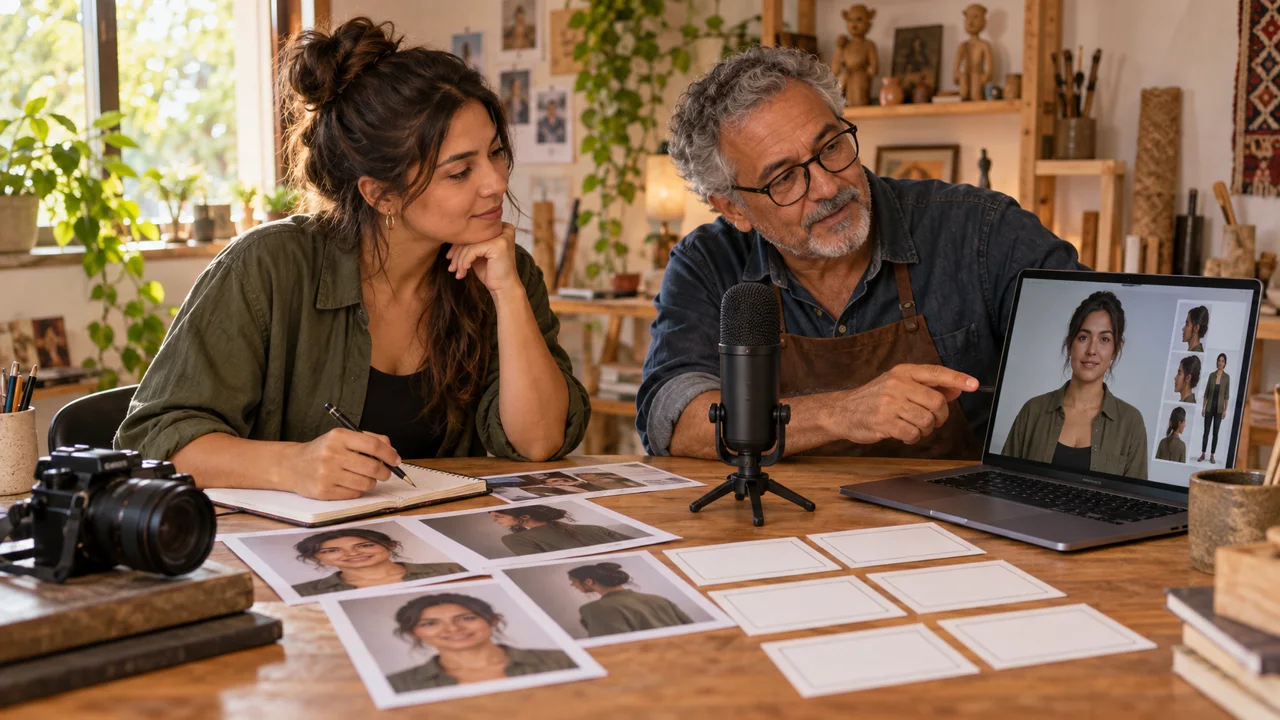
Record yourself making a short wave, with your phone on a tripod.
Keep one person in view, with no cuts or camera movement.
Use a moderate speed.
Leave room for the hand throughout the gesture.
Choose a photo of yourself or an invented character with compatible framing.
A medium shot matches a medium shot; a full-body shot matches a full-body shot.
The photo also needs room for the action.
A hand resting under the chin does not show that the frame can fit a high wave.
Plan that margin before uploading.
Bia tests a small gesture before asking for a performance that moves around.
Weak decision
Shaky video with the hand leaving the frame and a tightly cropped photo.
Verifiable decision
Tripod, moderate wave, and a photo with room for the hand.
Notice which characteristics make the second decision easy to check.
2Check the gesture and identity separately
In Motion Control, upload the action video and character image in their corresponding fields.
Check which reference guides the person’s orientation.
That orientation is not the file’s vertical or horizontal aspect ratio.
When face matching is available, it helps guide the face; clothing and accessories still need their own review.
Generate a short attempt within your limit.
Watch the entire gesture and check the hands, face, clothing, and background.
If only part of the action transferred, note the difference.
A similar expression does not prove that the full movement was preserved.
Otávio uses a tripod to keep the camera steady while recording.
Completed brief · lesson example
1Video: one continuous wave
2Image: compatible framing and room to move
3Review: gesture, face, hands, and clothing
Use this sheet as a reference. Replace the example with your own project.
3Check the decision against its use
Compatible framing leaves room for the gesture, not just the same body area.
Otávio uses the worksheet to check: review: gesture, face, hands, and clothing.
Teaching illustration created in Codex: The wave and portrait separate action from appearance. The smaller reference needs more room for a high wave; it is not an approved transfer result.
Test yourself
The photo cuts off the space where the hand would need to rise. What should you fix first?
It’s normal to get stuck hereIf the hand leaves the image, widen the framing and make a new reference. Simplify the wave before increasing the number of attempts.
Practice now 0/3
Transfer a gesture using a motion reference
About 10 minutes of active work. Queues do not count. If you lack access, record why and leave the practice pending. You are done when a motion test has been saved and compared.
Use files you own or are allowed to use. Generation may require an account and credits. Leave tasks you have not done marked as pending, and keep the originals.
Gesture video: <own file>
Image: <reference>
Framing: medium shot / full body
Room for hand: <checked>
Character orientation: <account option>
Cost: <screen>
Output: <file or not generated yet + reason>
Review: gesture / face / hands / clothing
After these steps, you can test a wave using a photo and video with compatible framing.
Lesson cheat sheet
Transfer a gesture using a motion reference
Video: one continuous wave
Image: compatible framing and room to move
Review: gesture, face, hands, and clothing
Your next step
You now have criteria for testing a wave using a photo and video with compatible framing.
Save this lesson’s deliverable in the project folder. You will use it in the next step.
Next: Separate fixed identity from changing context
Production and documentation continuation · module 3Production and follow-up steps after the short practice.
One person, one gesture, steady camera
Experiment at your own pace
Record the gesture from lesson 2 again if the hand leaves the frame or the camera moves.
What to observe
Use your own recording or one you are authorized to use; do not copy someone’s performance without permission.
Check the gesture and identity separately
Experiment at your own pace
Next: Adjust only the framing or size of the gesture, then compare it with the first test.
What to observe
Do not assume motion control also performed lip sync; review speech through an appropriate feature.
Check features and costs in your current account. Guides may show different paths depending on avatar type and mode.
Lesson 9 · AI Avatars v6.2 · INEMA.CLUB PRO
Module 4 · Lesson 10 of 12
Separate fixed identity from changing context
You can create a character’s visual profile and review references.
Reading: about 15 minutes. Practice: 10 active minutes. Avatar creation, queues, and extra production need separate sessions.
When every prompt reinvents the face, clothing, and voice, a series loses continuity. A clear reference avoids starting the character over in every scene.
In 1 minute
Fixed: face, hair, clothing, and voice
Variable: topic, setting, and gesture
Evidence: approved and reviewed reference
1The profile fixes what the audience recognizes
Define a working name, role, appearance, voice, and way of speaking.
For Nina: a virtual workshop presenter with short curly hair and a gray streak, a rust-colored jacket, and a calm voice.
Separate these traits from the context, such as the workbench, topic, and gesture.
The character’s story should serve the content without inventing real credentials.
A so-called master prompt is just reusable base text.
It helps you remember decisions, but it does not guarantee the same face.
Also save an approved reference image.
Compare the eyes, nose, hair, and clothing when reviewing variations.
Bia changes the scene topic while keeping Nina’s visual reference.
Weak decision
Ask for a friendly teacher again in every scene.
Verifiable decision
Reuse the profile and reference, changing only the context and gesture.
Notice which characteristics make the second decision easy to check.
2Reuse the reference in your chosen feature
OpenArt documentation recommends starting from a main reference, preparing angles, and saving the character for reuse.
This keeps you from relying on a new description for every attempt.
Check the controls and select the saved character when the mode allows it.
A sheet of angles may also contain differences.
Review each view before adding it to the library.
If the hair or face changes, remake that image instead of teaching the next step the wrong variation.
For a real person, keep their own photos for comparison.
Otávio uses his own photos to check the digital version’s appearance.
Completed brief · lesson example
1Fixed: face, hair, clothing, and voice
2Variable: topic, setting, and gesture
3Evidence: approved and reviewed reference
Use this sheet as a reference. Replace the example with your own project.
3Check the decision against its use
An image from another angle goes into the library only after comparison with the main reference.
Otávio uses the worksheet to check: evidence: approved and reviewed reference.
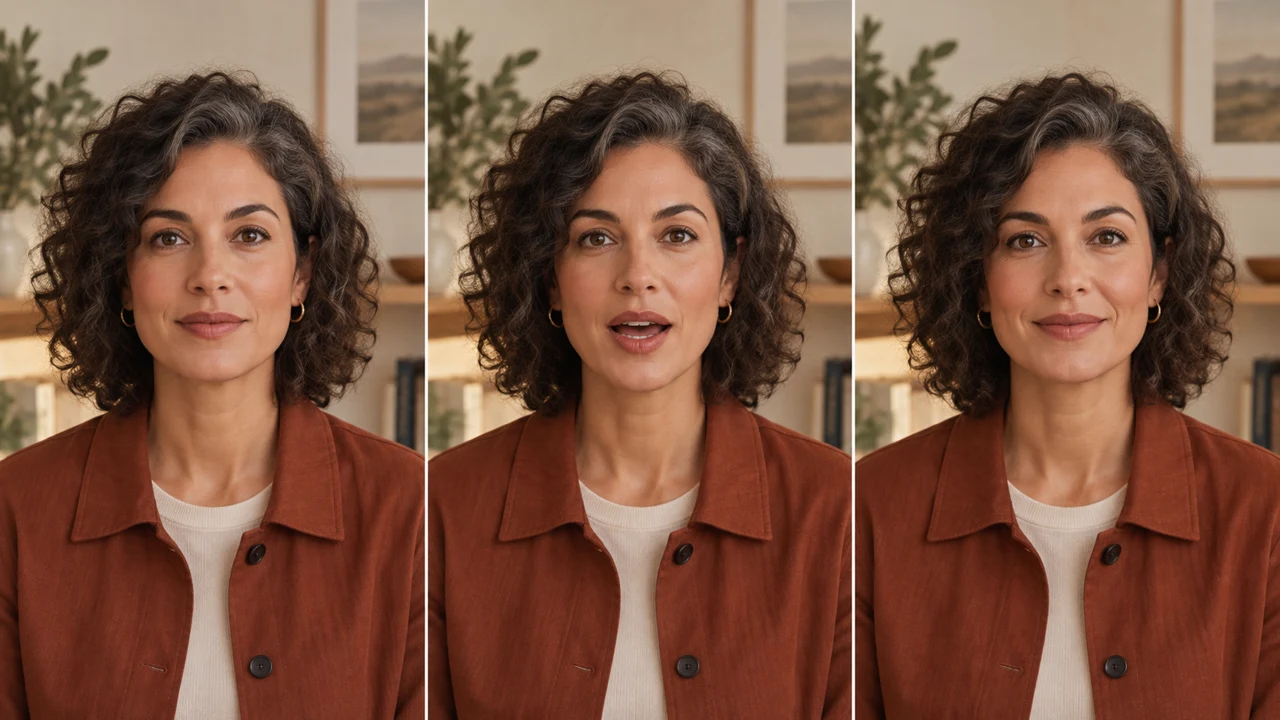
Teaching illustration created in Codex: The three portraits are an illustrated study of angles. Their resemblance needs to be checked; they do not prove consistency across a video generation.
Test yourself
The new angle changed the character’s nose. What should you do?
It’s normal to get stuck hereChoose a few recognizable details. A long list of traits you cannot check makes review harder.
Practice now 0/3
Separate fixed identity from changing context
About 10 minutes of active work. Generation queues do not count. You are done when the profile separates identity from context and points to a reviewed reference.
Use files you own or are allowed to use. Generation may require an account and credits. Leave tasks you have not done marked as pending, and keep the originals.
Name: Nina, virtual presenter
Role: explain workshop techniques
Fixed traits: short curly hair with a gray streak; rust-colored jacket; cream shirt; calm voice; face from the reference.
Variable traits: setting, topic, and gesture
Main reference: <file>
Scene: explain a brush at the workbench
Status: profile / saved / test generated
After these steps, you can create a character’s visual profile and review references.
Lesson cheat sheet
Separate fixed identity from changing context
Fixed: face, hair, clothing, and voice
Variable: topic, setting, and gesture
Evidence: approved and reviewed reference
Your next step
You now have criteria for creating a character’s visual profile and reviewing references.
Save this lesson’s deliverable in the project folder. You will use it in the next step.
Next: Create an alternative in Influencer Studio
Production and documentation continuation · module 4Production and follow-up steps after the short practice.
The profile fixes what the audience recognizes
Experiment at your own pace
Create a short profile with five fixed traits and three that can change.
What to observe
Do not use the base text as proof of consistency; compare the images.
Reuse the reference in your chosen feature
Experiment at your own pace
Next: Save the character in the available feature and test a new scene with the reference linked.
What to observe
If you only wrote the profile, record it as planned; a saved character and generated scenes are separate steps.
Check features and costs in your current account. Guides may show different paths depending on avatar type and mode.
Lesson 10 · AI Avatars v6.2 · INEMA.CLUB PRO
Module 4 · Lesson 11 of 12
Create an alternative in Influencer Studio
You can set attributes and test a character through menus.
Reading: about 15 minutes. Practice: 10 active minutes. Avatar creation, queues, and extra production need separate sessions.
Not every tool starts with a text box. A visual builder can help you choose an appearance, but the result still needs review.
In 1 minute
Alternative: blue shirt and green glasses
Selections: attributes recorded in the builder
Status: proposal saved or separate training
1Menus make choices explicit
In Higgsfield AI Influencer Studio, open character creation and choose the attributes available in the Builder panel.
Start with a few visual choices and generate a proposal after checking the cost.
Save the version that best fits the character’s role.
For this exercise, imagine an alternative to Nina: a presenter in a blue shirt and green glasses.
It is a separate proposal, not a continuation of the previous identity.
Distinctive details can make a face recognizable, but they do not need to become a caricature or rely on stereotypes.
Bia records the alternative separately so it does not alter Nina’s reference.
Prompts to compare · teaching example
PromptChange every attribute and mix portraits of different people in one collection.
There are no observable limits to check the work against.
PromptChoose a few traits, save the proposal, and distinguish a library from training.
There are clear criteria for checking the decision.
Compare the two instructions. They are examples written for this lesson, with no simulated tool response.
2A saved character is not the same as a trained identity
Studio lets you save characters and send them to other features.
Soul ID is a separate feature that trains an identity from a set of photos.
The guide we checked asks for at least twenty images of the same identity.
Plan this step only after checking that the set is consistent.
For an invented character, you need to create and review the references.
Do not mix faces just to reach the required number.
The quality of the selection matters.
This course does not require training Soul ID to make your first video; the comparison helps you decide what to invest in next.
Otávio distinguishes saving an image from training an identity with multiple files.
Completed brief · lesson example
1Alternative: blue shirt and green glasses
2Choices: attributes recorded in the builder
3Status: proposal saved or separate training
Use this sheet as a reference. Replace the example with your own project.
3Check the decision against its use
A saved proposal, a set of references, and a trained identity are different states.
Otávio uses the worksheet to check: status: proposal saved or separate training.
Teaching illustration created in Codex: The blue shirt and glasses show an alternative proposal. The grid is illustrative, not a screenshot of Higgsfield or Nina’s identity.
Test yourself
You saved a portrait in Studio. What can you say?
It’s normal to get stuck hereIf the tool is unavailable, the profile is still useful. Resume generation later without silently switching to another feature.
Practice now 0/3
Create an alternative in Influencer Studio
About 10 minutes of active work. Queues do not count. If you lack access, record why and leave the practice pending. You are done when a proposal has been generated and saved.
Use files you own or are allowed to use. Generation may require an account and credits. Leave tasks you have not done marked as pending, and keep the originals.
Visual alternative: <attributes>
Role: <what content to present>
Settings: <selected menus>
Cost: <screen>
File: <proposal saved or pending>
Soul ID: not started / separate step
Differences observed: <review>
After these steps, you can set attributes and test a character through menus.
Lesson cheat sheet
Create an alternative in Influencer Studio
Alternative: blue shirt and green glasses
Choices: attributes recorded in the builder
Status: proposal saved or training is separate
Your next step
You now have criteria for defining attributes and testing a character through menus.
Save this lesson’s deliverable in the project folder. You will use it in the next step.
Next: Organize four episodes and audit delivery
Production and documentation continuation · module 4Production and follow-up steps after the short practice.
Menus help make choices explicit
Experiment at your own pace
Record visual choices before editing the proposal.
What to observe
Generating through menus does not remove decisions or guarantee a unique face.
A saved character is not the same as a trained identity
Experiment at your own pace
Optional follow-up: compare a scene with a saved character and one with a trained identity, if it fits your series.
What to observe
Do not call an identity trained when you only saved a proposal in the library.
Check features and costs in your current account. Guides may show different paths depending on avatar type and mode.
Lesson 11 · AI Avatars v6.2 · INEMA.CLUB PRO
Module 4 · Lesson 12 of 12
Organize four episodes and audit delivery
You can plan a short series and check the three essential tests.
Reading: about 15 minutes. Practice: 10 active minutes. Avatar creation, queues, and extra production need separate sessions.
A reusable series needs rules and approved files. The number of scripts does not prove how many videos were made.
In 1 minute
Series: four messages with one fixed identity
Tests: HeyGen, Kling speech, and movement
Delivery: reviewed files and visible pending work
1Four episodes, one identity
Plan an introduction, a tip, an explanation, and a closing.
Keep the reference, voice, and speaking style consistent.
Change only the topic and the needed gesture.
Each episode needs a short message that fits the rehearsed time.
Keep the text and settings with the final file.
At Oficina Clara, Nina introduces herself, shows a brush, explains a choice, and invites viewers to continue.
This organizes the series without inventing a personal testimonial.
If you use your digital version, check that the message is still something you want to say.
Bia keeps the text version that matches each approved audio file.
Weak decision
Calling a folder of four scripts and no reviewed output a finished series.
Verifiable decision
Separate scripts, essential tests, and approved videos with recorded settings.
Notice which characteristics make the second decision easy to check.
2Three tests show what you learned
Gather the talking avatar from HeyGen, the speech test in Kling, and the motion transfer using your own reference.
For each one, record the input, settings, cost, file, and review.
If a feature was unavailable, mark it unavailable or pending.
An alternative may serve the message, but does not prove the same operation.
Before sharing, watch on your phone and check the text, pronunciation, mouth, hands, and identity.
Clearly label a virtual character when applicable.
Keep approved files separate from tests.
The project is complete when the chosen deliverables exist and have been reviewed.
Otávio marks an episode ready only after watching the file on his phone.
Completed brief · lesson example
1Series: four messages with one fixed identity
2Tests: HeyGen, Kling speech, and movement
3Delivery: reviewed files and visible pending work
Use this sheet as a reference. Replace the example with your own project.
3Check the decision against its use
Planning can be complete while videos are pending. Mark production complete only after watching the final files.
Otávio uses the sheet to check: delivery: reviewed files and visible pending work.
Didactic illustration created in Codex: The cards show episode ideas, not finished videos. Also compare clothes and accessories before using them as references for one series. The rust-colored piece has a shirt cut, unlike the jacket in the earlier reference. Correct this change before approving continuity.
Test yourself
Four scripts are written, but only one video was generated. Which record is accurate?
It’s normal to get stuck hereStart with the pending task blocking the first episode. Keep your spending limit and approved references.
Practice now 0/3
Organize four episodes and audit delivery
About 10 minutes of active work. Generation queues do not count. You’re done when the series is planned and the tests have recorded evidence and statuses.
Use files you own or are allowed to use. Generation may require an account and credits. Leave tasks you have not done marked as pending, and keep the originals.
For each episode, fill in one block:
Number and purpose: <1 to 4>
Speech: <rehearsed text>
Reference and voice: <files>
Video and status: <file or pending>

HeyGen test (Lesson 6): <file and review>
Kling test (Lesson 8): <file and review>
Motion test (Lesson 9): <file and review>
Pending work and next session: <list>
Presenter label: <real or virtual>
After these steps, you can plan a short series and check the three essential tests.
Lesson cheat sheet
Organize four episodes and audit delivery
Series: four messages with one fixed identity
Tests: HeyGen, Kling speech, and movement
Delivery: reviewed files and visible pending work
Your next step
You now have criteria for planning a short series and checking the three essential tests.
Save this lesson’s deliverable in the project folder. You will use it in the next step.
Next: Apply the method to a new video with a different goal.
Production and documentation continuation · module 4Production and follow-up steps after the short practice.
Four episodes, one identity
Experiment at your own pace
Follow-up: make all four episodes, review each, and compare the identity across them.
What to observe
Four script cards are a plan, not four finished videos.
Three tests show what you learned
Experiment at your own pace
Required follow-up: complete pending production before presenting the project as finished.
What to observe
Set aside extra sessions to create avatars, generate, correct, and edit. The ten-minute practices do not include all this production.