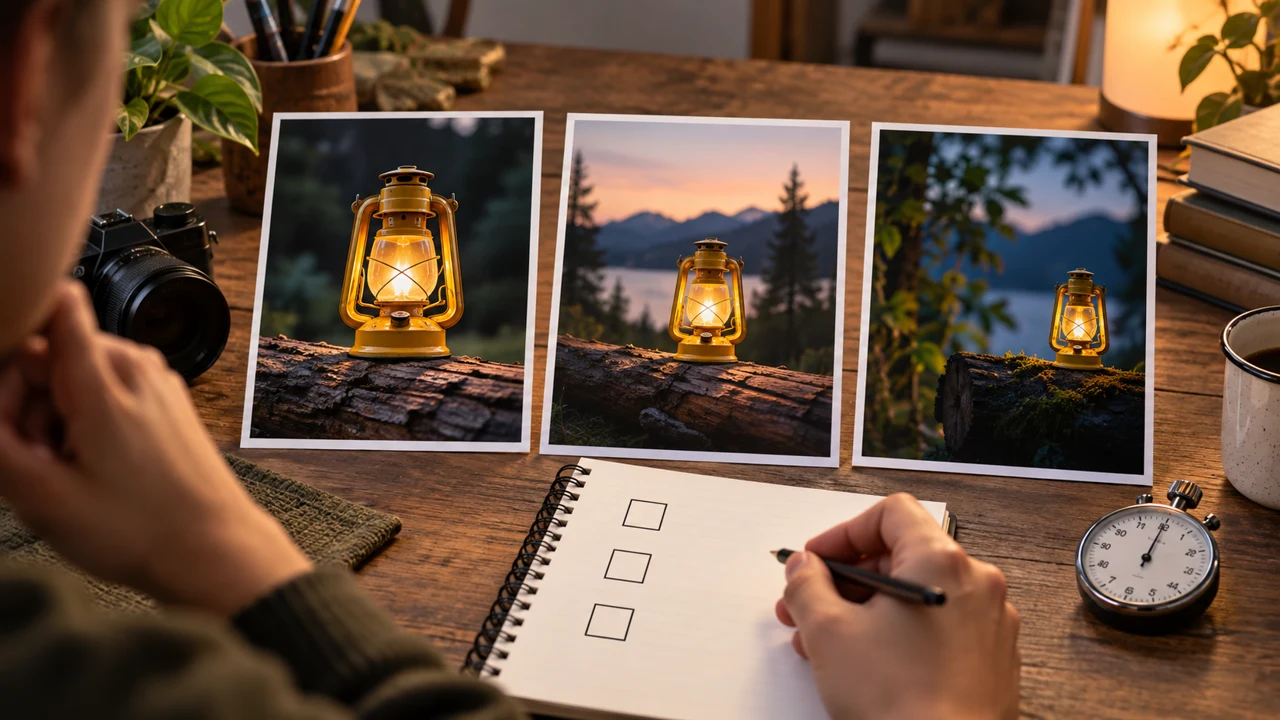
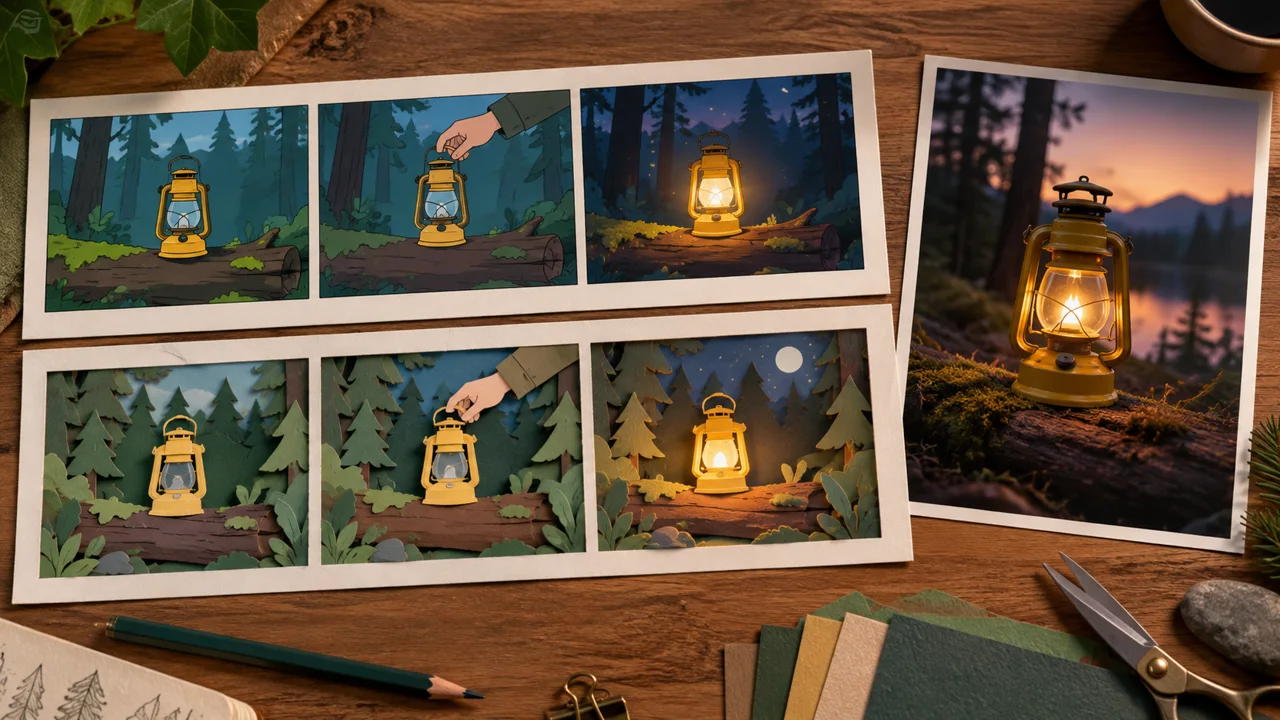
You can organize up to nine references without mixing their roles.
Reading: about 15 minutes. Practice: 10 active minutes. Queues, reference production, and corrections take extra time.
A beautiful collage can misguide a scene. Each reference should show what it provides: object, setting, light, or visual language.
In 1 minute
Case: fictional Vagalume lantern
Roles: object, setting, light, and style
Selection: a few files with clear purposes
1A reference is a visible decision
Reference is material that guides a choice.
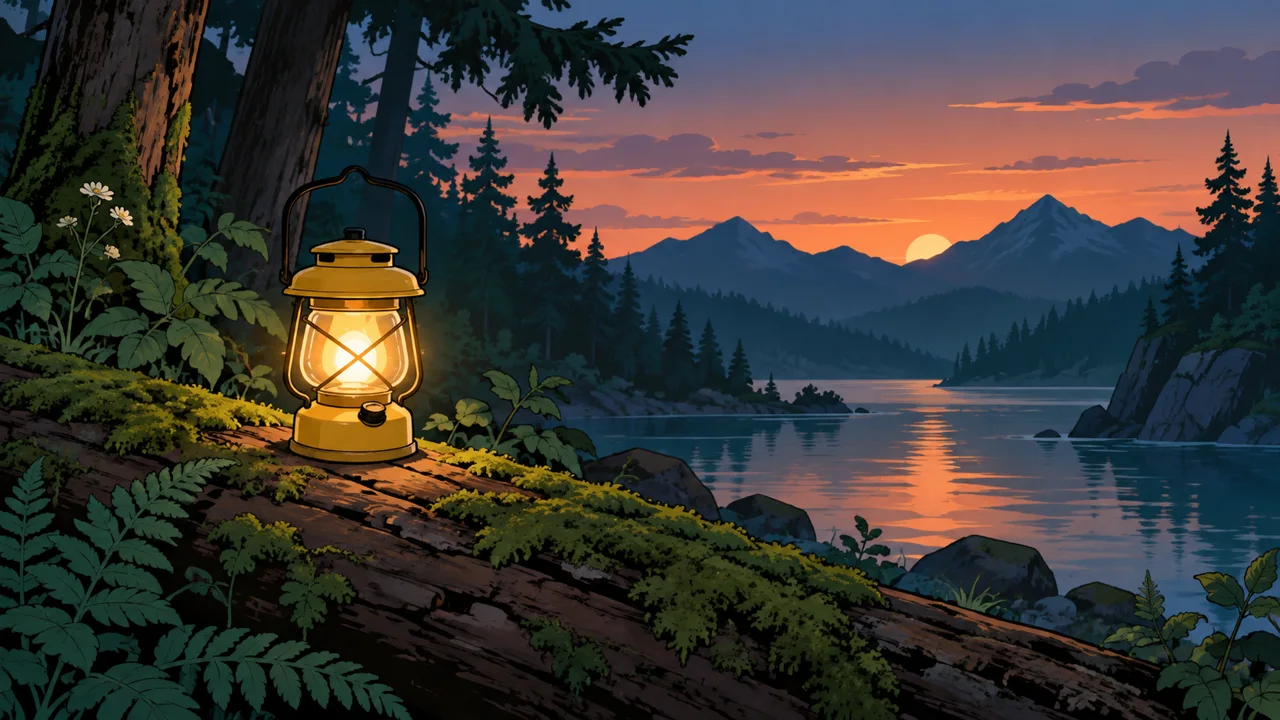
In the Vagalume case, a yellow lantern appears in a forest at dusk.
Separate the object, setting, lighting, and framing images.
If every image shows something different without a purpose, the generator receives an ambiguous set.
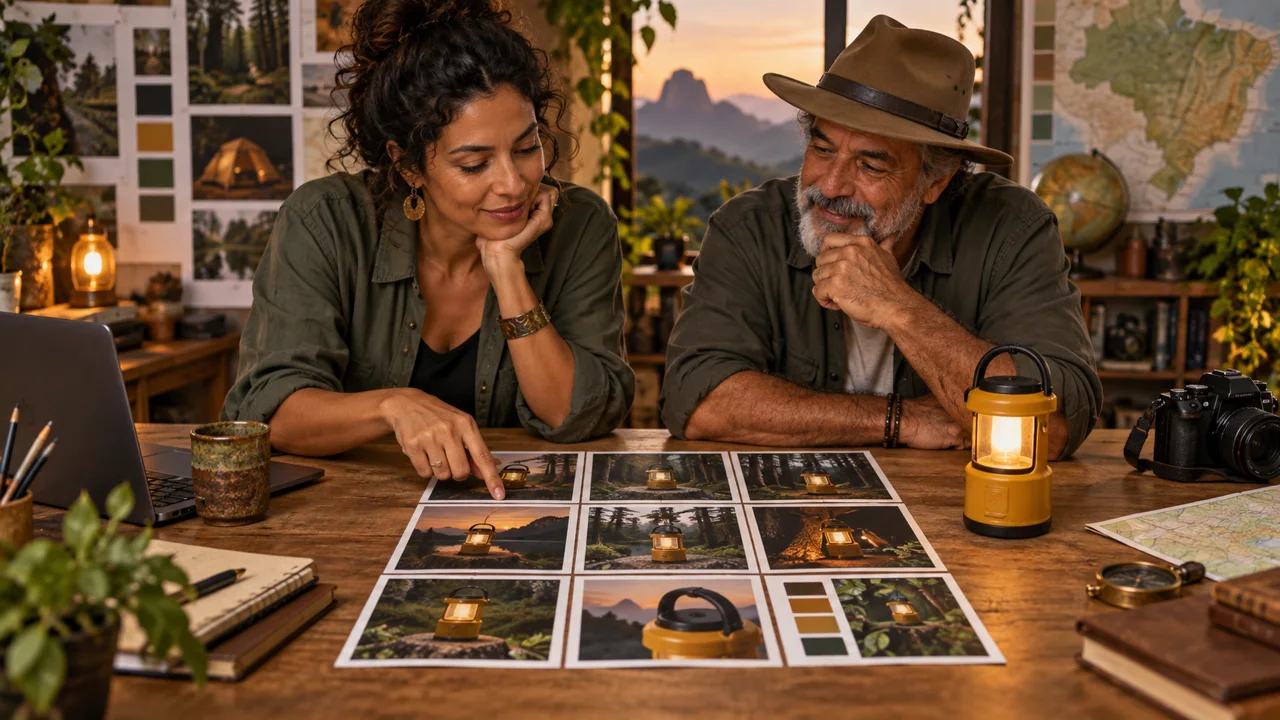
Lara wants to compare two visual languages for the same short ad.
Roberto needs viewers to recognize the lantern and the setting of his inn.
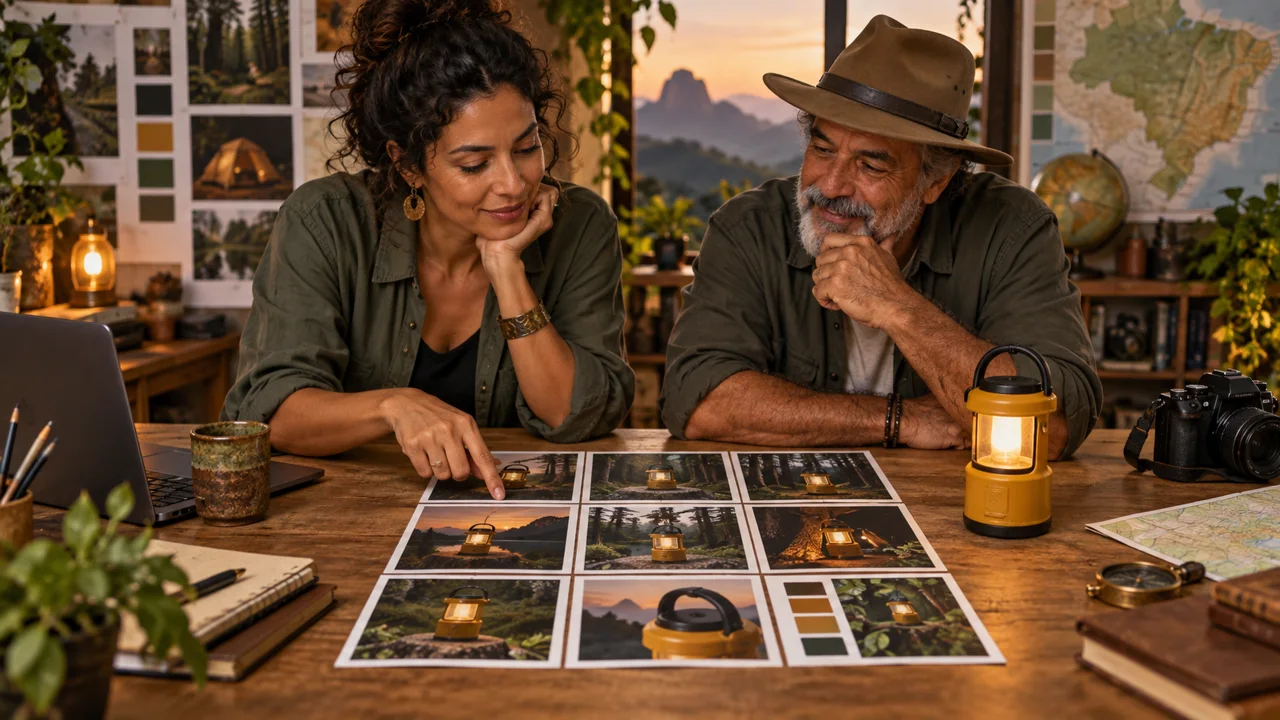
They build a board of up to nine images, but send only those needed for the test.
The number is an organization exercise, not a universal requirement.
Lara, a 36-year-old art director, explains each image’s purpose.
Prompts to compare · teaching example
PromptSend nine random images because the field accepts many files.
There are no observable limits to check the work against.
PromptSeparate object, setting, light, and style; send only what has a purpose.
You have clear criteria for checking the decision.
Compare the two instructions. They are examples written for this lesson, with no simulated tool response.
2A tool limit is not a creative goal
The original Seedance 2.0 documentation describes text, image, video, and audio as inputs.
The 2.5 line expands the limits and controls.
The platform where you use the model may offer different combinations.
Check the version, format, cost, and accepted quantity in your account.
Nine images on the board do not mean you must send nine files.
One clear image can do more than several repeated ones.
Keep the organized version to compare decisions, and record which references were actually attached during generation.
Roberto, a 58-year-old innkeeper, chooses his own photo when he needs to show his actual equipment.
Completed brief · lesson example
1Case: fictional Vagalume lantern
2Roles: object, setting, light, and style
3Selection: a few files with clear purposes
Use this sheet as a reference. Replace the example with your own project.
3Check the decision against its use
Allowed quantity does not prove quality; each file must resolve a project decision.
Roberto uses the checklist to confirm: selection: a few files with clear purposes.
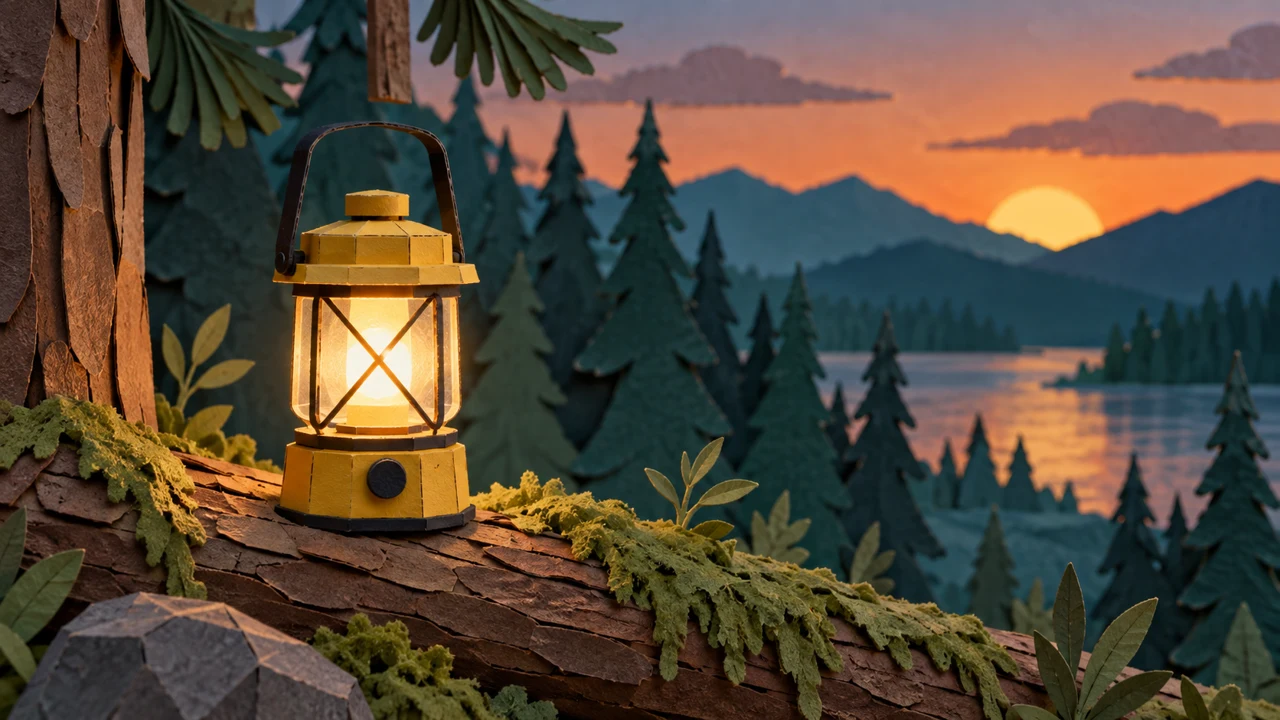
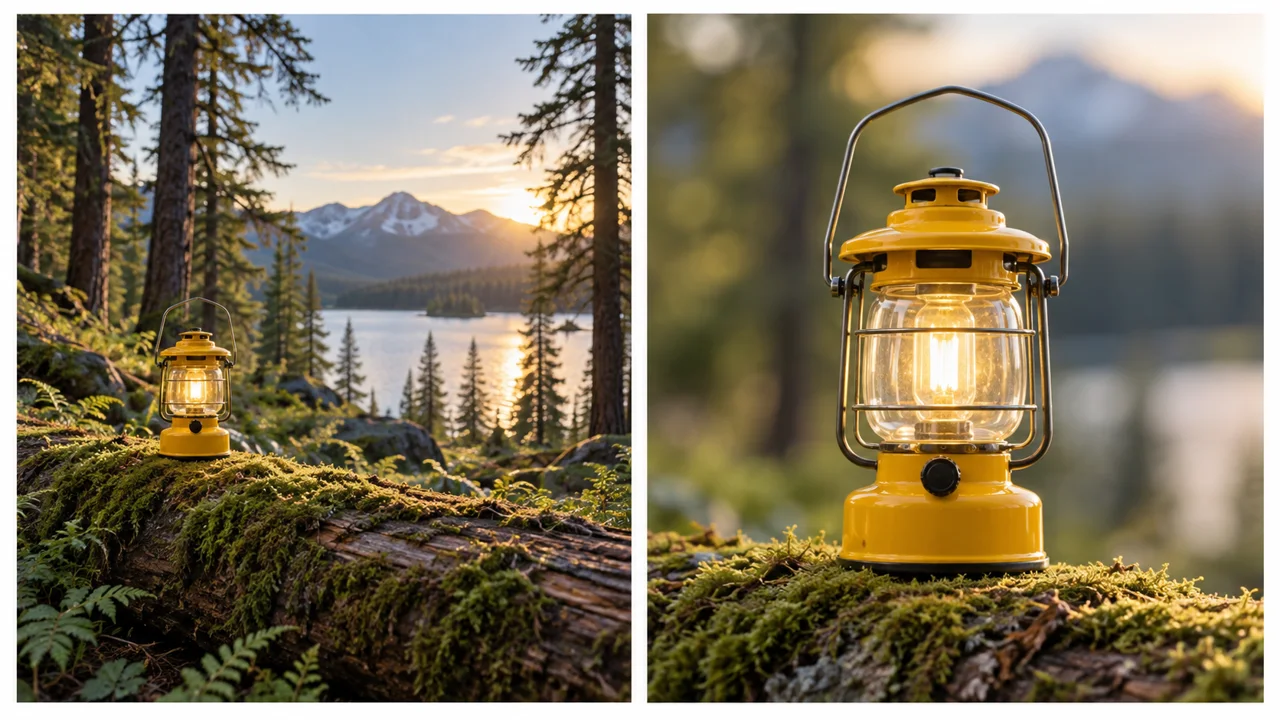
Educational illustration created in Codex: The board gathers studies of the object, setting, and light. The illustrated lanterns may vary; choose one main reference before production.
Test yourself
Two references show lanterns with different shapes. What should you clarify?
It’s normal to get stuck hereWithout a collage editor, make a list in a document with each filename and purpose. Organization matters more than polish.
Practice now 0/3
Build a reference board with a purpose
About 10 minutes of active work. Generation queues are not included. Done when a board or reference list states the purpose of every selected file.
Use files you own or have permission to use. Generation may require an account and credits. Leave uncompleted activities pending and keep the originals.
Reference 1: <file> | purpose: object
Reference 2: <file> | purpose: setting
Reference 3: <file> | purpose: style
Other: <only if needed>
Version and mode: <account>
Cost and cap: <screen and limit>
After these steps, you can organize up to nine references without mixing their roles.
Lesson cheat sheet
Build a reference board with a purpose
Case: fictional Vagalume lantern
Roles: object, setting, light, and style
Selection: a few files with clear purposes
Your next step
You now have criteria to organize up to nine references without mixing their roles.
Save this lesson’s work in the project folder. You will use it in the next step.
Next: Describe two styles through observable traits
Production and documentation follow-up · module 1Production and care steps to resume after the short exercise.
A reference is a visible decision
Experiment at your own pace
Choose materials you own or have permission to use, and assign each one a purpose.
What to observe
A lighting reference should not silently replace the product’s appearance.
A tool limit is not a creative goal
Experiment at your own pace
Make a second selection with only object, setting, and style, and justify each file.
What to observe
Do not treat an older version’s limits as rules for another version or platform.
Check features and costs in your current account. Guides may show different paths depending on the model and mode.
Lesson 1 · Styles and Cinema v6.2 · INEMA.CLUB PRO
Module 1 · Lesson 2 of 9
Describe two styles through observable traits
You can write two style notes and prepare starting images.
Reading: about 15 minutes. Practice: 10 active minutes. Queues, reference production, and corrections take extra time.
A style name alone can hide important choices. Define shape, texture, color, and light so you can review the result.
In 1 minute
Style A: 2D, outlines, flat colors
Style B: layered paper, tactile edges
Keep fixed: object, story, and main palette
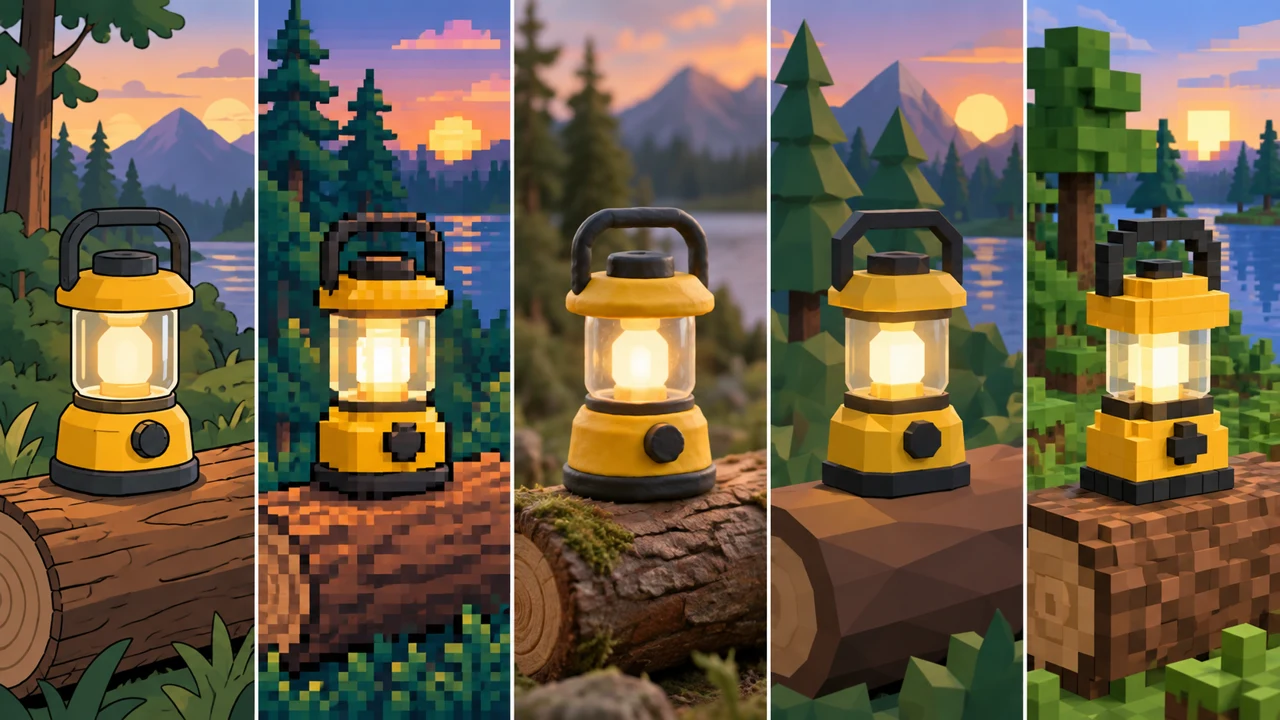
1Five visual languages, different choices
2D animation can use outlines and flat colors.
Pixel art builds shapes from visible blocks.
A 3D scene can explore volume and materials.
Low-poly style recalls older games, such as those from the PS1 era.
Voxel art uses cubic volumes, familiar from games such as Minecraft.
In a paper model, cutouts form layers, and small shadows show the space between them.
These names do not require copying game characters or settings.
Describe the visual language you want using original elements.
For Vagalume, we will compare flat-color 2D animation with a layered paper model.
The lantern and story stay the same.
Lara describes the texture instead of relying only on a style name.
Prompts to compare · teaching example
PromptAsk for any pretty style and accept a different lantern.
There are no observable limits to check the work against.
PromptDefine two visual languages and keep the same object’s handle, body, and base.
You have clear criteria for checking the decision.
Compare the two instructions. They are examples written for this lesson, with no simulated tool response.
2The starting image must match the style note
Prepare one version of the object for each style.
You can draw it or use an instruction-based image editor, such as a compatible Nano Banana mode.
Provide your reference and ask to change the visual language while preserving the shape and key parts.
Review it before animating.
A style change can alter the product.
Compare the lantern’s handle, body, and base.
If a feature disappears, correct the starting image.
A style note does not guarantee that a missing detail will return.
Keep the original reference with both versions.
Roberto checks whether the lantern still has the handle shown in the reference.
Completed brief · lesson example
1Style A: 2D, outlines, flat colors
2Style B: layered paper, tactile edges
3Keep fixed: object, story, and main palette
Use this sheet as a reference. Replace the example with your own project.
3Check the decision against its use
Style review includes checking that the object is still recognizable, not just that the texture looks good.
Roberto uses the checklist to confirm: keep fixed: object, story, and main palette.
Educational illustration created in Codex: The five panels illustrate visual languages. They are not a controlled model comparison or video results.
Test yourself
The paper version lost its handle. Which choice meets the project’s needs?
It’s normal to get stuck hereWithout access to an editor, draw simple studies for planning. Animation later requires an image that works in the chosen mode.
Practice now 0/3
Describe two styles through observable traits
About 10 minutes of active work. Generation queues are not included. Done when two style notes and three fixed traits are recorded, along with image status.
Use files you own or have permission to use. Generation may require an account and credits. Leave uncompleted activities pending and keep the originals.
A: 2D animation; clean outlines; yellow and teal; warm light.
B: paper model; visible layers; same palette; warm light.
Preserve: black handle, yellow body, and base.
Reference: <file>
Image A / B: <file or pending>
After these steps, you can write two style notes and prepare starting images.
Lesson cheat sheet
Describe two styles through observable traits
Style A: 2D, outlines, flat colors
Style B: layered paper, tactile edges
Keep fixed: object, story, and main palette
Your next step
You now have criteria to write two style notes and prepare starting images.
Save this lesson’s work in the project folder. You will use it in the next step.
Next: Write three shots that tell the same story
Production and documentation follow-up · module 1Production and care steps to resume after the short exercise.
Five visual languages, different choices
Experiment at your own pace
Write what should be visible in the shape, texture, palette, and lighting.
What to observe
A pixel is an image unit; a voxel is a volume. A square block on screen does not prove a scene is three-dimensional.
The starting image must match the style note
Experiment at your own pace
Follow-up needed: make and review both starting images before the generation lessons.
What to observe
The course images were created in Codex; they are not Nano Banana or Seedance demonstrations.
Check features and costs in your current account. Guides may show different paths depending on the model and mode.
Lesson 2 · Styles and Cinema v6.2 · INEMA.CLUB PRO
Module 1 · Lesson 3 of 9
Write three shots that tell the same story
You can build a short storyboard with a beginning, action, and outcome.
Reading: about 15 minutes. Practice: 10 active minutes. Queues, reference production, and corrections take extra time.
Two styles are easy to compare only when they tell the same story. Set the sequence before choosing effects.
In 1 minute
Shot 1: introduce the object and setting
Shot 2: show the change in light
Shot 3: reveal the result
1Each shot should add information
A storyboard is a visual script made of frames.
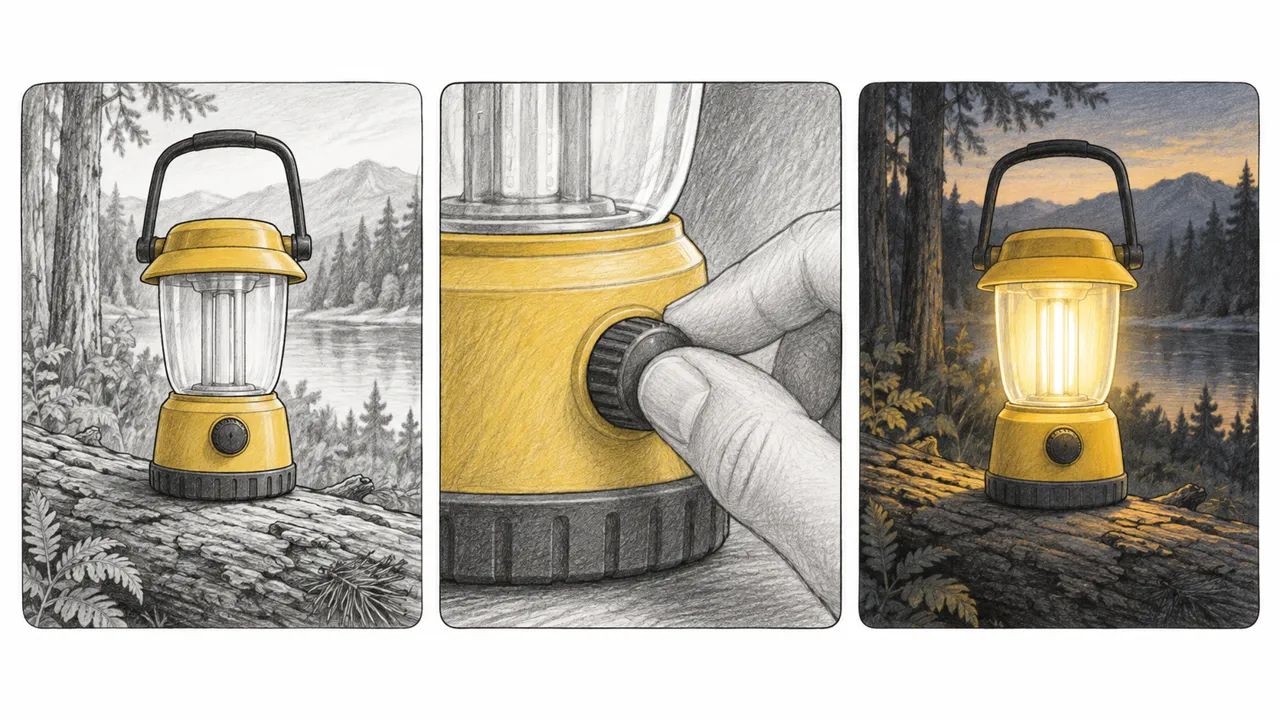
One shot shows the lantern in its setting; another shows the action; the third reveals its light.
Note the action, camera, and ending point in each frame.
Add up the durations to fit the total allowed by the mode.
To make it easier, use one simple action and a subtle camera move.
A hand pressing a button may need more corrections than a planned change in light.
Choose what needs to appear, and check that your reference shows that part of the object.
Lara keeps the prompt focused to spot conflicts before spending.
Weak decision
Ask for cinematic style, action, many effects, and different styles without a sequence.
Verifiable decision
Show the lantern, turn it on, and reveal its light in three defined shots.
Notice which characteristics make the second decision easy to check.
2A short text helps reveal conflicts
Organize the context, references, shots, style, and audio.
Use up to one thousand five hundred characters as the editorial limit for this exercise.
That number is not a universal Seedance restriction.
If you need to shorten it, remove repeated adjectives before essential actions.
Write the transitions: simple cut, continuous push-in, or a match cut between similar shapes.
Do not ask for a locked camera and a large camera move at the same time.
Versions A and B use the same sequence; only the style note and matching image change.
Roberto keeps the same story in both versions to compare the message.
Completed brief · lesson example
1Shot 1: introduce the object and setting
2Shot 2: show the change in light
3Shot 3: reveal the result
Use this sheet as a reference. Replace the example with your own project.
3Check the decision against its use
A and B should tell the same story so the comparison highlights the style change.
Roberto uses the checklist to confirm: shot 3: reveal the result.
Educational illustration created in Codex: The cards are planning drafts. The button detail is an option to check; this lesson’s script may show only the light turning on.
Test yourself
Version B also changed the story and camera. What became hard to evaluate?
It’s normal to get stuck hereIf the reference does not show that lantern detail, simplify the action or prepare another image before generation.
Practice now 0/3
Write three shots that tell the same story
About 10 minutes of active work. Generation queues are not included. Done when a three-shot script has checked action, camera, transition, and duration.
Use files you own or have permission to use. Generation may require an account and credits. Leave uncompleted activities pending and keep the originals.
Context: lantern on a log at dusk.
References: <unlit object, setting, style>
Shot 1: unlit lantern in its setting; locked camera.
Shot 2: close-up of the lantern window; light turns on gently.
Shot 3: view of the object lighting the log.
Transitions: simple cuts.
Duration per shot / total: <accepted values>
Audio: subtle ambience, no speech.
Style: <A or B>
After these steps, you can build a short storyboard with a beginning, action, and outcome.
Lesson cheat sheet
Write three shots that tell the same story
Shot 1: introduce the object and setting
Shot 2: show the change in light
Shot 3: reveal the result
Your next step
You now have criteria to build a short storyboard with a beginning, action, and outcome.
Save this lesson’s work in the project folder. You will use it in the next step.
Next: Generate the first version with available Seedance
Production and documentation follow-up · module 1Production and care steps to resume after the short exercise.
Each shot should add information
Experiment at your own pace
Draw three frames or write three cards, with one action per shot.
What to observe
Do not describe an action that depends on a detail missing from the starting image.
A short text helps reveal conflicts
Experiment at your own pace
Read the script aloud and check that each shot ends in an observable state.
What to observe
Specifying a cut in the text does not guarantee the model will perform it; review the output.
Check features and costs in your current account. Guides may show different paths depending on the model and mode.
Lesson 3 · Styles and Cinema v6.2 · INEMA.CLUB PRO
Module 2 · Lesson 4 of 9
Generate the first version with available Seedance
You can make and review a short test in style A.
Reading: about 15 minutes. Practice: 10 active minutes. Queues, reference production, and corrections take extra time.
The first test should show whether the story and look work together. Start with a small output and record what actually ran.
In 1 minute
Input: reviewed image A
Prompt: a three-shot sequence
Review: story before polish
1Link real references to the prompt
Open Seedance on the available platform and confirm the selected version.
Add the starting image for style A and any required references.
In the prompt, identify which file guides the object, setting, or visual style.
Use the links provided by the interface; do not invent filenames for files you did not attach.
The reference panel from lesson 1 helps you choose; it does not require you to upload everything.
For the first test, avoid redundant materials.
Check the starting image and the three-shot sequence before confirming generation.
Lara checks the shot order before requesting a longer output.
Weak decision
Generating several costly versions without checking whether the first one tells the story.
Verifiable decision
Make a short output, save it, and review the order, action, and object.
Notice which characteristics make the second decision easy to check.
2Review the story before asking for more detail
Set the duration, aspect ratio, and audio to match the script.
Choose an available test resolution and check the total cost.
Generate an output, save it, and watch it all the way through.
Check shot order, the light turning on, and whether the object stays intact.
Only then assess texture details.
A starting image with the light already on may conflict with a script that starts in darkness.
Fix that starting state before trying again.
If the model ignores a cut, simplify the sequence or generate the shots separately, and record the change in method.
Roberto compares the flashlight throughout the video, not just in the thumbnail.
Completed brief · lesson example
1Input: reviewed image A
2Prompt: a three-shot sequence
3Review: story before polish
Use this sheet as a reference. Replace the example with your own project.
3Check the decision against its use
Practice is complete only when a generated file has been reviewed. If you lack access or the queue is still running, record the status and resume later.
Roberto uses the worksheet to check: review: story before polish.
Teaching illustration created in Codex: This 2D animation study shows a flashlight that is already on. It illustrates visual style; it is not a ready-to-use dark starting image or a Seedance result.
Test yourself
The starting image is already lit, but the script begins in darkness. What should you align?
It’s normal to get stuck hereIf your image already has the light on, revise the script or prepare a dark image before starting the animation.
Practice now 0/3
Generate the first version with available Seedance
About 10 minutes of active work. Generation queues do not count. You are done when a style A video has been saved and reviewed, with its settings recorded.
Use files you own or have permission to use. Generation may require an account and credits. Leave uncompleted activities pending and keep the originals.
Check features and costs in your current account. Guides may show different paths depending on the model and mode.
Lesson 4 · Styles and Cinema v6.2 · INEMA.CLUB PRO
Module 2 · Lesson 5 of 9
Produce version B and compare it using clear criteria
You can generate a second visual style and record the differences you observe.
Reading: about 15 minutes. Practice: 10 active minutes. Queues, reference production, and corrections take extra time.
A second version only teaches you something when you know what you kept the same. Separate planned changes from unexpected variations.
In 1 minute
Kept the same: script, duration, and camera
Changed: image and style note
Criteria: clarity, continuity, and intent
1Change the style and keep the test consistent
Use the reviewed image B and its style note.
Keep the script, duration, aspect ratio, and camera intent the same.
Repeat this in the same model version, when available.
Record any settings you could not keep the same.
The paper model should tell the same story as the 2D animation.
If you change the object or setting, you have changed more than one variable.
The comparison can still be useful, but you need to note the difference.
Do not attribute every difference to style.
Lara records a camera change that prevents an isolated comparison.
Prompts to compare · teaching example
PromptChoose B because it looks newer, even though the whole story changed.
There are no observable limits to check the work against.
PromptKeep the sequence and compare clarity, texture, and continuity in both files.
You have clear criteria for checking the decision.
Compare the two instructions. They are examples written for this lesson, with no simulated tool response.
2Compare readability and intent
Watch A and B without sound first.
Can you recognize the flashlight and understand the change in lighting?
Then assess texture, palette, and continuity.
Finally, listen to the audio.
Choose the version that communicates your goal better.
Write down specific defects, or note that you did not find any in the criteria you reviewed.
There is no single style that works best for every use.
Paper can suit a handmade concept; 2D can emphasize outlines and contrast.
These are art-direction options, not guarantees.
Your choice depends on the result you made and your intended audience.
Roberto chooses based on how clearly the message will reach the guests, not on the flashiest effect.
Completed brief · lesson example
1Kept the same: script, duration, and camera
2Changed: image and style note
3Criteria: clarity, continuity, and intent
Use this sheet as a reference. Replace the example with your own project.
3Check the decision against its use
Two still studies show appearance; comparing motion requires both video files.
Roberto uses the worksheet to check: criteria: clarity, continuity, and intent.
Teaching illustration created in Codex: The paper model is an independent study. Compare its shape with the reference before use; it is not the same video test as version A.
Test yourself
B also changed the camera. What is the most careful conclusion?
It’s normal to get stuck hereIf B changed the product too much, review the starting image before blaming the paper style.
Practice now 0/3
Produce version B and compare it using clear criteria
About 10 minutes of active work. Generation queues do not count. You are done when you have compared both videos and your choice is based on observed evidence.
Use files you own or have permission to use. Generation may require an account and credits. Leave uncompleted activities pending and keep the originals.
Same conditions: <list>
Changes beyond style: <none or list>
File A / B: <names>
Action clarity: <observation>
Continuity: <observation>
Texture and palette: <observation>
Choice for my audience: <A or B, and why>
After these steps, you can generate a second visual style and record the differences you observe.
Lesson cheat sheet
Produce version B and compare it using clear criteria
Kept the same: script, duration, and camera
Changed: image and style note
Criteria: clarity, continuity, and intent
Your next step
You now have criteria for generating a second visual style and recording the differences you observe.
Save this lesson’s work in the project folder. You will use it in the next step.
Next: Plan the camera, lens, and story moment
Production follow-up and documentation · Module 2Production notes and safeguards for continuing after the short practice.
Change the style and keep the test consistent
Experiment at your own pace
Prepare a table of the conditions you kept and changed before generating B.
What to observe
Variation in the generator means one comparison cannot establish a universal rule about performance.
Compare readability and intent
Experiment at your own pace
Next: Repeat a test with another image to see whether you still prefer the same style.
What to observe
Without both videos, you can compare notes and images, but the motion review is still pending.
Check features and costs in your current account. Guides may show different paths depending on the model and mode.
Lesson 5 · Styles and Cinema v6.2 · INEMA.CLUB PRO
Module 2 · Lesson 6 of 9
Plan the camera, lens, and story moment
You can write a camera sheet with an intent and review criterion.
Reading: about 15 minutes. Practice: 10 active minutes. Queues, reference production, and corrections take extra time.
Camera and lens names do not replace an intent. Decide what the audience needs to notice, then choose the framing.
In 1 minute
Purpose: reveal the light turning on
Camera: still or a short push-in
Criterion: readable object and clear action
1Framing guides attention
A wide shot shows how the object relates to its surroundings.
A close-up highlights a detail.
Focal length describes a lens characteristic that affects the viewing angle.
With the same sensor format, a shorter focal length usually shows a wider field of view.
Camera distance also changes perspective.
Twenty-four millimeters may suggest a wide field of view in some setups, but it is not a universal filmmaking formula.
In a generator, this control is a visual guide; assess the image it produces.
Do not treat the selected name as a physical measurement from a real shoot.
Lara chooses camera movement based on the story moment, not a list of effects.
Weak decision
Choose famous lenses and cameras without saying what needs to appear.
Verifiable decision
Decide the focus, framing, and end point of the movement before setting it up.
Notice which characteristics make the second decision easy to check.
2Movement should serve the event
To show the flashlight turning on, a still camera can make the change clear.
A slow push-in can highlight the lit window.
If the goal is to show the place, a wider view can reveal the forest.
Choose one movement and one end point.
In Cinema Studio, camera, lens, and light controls depend on the version and mode.
Record the options you actually used.
Start with a simple setup to learn how it affects the result.
Add complexity only when it solves a story need.
Roberto wants enough space to recognize the inn’s surroundings.
Completed brief · lesson example
1Purpose: reveal the light turning on
2Camera: still or a short push-in
3Criterion: readable object and clear action
Use this sheet as a reference. Replace the example with your own project.
3Check the decision against its use
The lens name does not prove the result; check how the object and setting appear in the video.
Roberto uses the worksheet to check: criterion: readable object and clear action.
Teaching illustration created in Codex: The two frames compare a wide view with a close crop. They are not a lens measurement or a certified optical simulation.
Test yourself
The goal is to show the inn’s surroundings. Which framing helps first?
It’s normal to get stuck hereIf you do not understand a control, keep the default and make a note. You can compare later by changing just one thing.
Practice now 0/3
Plan the camera, lens, and story moment
About 10 minutes of active work. Generation queues do not count. You are done when a camera sheet connects intent, framing, movement, and the available settings.
Use files you own or have permission to use. Generation may require an account and credits. Leave uncompleted activities pending and keep the originals.
Shot: <number and purpose>
Main focus: the light turning on
Framing: <open or closed>
Movement: <still or one movement>
End point: <situation>
Available camera/lens/focal length: <actual options>
Approve if: clear action and intact object
After these steps, you can write a camera sheet with an intent and review criterion.
Lesson cheat sheet
Plan the camera, lens, and story moment
Purpose: reveal the light turning on
Camera: still or a short push-in
Criterion: readable object and clear action
Your next step
You now have criteria for writing a camera sheet with an intent and review criterion.
Save this lesson’s work in the project folder. You will use it in the next step.
Next: Generate a scene with a transition in Cinema Studio
Production follow-up and documentation · Module 2Production notes and safeguards for continuing after the short practice.
Framing guides attention
Experiment at your own pace
Write whether the shot should show the setting, action, or a detail before choosing a setting.
What to observe
A camera move is different from a zoom, which changes magnification without moving the camera.
Movement should serve the event
Experiment at your own pace
Next: Make two short tests, changing only one camera choice.
What to observe
Do not combine several conflicting camera moves just to make a scene look cinematic.
Lara writes the last frame of one shot and the first frame of the next.
Weak decision
Add a flashy transition that has no connection between the shots.
Verifiable decision
Define the end, the beginning, and the visual reason for the transition.
Notice which characteristics make the second decision easy to check.
2Choose a transition that makes sense
A simple cut switches directly from one shot to the next.
A visual match connects similar shapes, colors, or gestures.
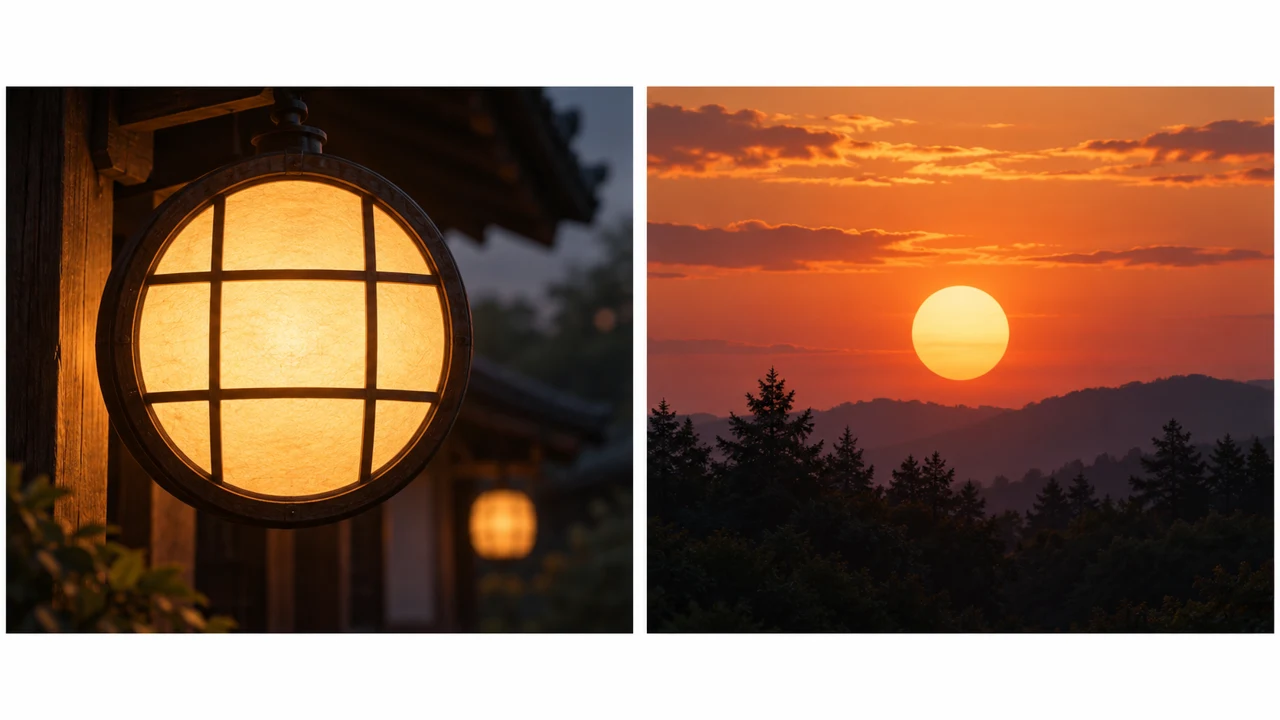
For example, a round light can lead to the sun.
This second example can use a different object; the flashlight does not have to physically turn into the sun.
Write what ends the first shot and what begins the next.
Watch the transition in motion to check pacing and continuity.
If the generated transition does not work, make the shots separately and cut them in an editor.
Record that the edit happened afterward.
Roberto chooses a subtle cut when it makes the message clearer.
Completed brief · lesson example
1Scene: a few purposeful shots
2Transition: a simple cut or visual match
3Review: watch the whole transition
Use this sheet as a reference. Replace the example with your own project.
3Check the decision against its use
If you made the transition in an editor, record that. The final result does not prove the generator made the cut.
Roberto uses the worksheet to check: review: watch the whole transition.
Teaching illustration created in Codex: The round lamp and sun illustrate a visual match in a separate example. They are not the Vagalume flashlight or an executed video transition.
Test yourself
You joined two clips in an editor to make the cut. How should you describe the deliverable?
It’s normal to get stuck hereIf the generated shot does not cut where you asked, simplify the sequence or make the shots separately and edit them later.
Practice now 0/3
Generate a scene with a transition in Cinema Studio
About 10 minutes of active work. Generation queues do not count. You are done when a generated scene has been saved and the transition between shots reviewed.
Use files you own or have permission to use. Generation may require an account and credits. Leave uncompleted activities pending and keep the originals.
Studio version: <screen>
References: <files and purposes>
Shot 1 ends: <status>
Shot 2 begins: <status>
Reason for transition: <continuity or similarity>
Settings/cost: <screen>
File: <output>
Transition: generated / assembled afterward / pending
After these steps, you can make a short scene and check the transition between shots.
Lesson cheat sheet
Generate a scene with a transition in Cinema Studio
Scene: a few purposeful shots
Transition: a simple cut or visual match
Review: watch the whole transition
Your next step
You now have criteria for making a short scene and checking the transition between shots.
Save this lesson’s work in the project folder. You will use it in the next step.
Next: Choose another tool based on the task that remains
Production and documentation continuation · module 3Production notes and care tips for returning after the short practice.
Set up the scene for your version
Experiment at your own pace
Make a sheet of the actual settings so you can repeat the attempt later.
What to observe
A proposal from an assistant director still needs review before you confirm generation.
Choose a transition that makes sense
Experiment at your own pace
Next: Compare a simple cut with a visual match and choose what helps your message.
What to observe
Side-by-side images suggest a transition, but do not show the cut’s timing or quality.
Check features and costs in your current account. Guides may show different paths depending on the model and mode.
Lesson 7 · Styles and Cinema v6.2 · INEMA.CLUB PRO
Module 3 · Lesson 8 of 9
Choose another tool based on the task that remains
You can plan a comparable test between available options.
Reading: about 15 minutes. Practice: 10 active minutes. Queues, reference production, and corrections take extra time.
No model name solves every scene. Before switching, compare the task you need, the accepted inputs, and the result you observed.
In 1 minute
Question: what problem do I want to investigate?
Compatibility: accepted inputs and actual feature
Evidence: file, settings, and review
1Turn a problem into a selection criterion
If the object deformed during the action, the criterion is whether it stays intact in motion.
If the speech failed, check the words and sync.
If the style changed, check the visual references.
Choose one question for each comparison and keep the script and materials as similar as possible.
The old proposal mentioned Kling 2.5, Hailuo 2, and Veo 3.1.
Catalogs change: newer Kling versions are available, and current MiniMax documentation describes H3.
Do not use an old recommendation as proof of what is best today.
Record the version and mode you actually tested.
Lara investigates object continuity with a small test.
Prompts to compare · teaching example
PromptSwitch models because someone said one is always better at physics.
There are no observable limits to check the work against.
PromptChoose a concrete task and compare files under recorded conditions.
You have clear criteria for checking the decision.
Compare the two instructions. They are examples written for this lesson, with no simulated tool response.
2A comparison must account for different features
Veo in Flow offers different features depending on the mode.
Kling, Seedance, and MiniMax alternatives also differ in inputs and controls.
Check the specific feature, not just the product family name.
If an option does not accept your material, the test conditions have changed.
Start with a short section and a spending limit.
Save the wait time, settings, and file.
Assess the same criterion in both results.
One attempt is limited evidence, not a definitive ranking of the tools.
Roberto records the cost and availability before approving another attempt.
Completed brief · lesson example
1Question: what problem do I want to investigate?
2Compatibility: accepted inputs and actual feature
3Evidence: file, settings, and review
Use this sheet as a reference. Replace the example with your own project.
3Check the decision against its use
Do not turn a feature lookup into a quality claim you have not observed.
Roberto uses the worksheet to check: evidence: file, settings, and review.
Teaching illustration created in Codex: The cards represent a review of alternatives. They are illustrated studies, not outputs compared across three services.
Test yourself
You only read the feature pages. What have you confirmed?
It’s normal to get stuck hereIf you cannot afford a comparison, finish the compatibility sheet. You can test the output in another session.
Practice now 0/3
Choose another tool based on the task that remains
About 10 minutes of active work. Generation queues do not count. You are done when a comparison plan identifies the task, compatibility, cost, and conditions.
Use files you own or have permission to use. Generation may require an account and credits. Leave uncompleted activities pending and keep the originals.
Question: does the object stay intact during the action?
Option A: <version, mode, inputs, cost>
Option B: <version, mode, inputs, cost>
Kept the same: script, reference, and intent
Unavoidable differences: <list>
Files: <names or pending>
Possible conclusion: <limited observation>
After these steps, you can plan a comparable test between available options.
Lesson cheat sheet
Choose another tool based on the task that remains
Question: what problem do I want to investigate?
Compatibility: accepted inputs and actual feature
Evidence: file, settings, and review
Your next step
You now have criteria for planning a comparable test between available options.
Save this lesson’s work in the project folder. You will use it in the next step.
Next: Review the three files before delivery
Production and documentation continuation · module 3Production notes and care tips for returning after the short practice.
Turn a problem into a selection criterion
Experiment at your own pace
Make one row per option with the input, feature, cost, and criterion you plan to assess.
What to observe
A promotional demo does not prove that your case will get the same result.
A comparison must account for different features
Experiment at your own pace
Optional next step: Run the comparison with one tool change and documented conditions.
What to observe
If you only checked the catalog, record compatibility research; do not claim you compared video quality.
Check features and costs in your current account. Guides may show different paths depending on the model and mode.
Lesson 8 · Styles and Cinema v6.2 · INEMA.CLUB PRO
Module 3 · Lesson 9 of 9
Review the three files before delivery
You can audit two style versions and one cinematic scene.
Reading: about 15 minutes. Practice: 10 active minutes. Queues, reference production, and corrections take extra time.
A style presentation is ready only when the files match what you promised. The final review brings together the story, image, and delivery format.
In 1 minute
A and B: same story, different styles
Cinema scene: camera and transition reviewed
Delivery: files and method identified
1Three deliverables need to exist
Gather video A, video B, and the Cinema Studio scene.
Confirm that A and B tell the same story, and record any other differences.
For the third piece, check the camera and transition.
Record the file, version, cost, and review decision for each deliverable.
If a piece exists only in the script, mark production as pending.
This lesson’s exercise organizes the audit; it does not automatically generate the missing videos.
Set aside sessions to produce, correct, and assemble what is needed.
Keep the references with the results.
Lara keeps the original file to compare any enlargement.
Weak decision
Deliver only attractive images and claim all three videos are ready.
Verifiable decision
Check each file, separate pending work, and explain the method used.
Notice which characteristics make the second decision easy to check.
2Polish comes after content approval
Increasing resolution can improve presentation, but may not fix shape, motion, or cuts.
If you use enlargement, also called upscale, compare the original and new versions.
Look at edges, textures, and invented details.
Keep the original.
Export in a format suited to its use, then open the file outside the editor.
Watch it on your phone with and without sound.
Check the beginning, ending, duration, and readability.
If you share fictional studies, present them as studies.
Do not credit a tool for an image or edit made with another.
Roberto checks the result on his phone before sharing it with guests.
Completed brief · lesson example
1A and B: same story, different styles
2Cinema scene: camera and transition reviewed
3Delivery: files and method identified
Use this sheet as a reference. Replace the example with your own project.
3Check the decision against its use
Finishing the audit and finishing production are different; the final project requires all three videos to be reviewed.
Roberto uses the checklist to confirm: delivery: files and method identified.
Educational illustration created in Codex: The strips are illustrated storyboards in two styles. They do not show delivered video files or a technical model comparison.
Test yourself
The video has higher resolution, but the object is still distorted. What should you do?
It’s normal to get stuck hereStart with the pending item that blocks the A/B comparison. Leave enlargement until content approval.
Practice now 0/3
Review the three files before delivery
About 10 minutes of active work. Queues are not included. Done when the audit records all three statuses and links evidence to decisions.
Use files you own or have permission to use. Generation may require an account and credits. Leave uncompleted activities pending and keep the originals.
Video A: <file, model, review>
Video B: <file, model, review>
Cinema Studio scene: <file, version, review>
Later edit: <operations performed>
Upscaling: <not used or settings>
Pending work: <list>
Delivery note: goal, choices, method, and limits
After these steps, you can audit two style versions and one cinematic scene.
Lesson cheat sheet
Review the three files before delivery
A and B: same story, different styles
Cinema scene: camera and transition reviewed
Delivery: files and method identified
Your next step
You now have criteria to audit two style versions and one cinematic scene.
Save this lesson’s work in the project folder. You will use it in the next step.
Next: Apply the method to a new video with a different goal.
Production and documentation continuation · module 3Production notes and care tips for returning after the short practice.
Three deliverables must exist
Experiment at your own pace
Follow-up needed: finish any missing video before presenting the project as complete.
What to observe
Three thumbnails do not replace three watched and reviewed videos.
Polish comes after content approval
Experiment at your own pace
Make a short sheet with the goal, method, files, and limits for the delivery.
What to observe
Do not confuse chosen resolution, later enlargement, and observed visual quality.