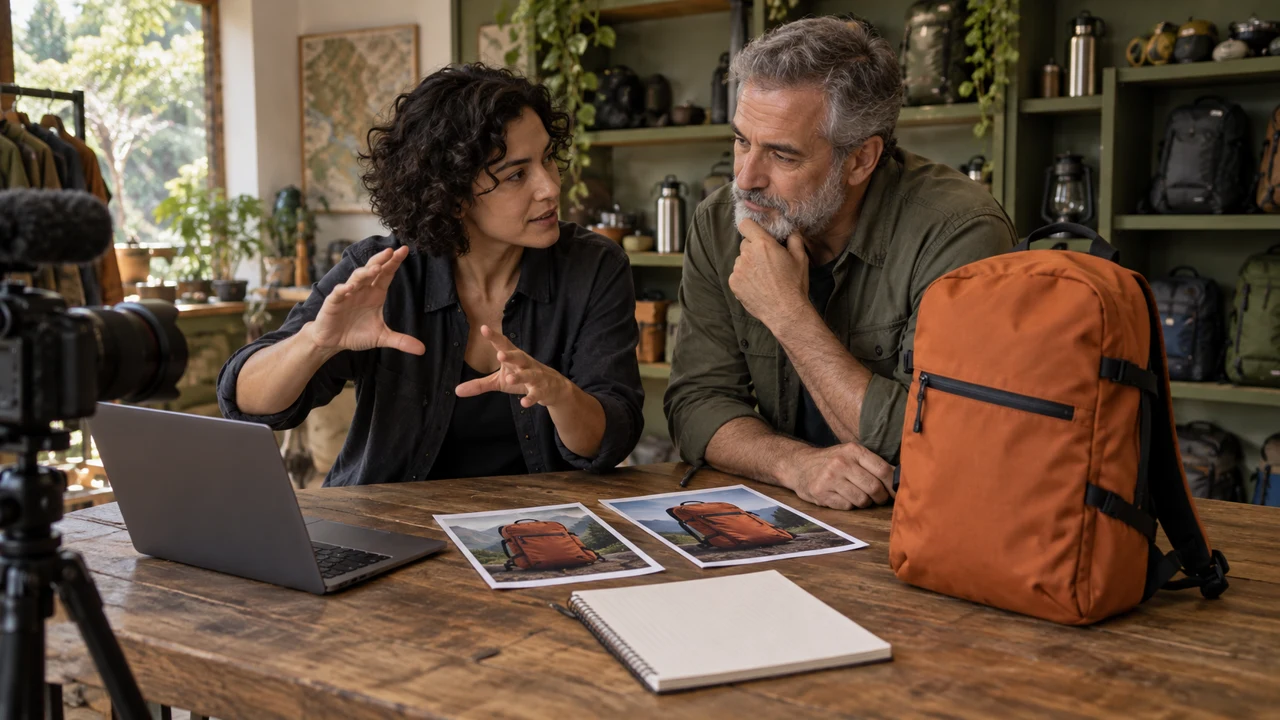
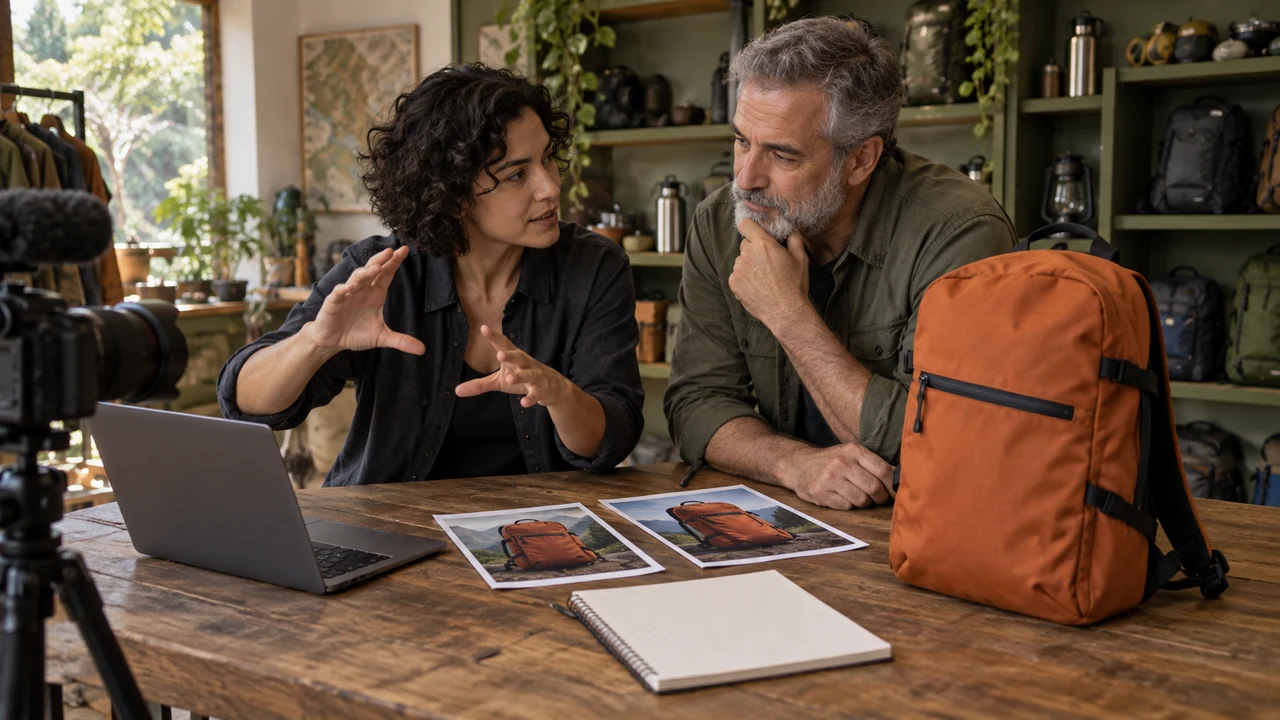
Reading: about 15 minutes. The practice takes 10 active minutes; generation and extra production depend on queues and tests.
Kling appears in different features. Before testing a claim, find out which feature your account actually offers.
In 1 minute
Case: fictional Rota backpack, orange and black
Record: model and feature shown in your account
Limit: cost per attempt × maximum number
1A model is not the same as a feature
Model is the system that generates the result.
A feature is the operation you choose, such as animating an image or editing a video.
The documentation introduces VIDEO 3.0 and VIDEO 3.0 Omni, successors to earlier product lines.
Your account may show other options.
Write down the full name shown. Do not assume they are equivalent.
An older tutorial may show O1 or 2.6.
That helps you recognize the feature’s history, but does not guarantee the same buttons today.
Use the linked documentation alongside the current screen.
Luiza, a 34-year-old videographer, records the model for each file so she can compare tests.
Prompts to compare · teaching example
PromptChoose the newest button and generate several outputs without checking the cost.
There are no observable limits to check the work against.
PromptRecord the model, feature, duration, one output, and limit before testing.
You have clear criteria for checking the decision.
Compare the two instructions. They are examples written for this lesson, with no simulated tool response.
2Your budget must account for attempts
Choose a short test, one output, and a limit on retries.
Note the cost shown on screen before generating.
Multiply that cost by your maximum number of attempts.
To estimate in your currency, divide what you actually paid for the package by the credits it included.
This estimates usage; it is not the price of a single purchase.
Promotional credits and expiration dates can change the math.
Record the date and leave room to review an attempt that did not work.
Fictional example: 20 credits per attempt, up to three attempts, for a 60-credit limit.
Replace these numbers with the ones in your account.
Davi, a 57-year-old shop owner, sets a limit before approving production of the fictional backpack.
Completed brief · lesson example
1Case: fictional Rota backpack, orange and black
2Record: model and feature shown in your account
3Limit: cost per attempt × maximum number
Use this sheet as a reference. Replace the example with your own project.
3Check the decision against its use
Record the model you actually used; a tutorial name does not prove your account settings.
Davi uses the sheet to check: limit: cost per attempt × maximum number.
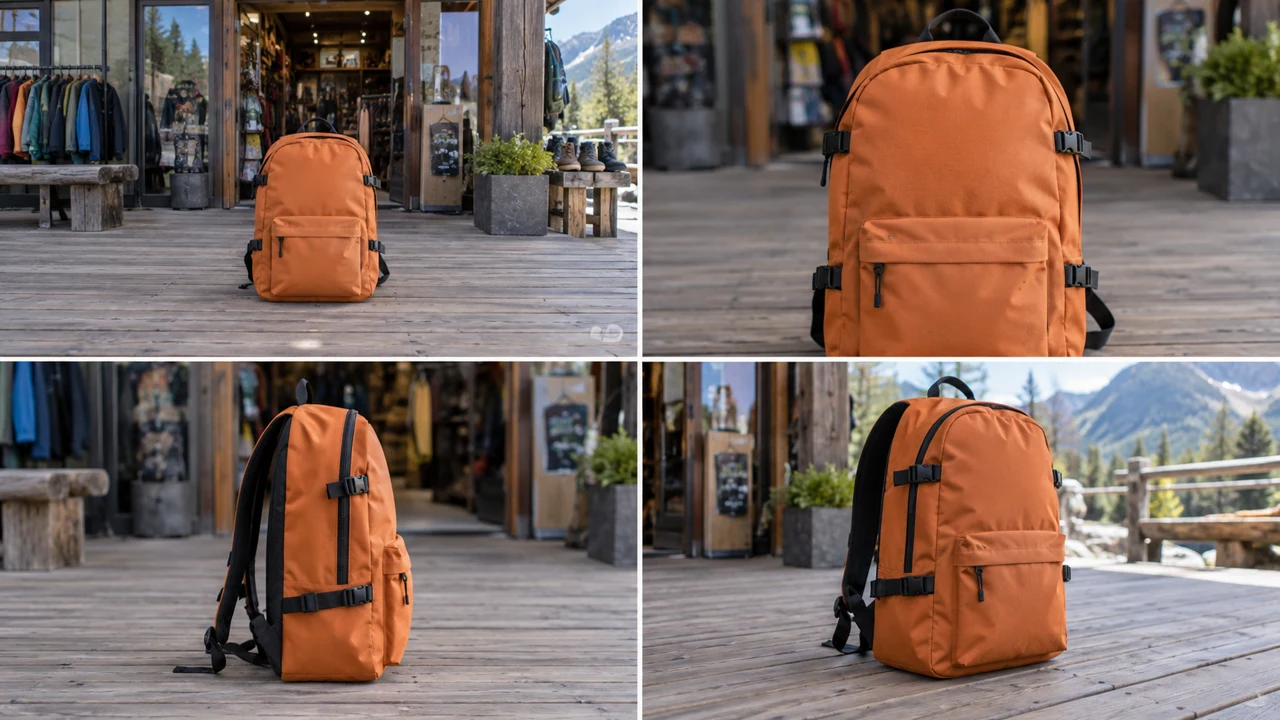
Didactic illustration created in Codex: The references and backpack show the project subject. The illustration shows neither prices nor a real Kling screen.
Test yourself
Two modes show different costs. How should you choose a limit?
It’s normal to get stuck hereIf you lack access, note what is missing. You can plan now, but leave generation practices pending.
Practice now 0/3
Learn your settings and spending limit
About 10 minutes of active work. Generation queues do not count. You’re done when the sheet shows actual settings, a limit, and access status.
Use files you own or have permission to use. Generation may require an account and credits. Leave uncompleted activities pending and keep the originals.
Model: <name shown on screen>
Feature: <operation>
Duration/format/audio: <settings>
Outputs: 1
Cost per attempt: <credits>
Maximum attempts: <number>
Limit: <multiplication>
Access: ready / pending
After these steps, you can record a model, feature, and test budget.
Lesson cheat sheet
Learn your settings and spending limit
Case: fictional Rota backpack, orange and black
Record: model and feature shown in your account
Limit: cost per attempt × maximum number
Your next step
You now have criteria for recording a model, feature, and test budget.
Save this lesson’s work in the project folder. You will use it in the next step.
Next: Choose between text-to-video and image-to-video
Supplemental material · Module 1Production notes and safeguards for continuing after the short practice.
A model is not the same as a feature
Experiment at your own pace
List the features shown in your account without starting a generation.
What to observe
The course was checked on 25/09/2026. Recheck availability and prices in your account. If there is a Labs area, treat it as experimental: confirm its purpose and limits before using it in the project.
Your budget must account for attempts
Experiment at your own pace
Calculate a limit using your account details and set aside one attempt for correction.
What to observe
Never treat an old course price as permission to spend today.
Check features, languages, and costs in your current account. Older guides may show different settings.
Lesson 1 · Kling AI v6.2 · INEMA.CLUB PRO
Module 1 · Lesson 2 of 15
Choose between text-to-video and image-to-video
You can prepare two prompts and choose the path that fits your case.
Reading: about 15 minutes. The practice takes 10 active minutes; generation and extra production depend on queues and tests.
A written prompt may invent a convincing scene but represent a specific product poorly. Match the input to what needs to stay faithful.
In 1 minute
Text-to-video: explore an imagined scene
Image-to-video: start from a reviewed reference
Decision: required fidelity and available material
1Text describes something that does not exist yet
Text-to-video starts without an image you provide.
Describe the subject, action, setting, and look.
For Rota, we might imagine an orange backpack on a trail.
That description does not identify a real backpack model.
The generator still decides many details.
Use this path to explore an idea when an exact product copy is not required.
The more a specific detail matters, the more you need to define and check it.
A long description can contain contradictions.
Luiza uses text to explore a fictional setting without promising an identical product.
Prompts to compare · teaching example
PromptAsk for the exact store backpack using only the words “beautiful backpack.”
There are no observable limits to check the work against.
PromptUse the product photo when its shape and details must be recognizable.
You have clear criteria for checking the decision.
Compare the two instructions. They are examples written for this lesson, with no simulated tool response.
2An image supplies the starting appearance
Image-to-video uses a starting image.
It already shows the object, framing, and light.
The prompt can focus on action and camera movement.
For a real product, photograph it with visible details.
For the fictional case, create your own image and review it before animating.
A reference reduces open decisions but does not freeze the product.
Zippers, straps, and proportions can still change during the video.
Keep the starting image for comparison and describe only movement that fits it.
Davi prefers the backpack photo when he needs to check the pocket and zipper.
Completed brief · lesson example
1Text-to-video: explore an imagined scene
2Image-to-video: start from a reviewed reference
3Decision: required fidelity and available material
Use this sheet as a reference. Replace the example with your own project.
3Check the decision against its use
For image-to-video, movement must fit the starting image.
Davi uses the sheet to check: decision: required fidelity and available material.
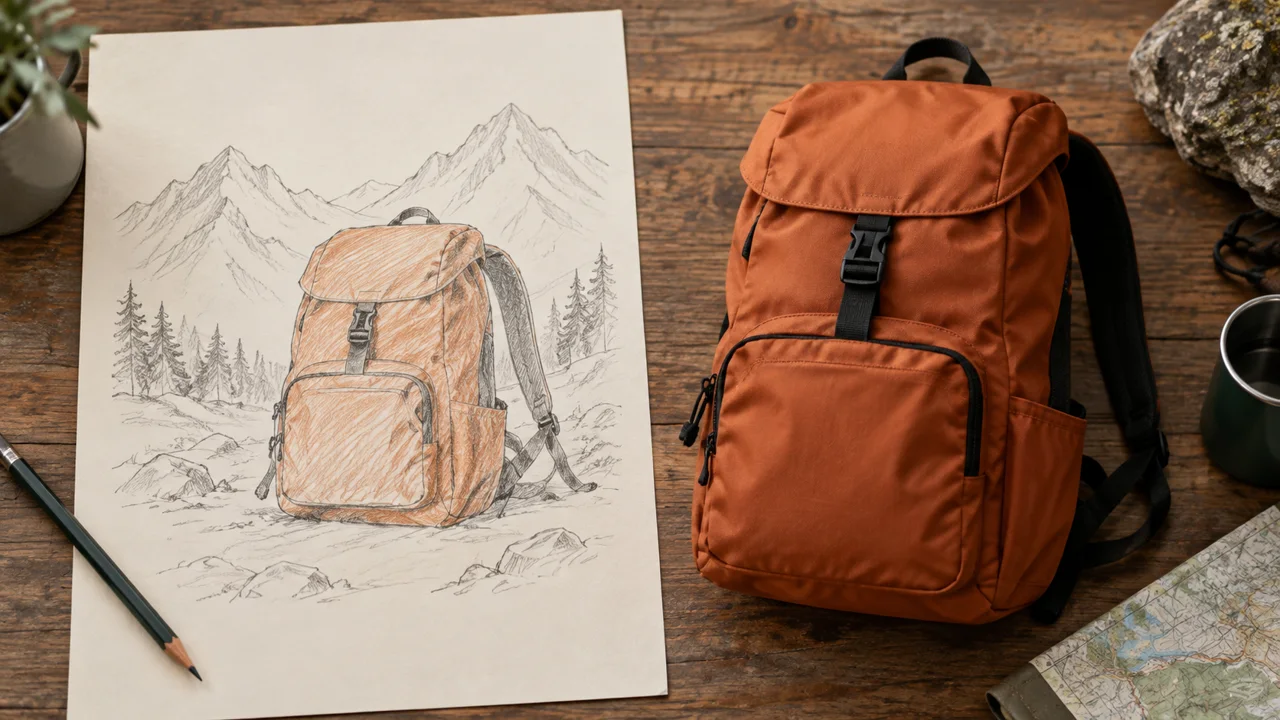
Didactic illustration created in Codex: The drawing represents an idea to build; the photo represents a supplied appearance. They are different planning inputs.
Test yourself
The goal is to show a real backpack with its specific zipper. Which input helps most?
It’s normal to get stuck hereIf you do not have a photo yet, plan the text version. To represent a real product, return with your own reference.
Practice now 0/3
Choose between text-to-video and image-to-video
About 10 minutes of active work. Generation queues do not count. You’re done when two prompts are written and your choice matches the needed fidelity.
Use files you own or have permission to use. Generation may require an account and credits. Leave uncompleted activities pending and keep the originals.
Text: orange backpack on wooden bench, fabric moves gently in the breeze, forest behind, natural photography.
Image: use my photo; camera still, fabric moves gently, preserve shape and straps.
Choice: <text or image>
Reason: <fidelity or exploration>
After these steps, you can prepare two prompts and choose the right path.
Lesson cheat sheet
Choose between text-to-video and image-to-video
Text-to-video: explore an imagined scene
Image-to-video: start from a reviewed reference
Decision: required fidelity and available material
Your next step
You now have criteria for preparing two prompts and choosing the right path.
Save this lesson’s work in the project folder. You will use it in the next step.
Next: Turn a failure into one small change
Supplemental material · Module 1Production notes and safeguards for continuing after the short practice.
Text describes something that does not exist yet
Experiment at your own pace
Write a scene in four lines: subject, action, setting, and appearance.
What to observe
Do not claim commercial fidelity for a backpack invented from text alone.
An image supplies the starting appearance
Experiment at your own pace
Choose an image and write an action that does not reveal hidden parts.
What to observe
A beautiful image is no substitute for checking the whole clip.
Check features, languages, and costs in your current account. Older guides may show different settings.
Lesson 2 · Kling AI v6.2 · INEMA.CLUB PRO
Module 1 · Lesson 3 of 15
Turn a failure into one small change
You can diagnose a flaw and write a correction test.
Reading: about 15 minutes. The practice takes 10 active minutes; generation and extra production depend on queues and tests.
When everything changes between attempts, you cannot tell what helped. A specific diagnosis makes the next test more useful.
In 1 minute
Flaw: what changed and when
Hypothesis: which choice may be related
Test: change just one variable
1Five questions before blaming the model
Does the reference show the needed detail?
Does the prompt contain conflicting actions?
Does the camera reveal a hidden part?
Does the movement fit the duration?
Do the settings match the feature you want?
These questions organize possible causes.
By themselves, they do not prove why a generation failed.
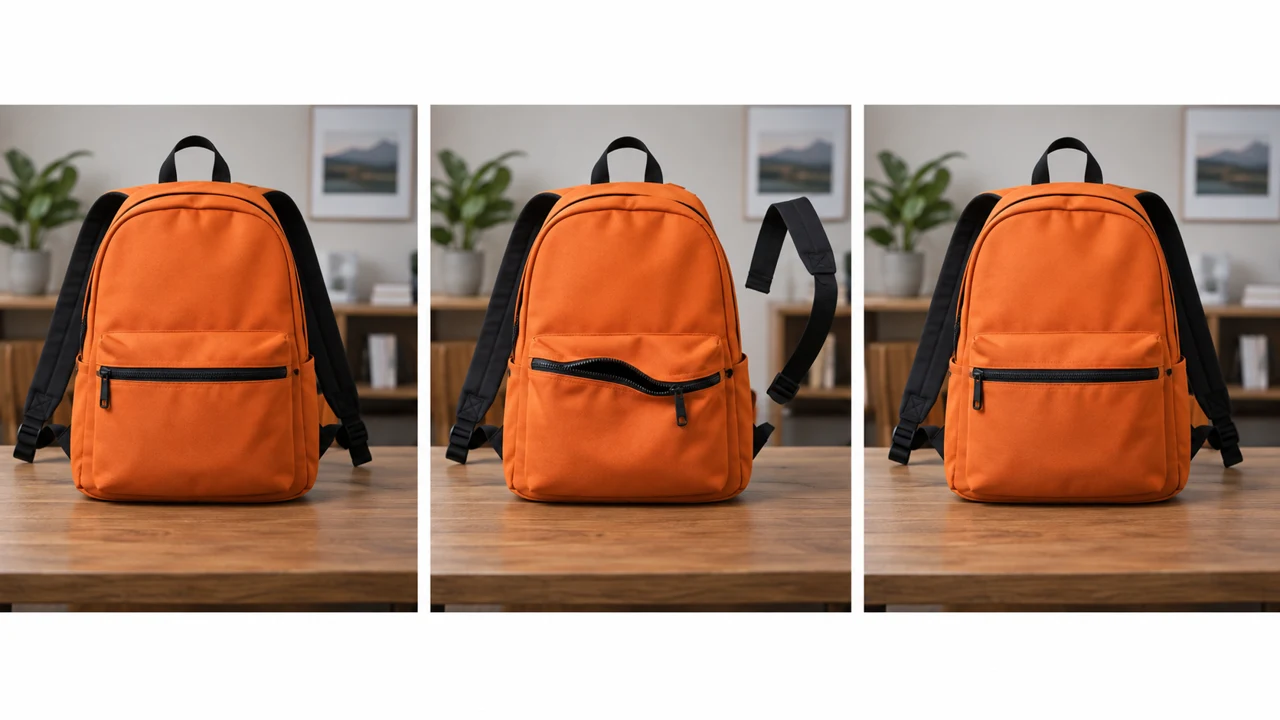
A strap that appears from nowhere may relate to an ambitious rotation or an incomplete reference.
Start with what you can observe.
Record when the error appears and keep the file for comparison.
Luiza notes the second where the flaw occurs and tests a simpler camera move.
Weak decision
Bad video; change model, light, image, and camera all at once.
Verifiable decision
Extra strap appears midway; test a still camera with the same image.
Notice which characteristics make the second decision easy to check.
2Change one variable per attempt
A variable is one choice you change in a test, such as speed, camera, or duration.
Keep the other choices the same.
Write what you expect and how you will check it.
A useful test might replace an orbit with a still camera while keeping the image, duration, and action.
One improvement may still depend on the generator’s variation.
Record that without claiming a universal rule.
The goal is a usable setting within your limit, not proof that one phrase always works.
Davi approves the correction only after watching the new file all the way through.
Completed brief · lesson example
1Flaw: what changed and when
2Hypothesis: which choice may be related
3Test: change just one variable
Use this sheet as a reference. Replace the example with your own project.
3Check the decision against its use
A correction plan is not evidence that the problem is solved.
Davi uses the sheet to check: test: change just one variable.
Didactic illustration created in Codex: The center panel was created with flaws for inspection. The frames are independent illustrations, not frames extracted from a real video.
Test yourself
You changed five things and the result improved. What can you conclude?
It’s normal to get stuck hereWithout your own video, describe the extra strap or odd zipper in the illustration. Record this as an illustration analysis.
Practice now 0/3
Turn a failure into one small change
About 10 minutes of active work. Generation queues do not count. You’re done when the diagnosis separates observation, hypothesis, and a test still to run.
Use files you own or have permission to use. Generation may require an account and credits. Leave uncompleted activities pending and keep the originals.
Observation: <flaw and timing, or illustrated panel>
Hypothesis: it may relate to <choice>
I will change only: <variable>
I will keep: <other conditions>
Expected: <verifiable result>
Status: planned / tested with file <name>
After these steps, you can diagnose a flaw and write a correction test.
Lesson cheat sheet
Turn a failure into one small change
Flaw: what changed and when
Hypothesis: which choice may be related
Test: change just one variable
Your next step
You now have criteria for diagnosing a flaw and writing a correction test.
Save this lesson’s work in the project folder. You will use it in the next step.
Next: Compare four camera choices
Supplemental material · Module 1Production notes and safeguards for continuing after the short practice.
Five questions before blaming the model
Experiment at your own pace
Classify a flaw using the most useful question to investigate it.
What to observe
Do not turn a hypothesis about the cause into a proven diagnosis.
Change one variable per attempt
Experiment at your own pace
Compare two files with one planned difference and note the limits of the comparison.
What to observe
Do not spend repeatedly without a new question or a set limit.
Check features, languages, and costs in your current account. Older guides may show different settings.
Lesson 3 · Kling AI v6.2 · INEMA.CLUB PRO
Module 2 · Lesson 4 of 15
Compare four camera choices
You can write four variations that change only the camera.
Reading: about 15 minutes. The practice takes 10 active minutes; generation and extra production depend on queues and tests.
“Cinematic camera” does not say how the viewpoint moves. Naming the move lets you compare intent with result.
In 1 minute
Keep fixed: image, action, duration, and format
Variations: four camera moves
Criterion: intact product and useful movement
1Framing and movement are different choices
Framing is what fits in the image.
Movement is how the viewpoint changes during a shot.
A still camera keeps its position.
A push-in moves toward the object.
A lateral move passes beside it.
An orbit circles around it.
Each option reveals different information about the space.
A photo shows framing, but cannot prove which move produced the view.
So the illustrations in this lesson help you imagine endpoints.
You need a real video to check the movement.
Luiza uses the same reference to see whether a short push-in highlights the product.
Weak decision
Change the setting, light, and movement in every camera version.
Verifiable decision
Keep everything else the same and compare still, push-in, lateral move, and short orbit.
Notice which characteristics make the second decision easy to check.
2A fair test keeps everything else the same
Prepare four prompts with the same starting image, action, duration, and format.
Change only the camera.
Use short, slow moves to reduce how many new areas appear.
Before generating, check whether four attempts fit your limit.
A still camera gives you a comparison baseline.
In the other tests, check whether the product stays intact and the move serves the message.
The flashiest variation may be the least useful.
You do not need to choose the most complex one.
Davi compares how readable the backpack is instead of automatically choosing the most eye-catching effect.
Completed brief · lesson example
1Keep fixed: image, action, duration, and format
2Variations: four camera moves
3Criterion: intact product and useful movement
Use this sheet as a reference. Replace the example with your own project.
3Check the decision against its use
You need to generate and watch all four files to compare results; the sheet proves planning only.
Davi uses the sheet to check: criterion: intact product and useful movement.
Didactic illustration created in Codex: The four framings suggest different positions. A still image shows neither movement nor guaranteed continuity.
Test yourself
Which change best preserves a fair comparison of four camera moves?
It’s normal to get stuck hereIf your budget allows only one test, use a still camera as the baseline and mark the other variations pending.
Practice now 0/3
Compare four camera choices
About 10 minutes of active work. Generation queues do not count. You’re done when four prompts differ only in camera and have a recorded criterion and limit.
Use files you own or have permission to use. Generation may require an account and credits. Leave uncompleted activities pending and keep the originals.
Model: <copy from account>
Duration: <value>
Format: <aspect ratio>
Base: backpack still on bench, same light and duration.
A: still camera.
B: slow, short push-in.
C: short lateral move, object stays in frame.
D: short orbit around the object.
Check: shape, straps, and useful movement.
Limit: <actual cost for four attempts>
After these steps, you can write four variations that change only the camera.
Lesson cheat sheet
Compare four camera choices
Keep fixed: image, action, duration, and format
Variations: four camera moves
Criterion: intact product and useful movement
Your next step
You now have criteria for writing four variations that change only the camera.
Save this lesson’s work in the project folder. You will use it in the next step.
Next: Write an action with a clear endpoint
Production follow-up and documentation · Module 2Production notes and safeguards for continuing after the short practice.
Framing and movement are different choices
Experiment at your own pace
Draw where the camera starts and ends for each move. FPV means first-person view, as if the camera traveled through the space. Save this more complex test until after the four simple comparisons.
What to observe
Zoom changes magnification; moving the camera closer changes its position. They are not identical descriptions.
A fair test keeps everything else the same
Experiment at your own pace
Next: generate the four variations within your limit, save them, and compare. Allow extra time for queues and review.
What to observe
Do not claim to have compared results if you only wrote the four prompts.
Check features, languages, and costs in your current account. Older guides may show different settings.
Lesson 4 · Kling AI v6.2 · INEMA.CLUB PRO
Module 2 · Lesson 5 of 15
Write an action with a clear endpoint
You can define the start, movement, and final state of a shot.
Reading: about 15 minutes. The practice takes 10 active minutes; generation and extra production depend on queues and tests.
An action without an endpoint may keep turning or changing until the cut. An endpoint helps you review what actually happened.
In 1 minute
Start: backpack held in someone’s hands
Action: set it on the bench
End: backpack still, hands out of frame
1The movement needs an observable ending
Describe the starting state, action, and final state.
Someone holds the backpack, sets it on the bench, and removes their hands.
At the end, the backpack is still.
This sequence is easier to review than asking for a dynamic product reveal.
The final state also helps you plan the next cut.
Not every movement fits in a few seconds.
Setting a backpack on a bench takes fewer steps than walking, opening it, taking things out, and leaving.
Reducing actions may work better than asking for exaggerated speed.
Luiza replaces five actions with one gesture: setting down the backpack.
Prompts to compare · teaching example
PromptThe backpack spins, opens, changes position, and shows every pocket quickly.
There are no observable limits to check the work against.
PromptHands set the backpack on the bench and leave; the object ends still.
You have clear criteria for checking the decision.
Compare the two instructions. They are examples written for this lesson, with no simulated tool response.
2Duration gives the action room
Choose a duration offered by the current model.
Plan a beginning, an action, and a short pause at the end.
If the clip ends before the action is complete, simplify or add time if the feature and budget allow it.
Then review the full action.
Keep the camera still during this test to isolate the action.
Note where the backpack touches the bench and when the hands leave.
If there is a jump or distortion, reaching the right final frame is not enough to approve the movement.
Davi watches the contact with the bench because it affects whether the product feels believable.
Completed brief · lesson example
1Start: backpack held in someone’s hands
2Action: set it on the bench
3End: backpack still, hands out of frame
Use this sheet as a reference. Replace the example with your own project.
3Check the decision against its use
A correct final state does not erase distortions or jumps during the movement.
Davi uses the sheet to check: end: backpack still, hands out of frame.
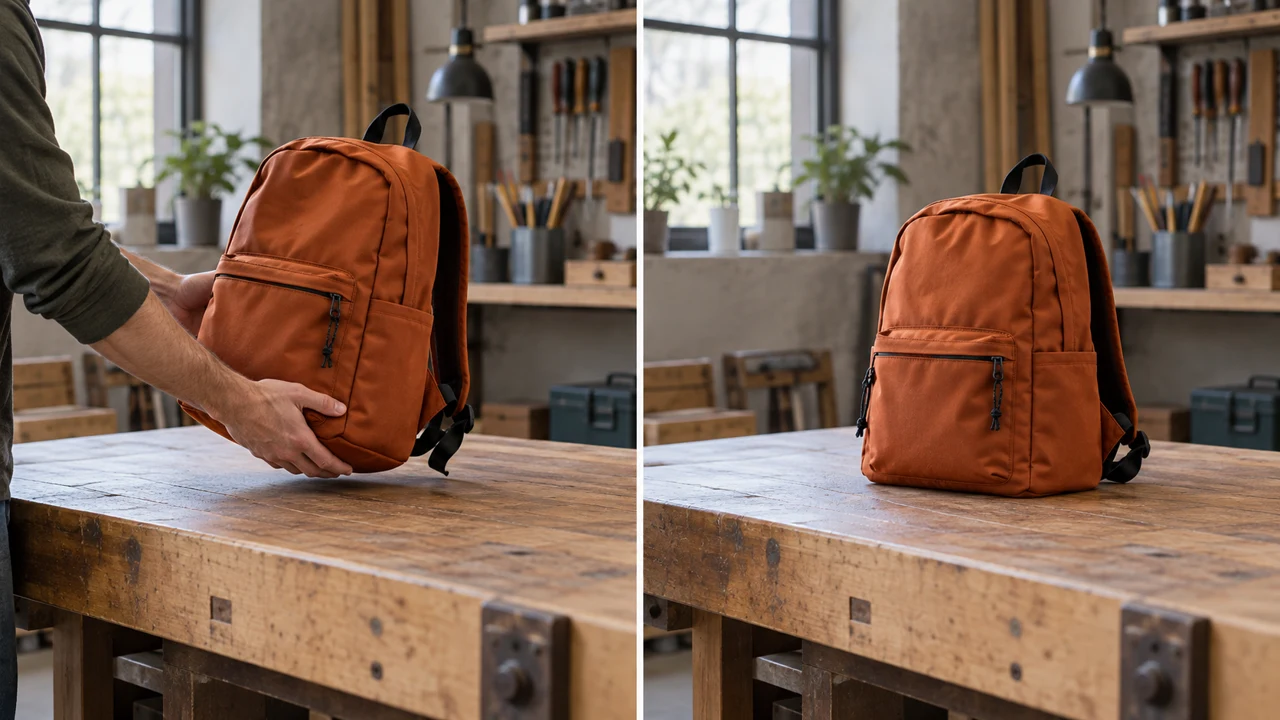
Didactic illustration created in Codex: The two images show starting and ending states. The path between them still needs to be generated and checked.
Test yourself
The video ends correctly, but the backpack passes through a hand halfway through. How should you assess it?
It’s normal to get stuck hereIf the action has many verbs, choose one gesture. You can make another scene later.
Practice now 0/3
Write an action with a clear endpoint
About 10 minutes of active work. Generation queues do not count. You’re done when the prompt describes a start, action, and end, with available timing and a review criterion.
Use files you own or have permission to use. Generation may require an account and credits. Leave uncompleted activities pending and keep the originals.
Start: <observable state>
Action: <one movement>
End: <observable state>
Camera: still
Available duration: <account value>
Check: contact, shape, and final pause
After these steps, you can define the start, movement, and final state of a shot.
Lesson cheat sheet
Write an action with a clear endpoint
Start: backpack held in someone’s hands
Action: set it on the bench
End: backpack still, hands out of frame
Your next step
You now have criteria for defining the start, movement, and final state of a shot.
Save this lesson’s work in the project folder. You will use it in the next step.
Next: Test two similar frames as start and end
Supplemental material · Module 2Production notes and safeguards for continuing after the short practice.
The movement needs an observable ending
Experiment at your own pace
Divide a long action into two shots with different final states.
What to observe
A prompt with exact timestamps does not guarantee the model will follow every second.
Duration gives the action room
Experiment at your own pace
Generate a short attempt and mark when it starts, makes contact, and comes to rest.
What to observe
Do not confuse ending in the right pose with performing a believable movement.
Check features, languages, and costs in your current account. Older guides may show different settings.
Lesson 5 · Kling AI v6.2 · INEMA.CLUB PRO
Module 2 · Lesson 6 of 15
Test two similar frames as start and end
You can generate and review a transition between two images of your own.
Reading: about 15 minutes. The practice takes 10 active minutes; generation and extra production depend on queues and tests.
Two images define the endpoints, but the generator still has to invent the path. The greater the difference, the harder it is to preserve a simple action.
In 1 minute
Inputs: two similar photos of your own
Prompt: a compatible transition
Review: endpoints and the full path
1The two frames need to show the same situation
The first and last frames guide the endpoints of a clip.
Take two photos of your own with the camera still.
In the example, the backpack is closed in one photo and slightly open in the other.
Keep the lighting, position, and background the same.
The difference should match a possible action without transforming the whole object.
Very different images may create a cut or an unexpected transformation.
That may work as a creative effect, but it does not show physical continuity.
First, state whether you want continuous action or a scene change.
Luiza props up her phone before taking both photos to reduce framing changes.
Weak decision
Starting image: backpack in a store; ending image: a different backpack on a mountain.
Verifiable decision
Same object and camera, with a small change in how open the backpack is.
Notice which characteristics make the second decision easy to check.
2Adding an end frame does not replace the prompt
In Kling, look for Start and End Frames or Add End Frame.
Add the two images in the correct order.
Describe the transition and check the available controls.
Generate one result within your limit, save it, and watch it all the way through.
Compare the endpoints and the path between them.
Did the object keep its shape?
Was there an unexpected cut?
Did the action finish?
Record your answer along with the file you used.
If the feature does not appear in your selected model, leave this test pending and check your account documentation.
Davi compares the zipper at the beginning and end, then watches the full path.
Completed brief · lesson example
1Inputs: two similar photos of your own
2Prompt: a compatible transition
3Review: endpoints and the full path
Use this sheet as a reference. Replace the example with your own project.
3Check the decision against its use
This practice requires a two-frame feature and a real video. If you do not have access, mark it as pending.
Davi uses the sheet to check: review the endpoints and the full path.
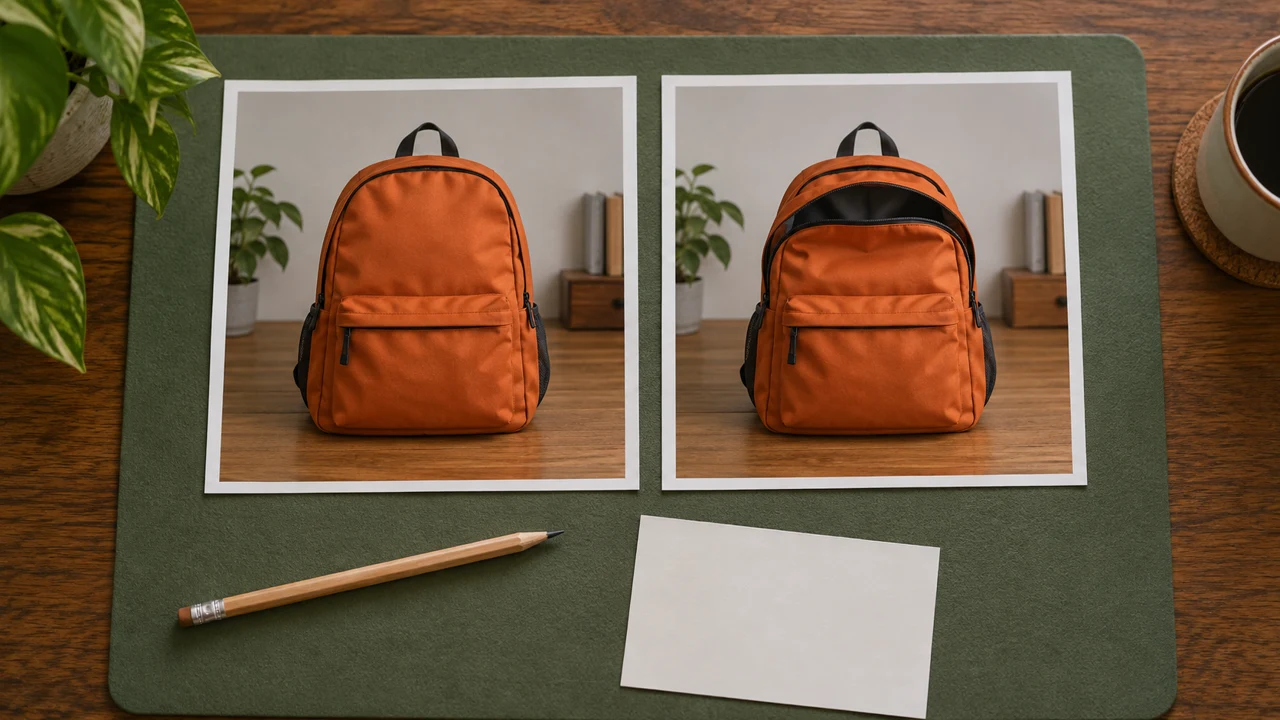
Teaching illustration created in Codex: The photos show similar states with a small difference in how open the backpack is. They illustrate the choice of endpoints without proving a transition.
Test yourself
The endpoints look right, but there is an unexpected cut between them. Does this prove continuous action?
If you got stuck here, that is normalStart with a small change in position or how open the backpack is. A full transformation can wait for a later study.
Practice now 0/3
Test two similar frames as start and end
About 10 minutes of active work. Generation queues are not included. You are done when one clip is saved and reviewed for its endpoints and the motion between them.
Use files you own or have permission to use. Generation may require an account and credits. Leave uncompleted activities pending and keep the originals.
Starting image: <file>
Ending image: <file>
Prompt: smooth transition between states, still camera, preserve object and background.
Model/cost: <actual>
Video: <file>
Endpoints/path: <observations>
Decision: use / redo
Transition example: a hand slightly opens the backpack zipper; still camera, preserve color and straps. Adapt it to the action visible in your images.
After completing the steps, you can generate and review a transition between two photos of your own.
Lesson cheat sheet
Test two similar frames as start and end
Inputs: two similar photos of your own
Prompt: a compatible transition
Review: endpoints and the full path
Your next step
You now have criteria for generating and reviewing a transition between two photos of your own.
Save this lesson’s work in the project folder. You will use it in the next step.
Next step: Say what to keep and what to avoid
Production follow-up and documentation · Module 2Production notes and safeguards for continuing after the short practice.
The two frames need to show the same situation
Experiment at your own pace
Photograph two nearby states of an object, keeping your phone propped in the same place.
What to observe
Do not use the illustrated comparison as proof that a tool made the transition.
Adding an end frame does not replace the prompt
Experiment at your own pace
If the first transition invents a transformation, try again with a smaller difference between the images.
What to observe
Availability depends on the mode. Do not silently replace two frames with just one.
Check features, languages, and costs in your current account. Older guides may show different settings.
Lesson 6 · Kling AI v6.2 · INEMA.CLUB PRO
Module 3 · Lesson 7 of 15
Say what to keep and what to avoid
You can rewrite a prompt with compatible priorities and constraints.
Reading: about 15 minutes. The practice takes 10 active minutes; generation and extra production depend on queues and tests.
A long list of prohibitions may compete with the main action. Keep the priority visible.
In 1 minute
Action: one desired change
Fixed: observable features
Limit: a few nonconflicting constraints
1Put the main prompt first
Start with the desired action, then say what should stay the same.
For the backpack: camera moves in slowly; keep its color, shape, and straps.
Add one relevant constraint, such as keeping the background unchanged.
This is a writing technique that makes review easier, not a special Kling command.
Sometimes it is called a constraint sandwich: preserve, change, preserve.
The name does not give the prompt extra power.
What matters is avoiding incompatible requests, such as a completely still camera and a full orbit in the same shot.
Luiza removes adjectives and leaves the push-in as the only change.
Weak decision
Still camera and full orbit; change the setting without changing the background.
Verifiable decision
Slow push-in, keep the backpack and background; avoid color changes.
Notice which characteristics make the second decision easy to check.
2Negative prompts are not available in every mode
When available in the selected mode, a negative prompt describes what to avoid.
It can support the main intent, but it cannot guarantee that flaws will be absent.
Check the field in your account.
If there is no such field, keep the regular prompt clear and review the result.
Start with a few constraints tied to the problem you observed.
Avoiding extra straps makes sense after you have noticed that flaw.
Forbidding everything you can imagine may conflict with the setting or action.
The generated file is still the test.
Davi chooses to preserve the straps and color because those are the product details he recognizes.
Completed brief · lesson example
1Action: one desired change
2Fixed: observable features
3Limit: a few nonconflicting constraints
Use this sheet as a reference. Replace the example with your own project.
3Check the decision against its use
A constraint guides generation; only inspection shows whether it was followed.
Davi uses the sheet to check: limit: a few nonconflicting constraints.
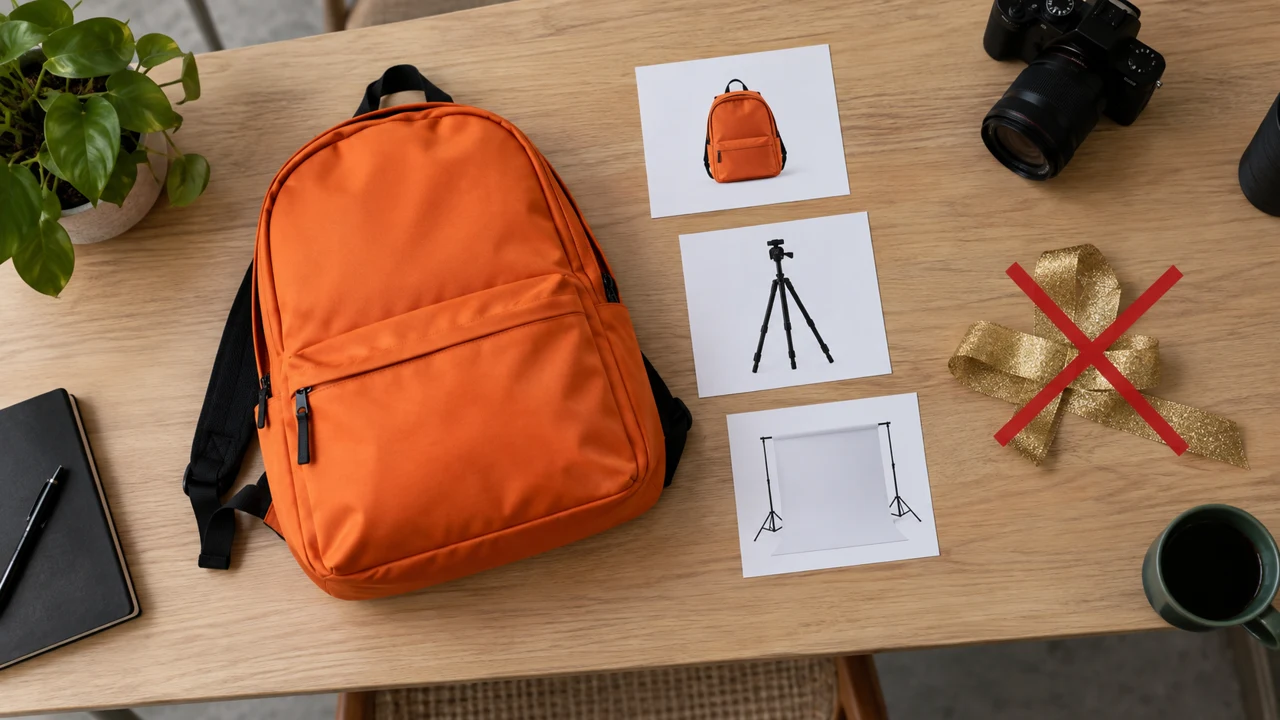
Teaching illustration created in Codex: The cards separate the object, camera, and background. The discarded tape represents an effect that is unnecessary for this test.
Test yourself
Which pair of instructions contains a direct contradiction?
If you got stuck here, that is normalRead each sentence and ask whether it prevents another one. Remove the clearest contradiction first.
Practice now 0/3
Say what to keep and what to avoid
About 10 minutes of active work. Generation queues are not included. You are done when a prompt has been rewritten without contradictions and with a clear priority.
Use files you own or have permission to use. Generation may require an account and credits. Leave uncompleted activities pending and keep the originals.
Action: slow push-in.
Keep: orange backpack, black straps, reference background.
Avoid: color change.
Field available: regular / negative
Conflict removed: <which one>
Test: still pending
After completing the steps, you can rewrite a prompt with compatible priorities and constraints.
Lesson cheat sheet
Say what to keep and what to avoid
Action: one desired change
Fixed: observable features
Limit: a few nonconflicting constraints
Your next step
You now have criteria for rewriting a prompt with compatible priorities and constraints.
Save this lesson’s work in the project folder. You will use it in the next step.
Next step: Tell reversal, speed-up, and interpolation apart
Supplementary material · module 3Production notes and care tips for returning after the short practice.
Put the main prompt first
Experiment at your own pace
Rewrite an old prompt in three lines: action, fixed features, and limit.
What to observe
Do not repeat ten quality synonyms in place of one visible decision.
Negative prompts are not available in every mode
Experiment at your own pace
Compare a concise prompt with one full of constraints, keeping the other controls the same and staying within your limit.
What to observe
A field documented for integration between programs may not exist on the page you use. Check your interface.
Check features, languages, and costs in your current account. Older guides may show different settings.
Lesson 7 · Kling AI v6.2 · INEMA.CLUB PRO
Module 3 · Lesson 8 of 15
Tell reversal, speed-up, and interpolation apart
You can reverse a copy and decide whether the effect makes sense.
Reading: about 15 minutes. The practice takes 10 active minutes; generation and extra production depend on queues and tests.
Changing timing can create an interesting effect, but it does not automatically fix an impossible action. First decide what change you want.
In 1 minute
Reversal: frames play in reverse order
Speed-up: same order, less time
Interpolation: estimated frames in between
1Reversal changes order; speed-up changes timing
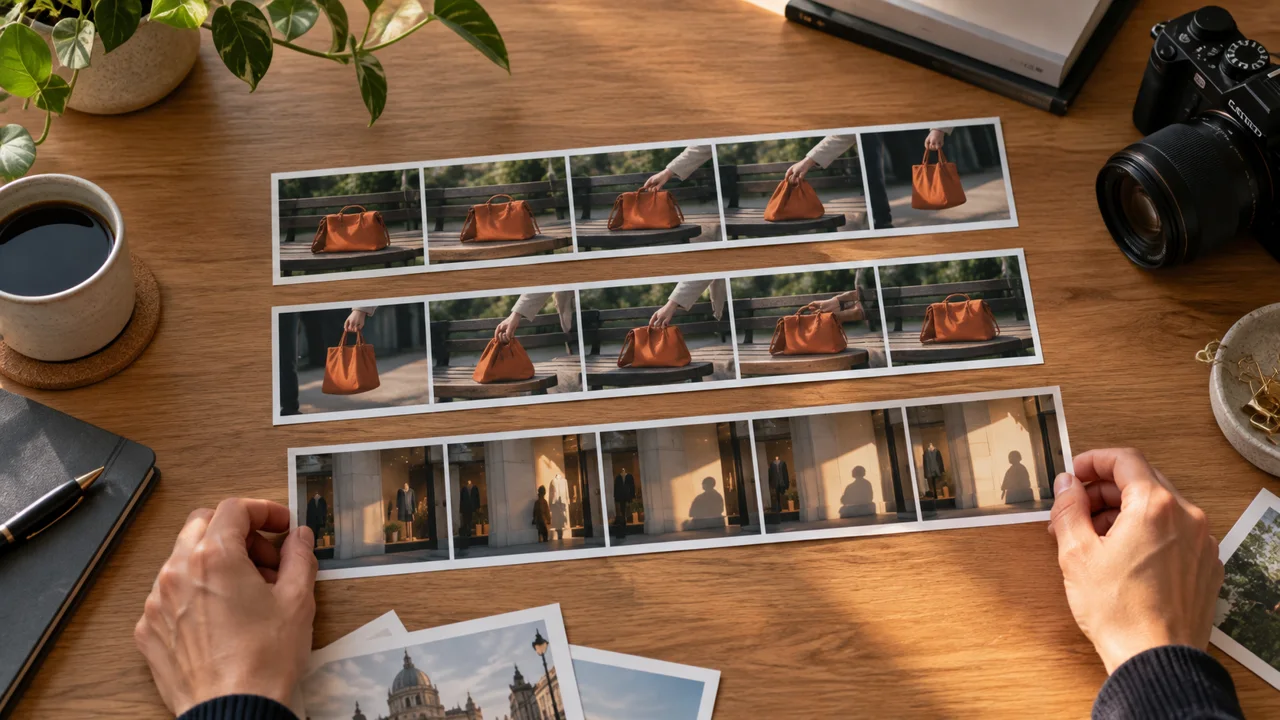
Reversal, or Reverse, plays the frames in the opposite order.
A lifted bag may look as if it is being set down.
Speed-up shortens the playback time.
Time-lapse compresses a long change, such as shadows moving through the day.
These are different operations.
Reversing a gesture involving gravity or speech can look strange.
Watch the fabric, hair, and contact with the hand.
In CapCut, select a copy of the clip and look for Reverse.
Wait for processing to finish before evaluating it.
Luiza compares the fabric in the reversed version before accepting the effect.
Prompts to compare · teaching example
PromptReverse a spoken video and expect it to fix lip sync.
There are no observable limits to check the work against.
PromptTest reversal on a short action without speech and compare how plausible it looks.
You have clear criteria for checking the decision.
Compare the two instructions. They are examples written for this lesson, with no simulated tool response.
2Interpolation creates estimated frames in between
Interpolation estimates images between existing frames to make motion look smoother.
It is not the same as generating a scene between two photos.
It also cannot reliably recover motion that was missing.
Edges, hands, and fabric may become distorted in the estimate.
Use a short test to decide whether the smoother motion is worth the new flaws.
If your mode does not offer interpolation, do not assume there is a hidden button.
In this project, reversal and speed adjustments happen in editing; check which feature is available.
Davi notices that a reversible action may work, while reversed speech loses meaning.
Completed brief · lesson example
1Reversal: frames play in reverse order
2Speed-up: same order, less time
3Interpolation: estimated frames in between
Use this sheet as a reference. Replace the example with your own project.
3Check the decision against its use
Reversal changes the order; it does not guarantee a new, physically correct action.
Davi uses the sheet to check: interpolation means estimated frames in between.
Teaching illustration created in Codex: The strips use a handbag as an example of reversed timing. They do not represent the Rota backpack or results from a real generation.
Test yourself
Which operation estimates images that were not in the original frames?
If you got stuck here, that is normalCapCut is a video editor. Labels vary between phone and computer; use the official guide below to find Reverse. If the feature is missing, leave the test pending.
Practice now 0/3
Tell reversal, speed-up, and interpolation apart
About 10 minutes of active work. Generation queues are not included. You are done when a copy has been reversed and compared with the original, and you have recorded a decision.
Use files you own or have permission to use. Generation may require an account and credits. Leave uncompleted activities pending and keep the originals.
Original file: <name>
Reversed copy: <name>
Normal action: <describe>
Reversed action: <describe>
Strange or natural detail: <observation>
Decision: use / discard because <reason>
After completing the steps, you can reverse a copy and decide whether the effect makes sense.
Lesson cheat sheet
Tell reversal, speed-up, and interpolation apart
Reversal: frames play in reverse order
Speed-up: same order, less time
Interpolation: estimated frames in between
Your next step
You now have criteria for reversing a copy and deciding whether the effect makes sense.
Save this lesson’s work in the project folder. You will use it in the next step.
Next step: Choose a speech path and check the lip sync
Supplementary material · module 3Production notes and care tips for returning after the short practice.
Reversal changes order; speed-up changes timing
Experiment at your own pace
Compare normal and reversed versions of a simple action with the sound muted.
What to observe
Do not reverse speech and expect it to remain understandable.
Interpolation creates estimated frames in between
Experiment at your own pace
If your editor has motion smoothing, compare one copy with the effect and one without it.
What to observe
Do not present interpolation as a universally available Kling feature today; here we teach the concept and how to evaluate it.
You can prepare a short speech test with clear lip-sync criteria.
Reading: about 15 minutes. The practice takes 10 active minutes; generation and extra production depend on queues and tests.
Audio generated with a video and lip sync added later are different paths. Knowing which one you use keeps you from promising a language or voice before checking.
In 1 minute
Path: native audio or lip sync added later
Materials: visible face and authorized voice
Review: words, language, and mouth movement match
1Native speech and lip sync added later
Native audio is generated with the video in a compatible mode.
Lip Sync adjusts mouth movements to match provided or generated speech.
The legacy Kling guide describes this feature using video with a full face and an audio file.
Check whether it appears in your account.
Languages and voices vary by model.
The VIDEO 3.0 guide consulted lists five languages and does not list Portuguese.
For Portuguese, do not assume native support: check the current documentation and test a short, authorized line using an available path.
Luiza records a short line to isolate the lip-sync test.
Weak decision
Assume every mode speaks Portuguese because the prompt is in Portuguese.
Verifiable decision
Check the language and feature, test one line, and listen to the full result.
Notice which characteristics make the second decision easy to check.
2Review speech by listening and looking
Prepare a simple line with natural pauses.
Use your own voice or a voice you are authorized to use.
The face should be visible, with nothing covering the mouth.
After generation, check whether the words, language, timing, and mouth movements match.
Watch the beginning and end of each line, the teeth, and changes in expression.
It is not enough for someone to look as if they are speaking.
The audio may say something else or cut off the last word.
Listen without looking, then watch the mouth.
Record the specific problem before requesting another try.
Review is part of the test.
Davi checks the words and language as well as the speaker’s appearance.
Completed brief · lesson example
1Path: native audio or lip sync added later
2Materials: visible face and authorized voice
3Review: words, language, and mouth movement match
Use this sheet as a reference. Replace the example with your own project.
3Check the decision against its use
Preparation does not prove synchronization. To evaluate it, run the test and review the audio and video together.
Davi uses the sheet to check: review the words, language, and mouth movement.
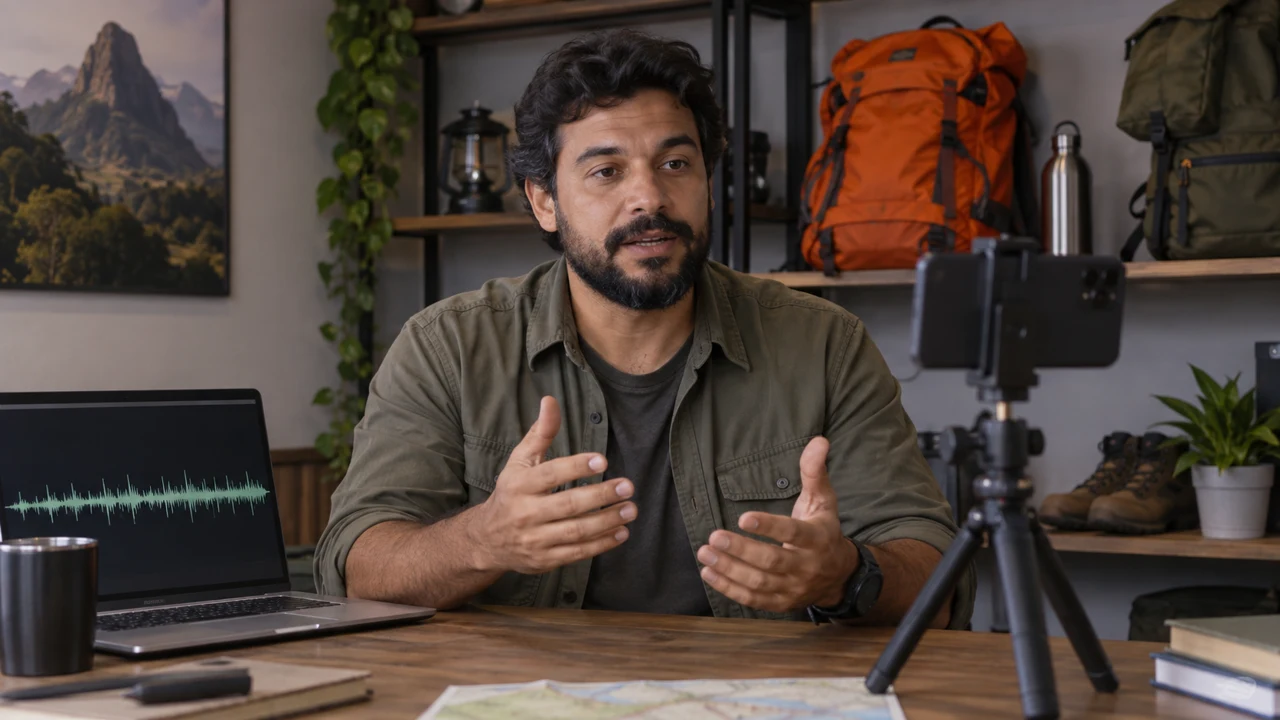
Teaching illustration created in Codex: The face is visible, and the screen suggests a voice recording. A still image does not demonstrate lip sync.
Test yourself
The audio is clear, but the mouth keeps moving after the speech ends. What should you record?
If you got stuck here, that is normalIf the feature is unavailable, save the audio and the brief. Off-screen narration is another choice, but it is not the same as lip sync.
Practice now 0/3
Choose a speech path and check the lip sync
About 10 minutes of active work. Generation queues are not included. You are done when an authorized line has been recorded and the test path is documented.
Use files you own or have permission to use. Generation may require an account and credits. Leave uncompleted activities pending and keep the originals.
Line: This is a demonstration of the Rota backpack.
Voice: mine / authorized by <record>
Recorded duration: <seconds>
Feature and language: <check in account>
Review: line, language, mouth, and pauses
Status: test planned / file reviewed <name>
After completing the steps, you can prepare a short speech test with clear lip-sync criteria.
Lesson cheat sheet
Choose a speech path and check the lip sync
Path: native audio or lip sync added later
Materials: visible face and authorized voice
Review: words, language, and mouth movement match
Your next step
You now have criteria for preparing a short speech test with clear lip-sync criteria.
Save this lesson’s work in the project folder. You will use it in the next step.
Next step: Build an element with consistent references
Production and documentation continuation · module 3Production notes and care tips for returning after the short practice.
Native speech and lip sync added later
Experiment at your own pace
Compare the native speech and uploaded-audio options available in your account.
What to observe
Do not promise perfect lip sync or language support you have not confirmed.
Review speech by listening and looking
Experiment at your own pace
Continuation: run a short test with the available feature, save it, and compare the speech with the mouth. Leave it pending if you do not have access.
What to observe
Do not use someone’s face or voice to create a testimonial without permission.
Check features, languages, and costs in your current account. Older guides may show different settings.
Lesson 9 · Kling AI v6.2 · INEMA.CLUB PRO
Module 4 · Lesson 10 of 15
Build an element with consistent references
You can create and check an object element in the library.
Reading: about 15 minutes. The practice takes 10 active minutes; generation and extra production depend on queues and tests.
Repeating a product’s name does not show its sides. A reference library can collect details that one photo is missing.
In 1 minute
References: the same object from different angles
Library: element saved and reopened
Use: select the linked element in the interface
1An element brings together views of the same subject
Elements is Kling’s element library.
An element can represent an object, character, or setting.
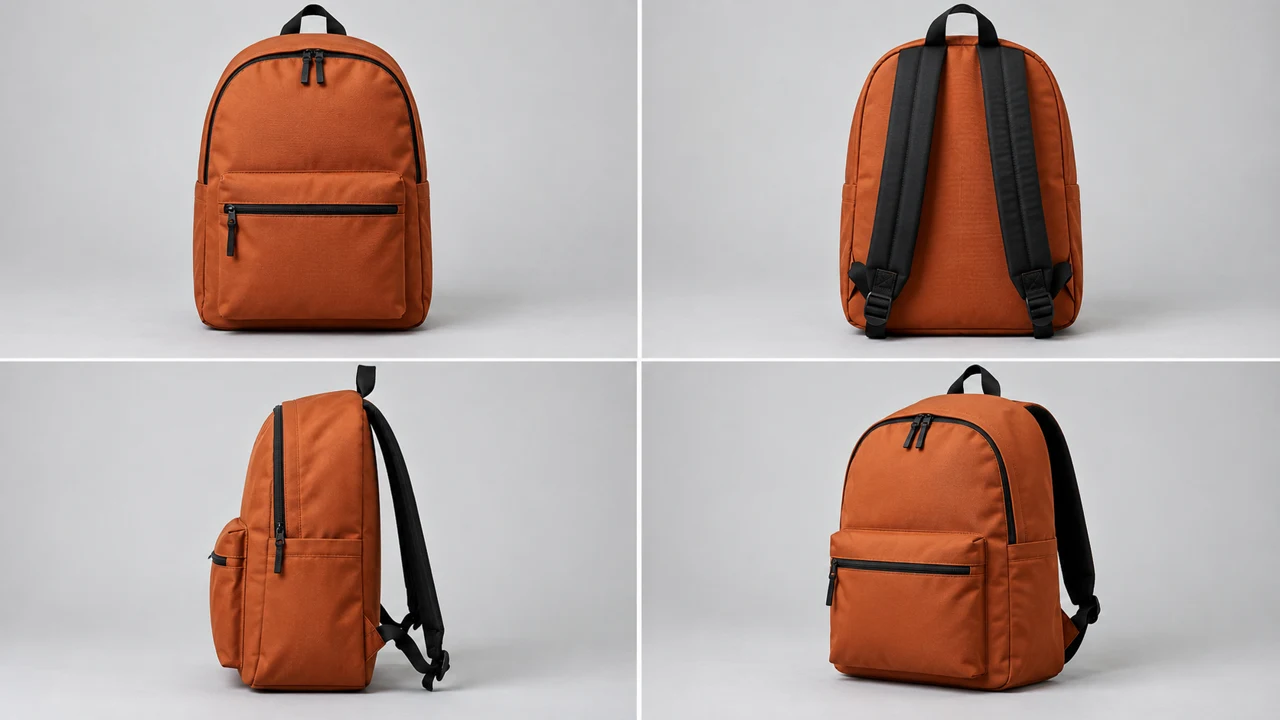
For an object, prepare photos of the same item from different angles.
The guide consulted describes elements using two to four images.
Check the limits shown in your account.
The photos should agree on shape, color, and details.
Mixing two similar backpacks may teach incompatible features.
Do not fill in a real side using an invented image without reviewing it.
Consistent references help, but they do not guarantee preservation in the video.
Luiza reviews the suggested images before accepting an automatically generated side view.
Weak decision
Create an element by mixing photos of backpacks with different pockets.
Verifiable decision
Use front and side views of the same object, check the description, and save it.
Notice which characteristics make the second decision easy to check.
2Saving the element still requires checking its details
Look for Elements or Assets and the option to create an element.
Upload a main image and a supporting image.
Give it a working name and review the suggested description.
Save and reopen the details to confirm which images were used.
In a compatible generation mode, select the element in the interface.
Typing its name without linking it may be treated as plain text.
Run a short test afterward and check whether the reference influenced the result.
Save the name and settings so you can repeat the process.
Davi removes a photo of a different backpack model to avoid mixing up the pockets.
Completed brief · lesson example
1References: the same object from different angles
2Library: element saved and reopened
3Use: select the linked element in the interface
Use this sheet as a reference. Replace the example with your own project.
3Check the decision against its use
Typing a name does not replace selecting the element in the interface.
Davi uses the sheet to check: use: select the linked element in the interface.
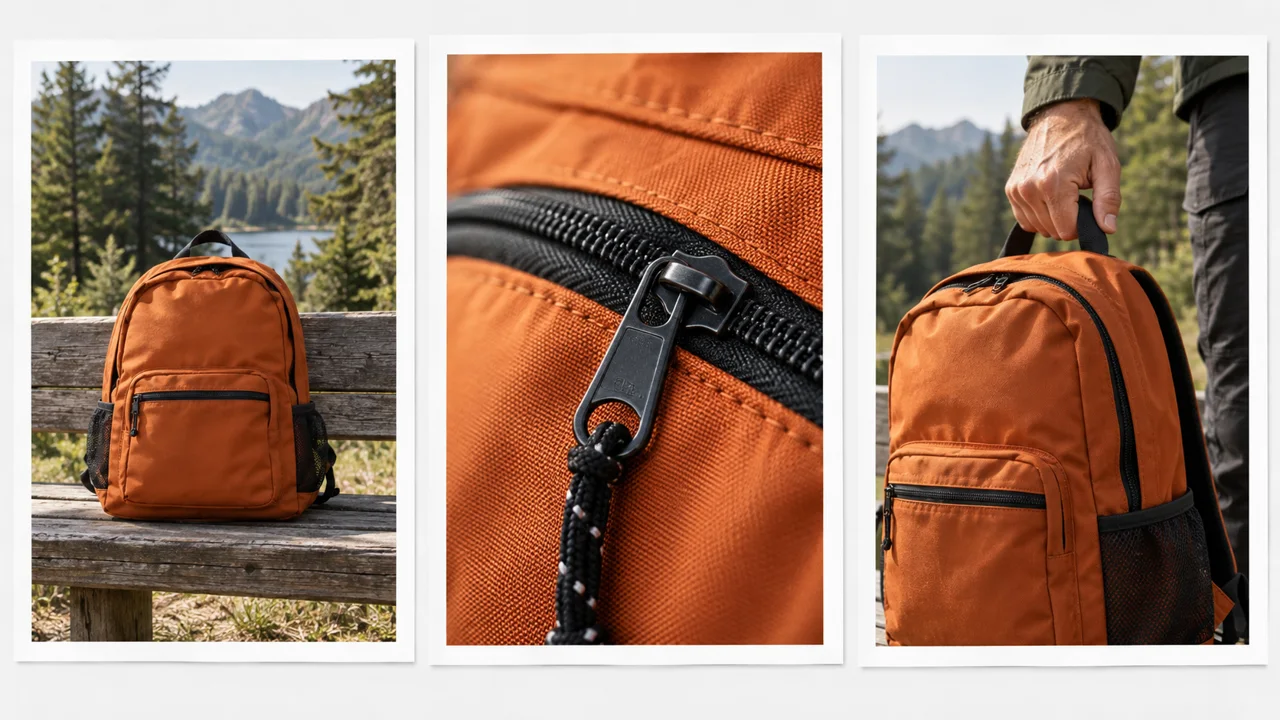
Teaching illustration created in Codex: The four angles illustrate what references are for. For a real product, use your own photos of the same item.
Test yourself
The two photos show different pockets because they are different products. What should you do?
If you got stuck here, that is normalIf creating an element requires an unavailable feature, save the photos and leave the practice pending. Do not record a link that does not exist.
Practice now 0/3
Build an element with consistent references
About 10 minutes of active work. Generation queues are not included. You are done when an element is saved and reopened with consistent references and a checked description.
Use files you own or have permission to use. Generation may require an account and credits. Leave uncompleted activities pending and keep the originals.
Element: Rota-object
Main image: <file>
Supporting image: <file>
Checked description: <shape and details>
Details reopened: <yes or pending>
Later test: still camera with linked reference
After completing the steps, you can create and check an object element in the library.
Lesson cheat sheet
Build an element with consistent references
References: the same object from different angles
Library: element saved and reopened
Use: select the linked element in the interface
Your next step
You now have criteria for creating and checking an object element in the library.
Save this lesson’s work in the project folder. You will use it in the next step.
Next step: Assign a role to each reference in Omni
Production and documentation continuation · module 4Production notes and care tips for returning after the short practice.
An element brings together views of the same subject
Experiment at your own pace
Compare front and side views of the same object before uploading them.
What to observe
More images cannot fix contradictory references.
Saving the element still requires checking its details
Experiment at your own pace
Continuation: link the element to a simple test and compare it with a try without the link, if that fits your limit.
What to observe
If your account does not offer the library, record that limitation. A photo folder is not the same as an element saved in the tool.
Check features, languages, and costs in your current account. Older guides may show different settings.
Lesson 10 · Kling AI v6.2 · INEMA.CLUB PRO
Module 4 · Lesson 11 of 15
Assign a role to each reference in Omni
You can plan an edit with linked references and a clear limit.
Reading: about 15 minutes. The practice takes 10 active minutes; generation and extra production depend on queues and tests.
Several images without assigned roles may compete in the result. Say which one provides the product, the setting, and the motion to reduce ambiguity.
In 1 minute
Product: backpack reference
Setting: reference for the new location
Preserve: object, gesture, and framing
1Each reference needs a role in the prompt
Omni accepts combinations of references in compatible modes.
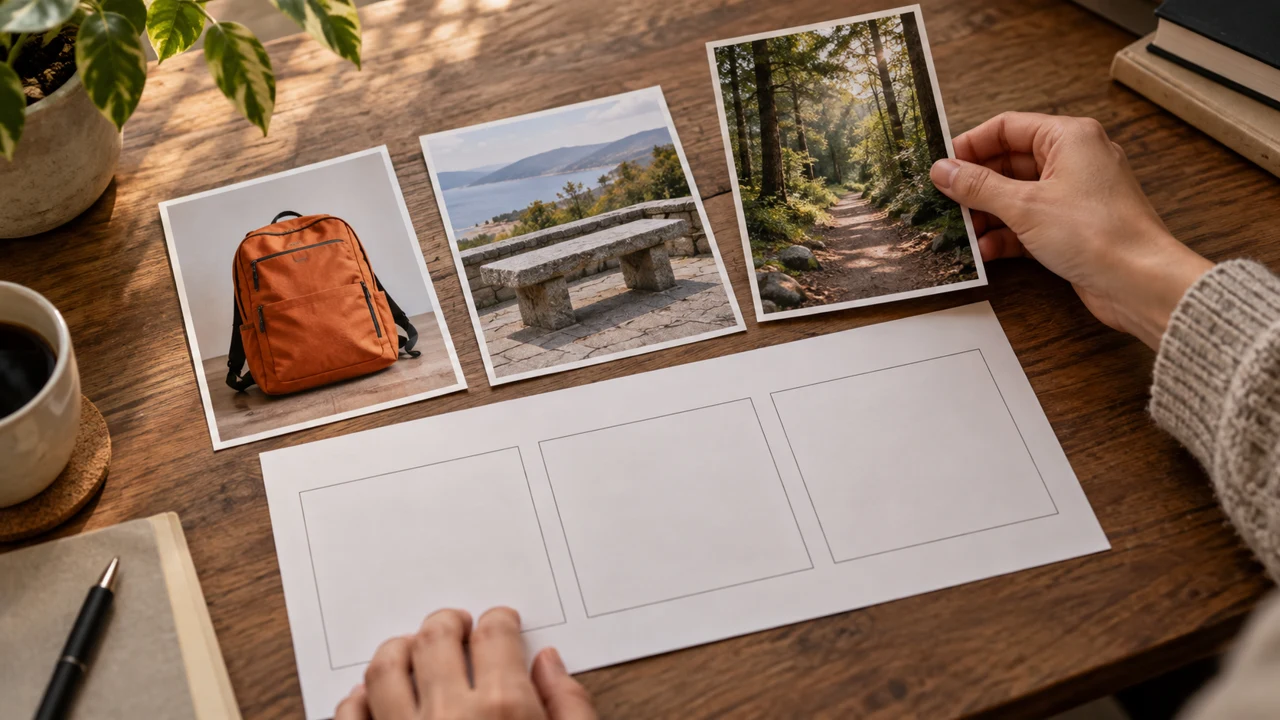
One image can show the product; another can show the setting.
A video can provide context or motion.
Select each file in the interface and use the references it provides, often identified with an at sign.
Do not invent an identifier that was never created.
For the Rota project, we want to keep the backpack and change only the setting.
Write down which reference defines each part.
Adding unnecessary files makes it harder to tell what guided the result.
Start with a few materials and explicit roles.
Luiza assigns a role to each file before writing the edit request.
Prompts to compare · teaching example
PromptAttach three photos and ask to “improve everything,” without saying what each one is for.
There are no observable limits to check the work against.
PromptLink the product and setting; ask only to change the background.
You have clear criteria for checking the decision.
Compare the two instructions. They are examples written for this lesson, with no simulated tool response.
2Editing a video means requesting a defined change
Omni documentation points to the O1 editing process.
There, a source video guides a modification.
Say what changes and what stays the same.
For example: replace the background with a park bench, preserving the backpack, gesture, and framing.
The edit may still change details you wanted to keep.
To evaluate it, compare the original and result over time.
Check the same area in both files.
If the gesture changed, the edit did not follow the constraint, even if the background looks good.
Davi checks the pocket and straps in the result as well as the new setting.
Completed brief · lesson example
1Product: backpack reference
2Setting: reference for the new location
3Preserve: object, gesture, and framing
Use this sheet as a reference. Replace the example with your own project.
3Check the decision against its use
Compare the original and result in motion. A correct background does not prove that everything else was preserved.
Davi uses the sheet to check: preserve the object, gesture, and framing.
Teaching illustration created in Codex: The photos separate the product from possible settings. They are planning materials; the image does not demonstrate a video edit.
Test yourself
The background is right, but the edit changed the backpack. Which criterion failed?
If you got stuck here, that is normalNo video of your own? Return to the clip from lesson 6 or use another clip you are allowed to use. When representing a real object, keep its original reference.
Practice now 0/3
Assign a role to each reference in Omni
About 10 minutes of active work. Generation queues are not included. You are done when an edit prompt identifies each reference, the change, and the limits.
Use files you own or have permission to use. Generation may require an account and credits. Leave uncompleted activities pending and keep the originals.
Source video: <file and interface reference>
Setting: <file and interface reference>
Prompt: change only the background to the linked setting; preserve the backpack, gesture, and video framing.
Estimated cost: <actual>
Status: planned / test pending
After completing the steps, you can plan an edit with linked references and a clear limit.
Lesson cheat sheet
Assign a role to each reference in Omni
Product: backpack reference
Setting: reference for the new location
Preserve: object, gesture, and framing
Your next step
You now have criteria for planning an edit with linked references and a clear limit.
Save this lesson’s work in the project folder. You will use it in the next step.
Next step: Prepare a compatible motion reference
Production and documentation continuation · module 4Production notes and care tips for returning after the short practice.
Each reference needs a role in the prompt
Experiment at your own pace
Make a map of each file, its role, and the detail to preserve.
What to observe
The reference limit depends on the mode and whether you use video; check before planning a batch.
Editing a video means requesting a defined change
Experiment at your own pace
Continuation: run a short edit, save the result, and compare the object, gesture, and background with the original.
What to observe
Never overwrite your only original file when testing an edit.
Check features, languages, and costs in your current account. Older guides may show different settings.
Lesson 11 · Kling AI v6.2 · INEMA.CLUB PRO
Module 4 · Lesson 12 of 15
Prepare a compatible motion reference
You can record and review a short gesture reference.
Reading: about 15 minutes. The practice takes 10 active minutes; generation and extra production depend on queues and tests.
Copying a gesture requires seeing the body that performs it. Cuts and hidden body parts can make transfer harder.
In 1 minute
Action: a short wave in one continuous shot
Image: compatible framing
Review: visible body and moderate motion
1The image guides appearance; video guides the gesture
Motion Control means controlling motion using a reference.
Use a character image and an action video in a compatible mode.
Prepare similar framing: full body with full body, or waist-up with waist-up.
Choose a clearly visible person and a moderate gesture.
For the first test, record a short wave in one continuous shot.
Leave room for the hand and avoid objects covering the face.
The reference does not need complicated acting.
A clear gesture matters more than spectacle.
Luiza records one continuous shot so the model does not have to interpret cuts.
Weak decision
Video with several cuts, two actors, and hands outside the frame.
Verifiable decision
One short gesture, one visible person, and framing that matches the image.
Notice which characteristics make the second decision easy to check.
2Check compatibility before you confirm
In Motion Control, check the image and motion-video fields.
Orientation indicates which reference guides the character’s direction; it is not the file’s aspect ratio.
Check the available options.
Some preserve the video’s orientation; others start from the image.
The current guide also describes facial linking under specific conditions.
Do not assume this link preserves clothing or accessories.
The test should check the gesture, face, and body edges.
If the hand disappears outside the frame, improve the reference before increasing the motion.
Record the file limits shown in your account because they depend on the mode.
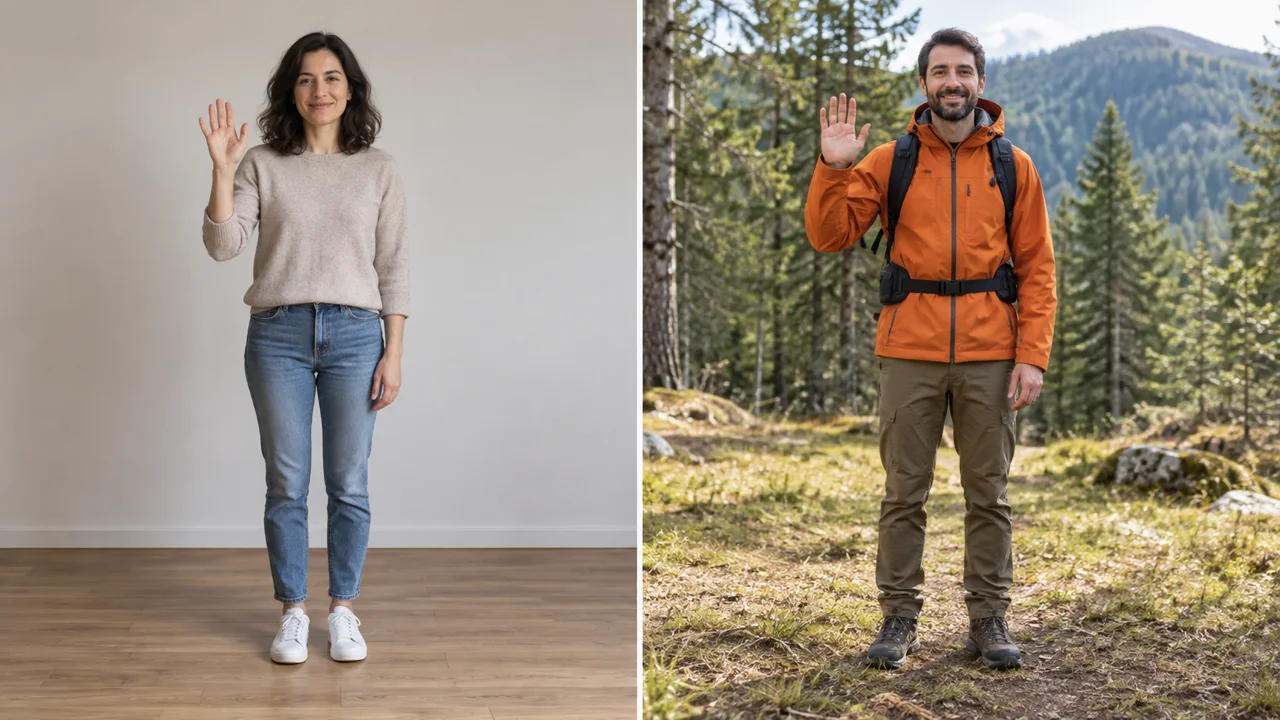
Davi checks whether the motion fits in the frame before approving a test.
Completed brief · lesson example
1Action: a short wave in one continuous shot
2Image: compatible framing
3Review: visible body and moderate motion
Use this sheet as a reference. Replace the example with your own project.
3Check the decision against its use
Facial linking does not guarantee identical clothing, accessories, or body; review each detail you need.
Davi uses the sheet to check: review for a visible body and moderate motion.
Teaching illustration created in Codex: The two characters illustrate a similar pose with different appearances. They are not the result of an actual motion transfer.
Test yourself
The video shows a full body, but the photo crops the arms and legs. What should you adjust?
If you got stuck here, that is normalWaist-up framing works if the head and hands stay visible during the gesture. For a full-body test, include the legs too. Use the same framing choice in the photo and video.
Practice now 0/3
Prepare a compatible motion reference
About 10 minutes of active work. Generation queues are not included. You are done when a gesture recording and a compatible image have been checked.
Use files you own or have permission to use. Generation may require an account and credits. Leave uncompleted activities pending and keep the originals.
Action video: <file of your own>
Character image: <authorized file>
Framing: full body / waist-up
Head and hands visible: <check>
Available orientation: <copy from account>
Status: reference ready / retake
After completing the steps, you can record and review a short gesture reference.
Lesson cheat sheet
Prepare a compatible motion reference
Action: a short wave in one continuous shot
Image: compatible framing
Review: visible body and moderate motion
Your next step
You now have criteria for recording and reviewing a short gesture reference.
Save this lesson’s work in the project folder. You will use it in the next step.
Next step: Plan and test a Multi-Shot sequence
Production and documentation continuation · module 4Production notes and care tips for returning after the short practice.
The image guides appearance; video guides the gesture
Experiment at your own pace
Record a simple gesture without moving the camera and check that the body stays visible.
What to observe
Use your own recording or get the person’s permission; do not copy someone else’s performance without permission.
Check compatibility before you confirm
Experiment at your own pace
Continuation: test with an authorized image and your recording; save it and compare the full gesture.
What to observe
A still image of the character does not prove motion transfer.
Check features, languages, and costs in your current account. Older guides may show different settings.
Lesson 12 · Kling AI v6.2 · INEMA.CLUB PRO
Module 5 · Lesson 13 of 15
Plan and test a Multi-Shot sequence
You can test a short sequence with three defined shots.
Reading: about 15 minutes. The practice takes 10 active minutes; generation and extra production depend on queues and tests.
A sequence works when every shot adds something. Requesting several cuts without defining each scene’s purpose leaves the story to chance.
In 1 minute
Shot 1: full backpack on a bench
Shot 2: close-up of the visible zipper
Shot 3: full object to finish
1A shot is one continuous segment of a scene
Multi-Shot means several shots in one generation.
The VIDEO 3.0 guide describes an automatic option and a custom one.
In a compatible mode, turn on Multi-Shot and look for shot customization.
The current interface determines how many shots fit and what duration is allowed.
For Rota, plan three functions: introduce the backpack, show the zipper, and finish with the whole object.
Each shot needs one simple action.
Add up the durations and check the total before confirming.
Do not overload a short shot with several actions.
Luiza assigns a purpose to each shot before opening the settings.
Weak decision
Three beautiful shots with no purpose, duration, or fixed detail.
Verifiable decision
Introduction, detail, and ending with the same backpack and checked timing.
Notice which characteristics make the second decision easy to check.
2The sequence needs to hold together across cuts
Preserve the shape, straps, lighting, and setting across shots.
Moving the camera closer may change what appears, but it should not invent another pocket.
After generation, watch without pausing to notice the rhythm.
Then pause at each cut to compare details.
For the first test, keep the object still and limit the action to the zipper, if the reference allows it.
A static sequence with continuity can teach more than three difficult movements.
Record what the tool did and what changed without being asked.
Davi compares the pockets after the cut to avoid showing a different product.
Completed brief · lesson example
1Shot 1: full backpack on a bench
2Shot 2: close-up of the visible zipper
3Shot 3: full object to finish
Use this sheet as a reference. Replace the example with your own project.
3Check the decision against its use
Check every cut and the framing. The third illustrated card crops the backpack and adds a hand; it needs correction to match the shot plan.
Davi uses the sheet to check: shot 3: full object to finish.
Teaching illustration created in Codex: The cards are illustrated proposals, not video frames. The third still fails the shot plan: it crops the backpack base and adds a hand. Reframe the whole object and remove the extra action before approving it.
Test yourself
The second shot shows a different pocket. What should you do before approving it?
If you got stuck here, that is normalQueues are not included in the ten active minutes. If Multi-Shot is unavailable in your account, save the cards and mark generation as pending.
Practice now 0/3
Plan and test a Multi-Shot sequence
About 10 minutes of active work. Queues are not included. Without access, record why and leave the practice pending. You are done when a generated sequence is saved and reviewed.
Use files you own or have permission to use. Generation may require an account and credits. Leave uncompleted activities pending and keep the originals.
Input: <reference of your own>
Shot 1: show the whole backpack; <seconds>
Shot 2: move closer to the visible zipper; <seconds>
Shot 3: show the whole backpack; <seconds>
Total: <sum accepted by your account>
Fixed: backpack, lighting, and setting
File and review: <fill in after generation>
After completing the steps, you can test a short sequence with three defined shots.
Lesson cheat sheet
Plan and test a Multi-Shot sequence
Shot 1: full backpack on a bench
Shot 2: close-up of the visible zipper
Shot 3: full object to finish
Your next step
You now have criteria for testing a short sequence with three defined shots.
Save this lesson’s work in the project folder. You will use it in the next step.
Next step: Build the transition to the next shot
Production and documentation continuation · module 5Production notes and care tips for returning after the short practice.
A shot is one continuous segment of a scene
Experiment at your own pace
Draw three cards and write one purpose on each.
What to observe
If the option is unavailable, record that limitation; arranging three files afterward does not prove a Multi-Shot generation.
The sequence needs to hold together across cuts
Experiment at your own pace
Continuation: fix one shot or simplify the action within your limit; keep the first result too.
What to observe
The order of prompts does not guarantee the order or fidelity of the result. Check the entire video.
Check features, languages, and costs in your current account. Older guides may show different settings.
Lesson 13 · Kling AI v6.2 · INEMA.CLUB PRO
Module 5 · Lesson 14 of 15
Build the transition to the next shot
You can prepare a continuation and criteria for consistency.
Reading: about 15 minutes. The practice takes 10 active minutes; generation and extra production depend on queues and tests.
A scene can work on its own and still clash with the next one. The transition should preserve what helps the audience follow the action.
In 1 minute
Starting point: your own file and its last usable moment
Consistency: position, lighting, and gesture
Method: first frame or linked video
1The last frame can set up the next shot
A frame is an image from one moment in a video.
Pause near the end and save a clean image, if your tool allows it.
It can be used as an image input for video in another generation.
Check it for distortion or blur before reusing it.
Compare the object’s position, the light direction, and the ongoing gesture.
In the example, the hand ends beside the zipper; the continuation should start from that situation.
A still image preserves appearance and position, but does not record the full speed of the motion.
Luiza writes down the gesture’s final state before planning the continuation.
Prompts to compare · teaching example
PromptAsk to “continue” without identifying the file or final state.
There are no observable limits to check the work against.
PromptLink the video or final frame and describe the next gesture, including fixed details.
You have clear criteria for checking the decision.
Compare the two instructions. They are examples written for this lesson, with no simulated tool response.
2A video reference offers another path
The O1 guide describes requests for a next shot or previous shot using a linked video.
Omni includes reference and editing steps from the same family.
Look for a compatible feature in your account and select the actual video before using the identifier shown.
Describe the continuation you want and the details that must stay the same.
For a previous shot, describe a situation that leads into the original beginning.
The tool can generate a proposal, but you must check the fit during editing.
Do not assume continuity is automatic.
Davi checks whether the backpack keeps its size and position in the transition.
Completed brief · lesson example
1Source: your own file and its last usable moment
2Continuity: position, light, and gesture
3Method: starting frame or linked video
Use this sheet as a reference. Replace the example with your own project.
3Check the decision against its use
Play the end of one clip followed by the start of the next. Separate images do not prove a good transition.
Davi uses the sheet to check: method: starting frame or linked video.
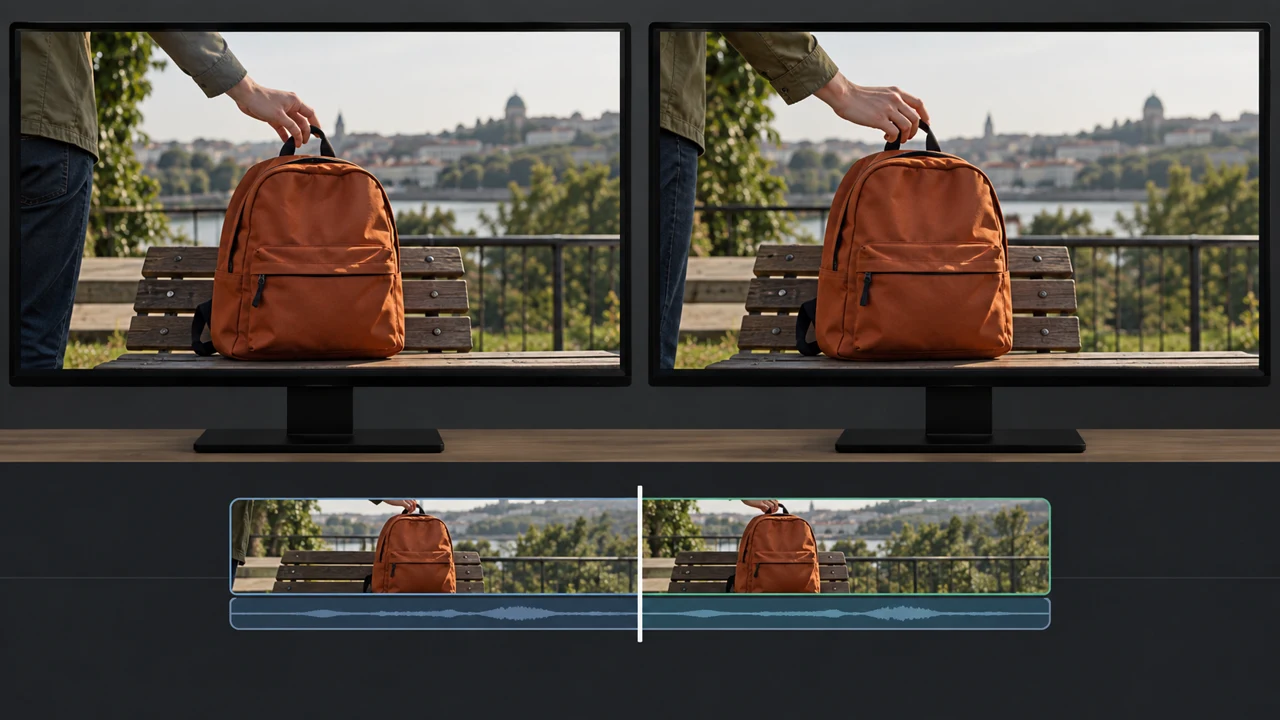
Didactic illustration created in Codex: The similar frames represent the planned transition. The timeline is a diagram, not a screenshot of a real editor.
Test yourself
You used an image from the end as input. How should you record the method?
It’s normal to get stuck hereIf you do not have a reviewed video of your own, return to the previous generation step. You can write the intent now, but the reference and test remain pending.
Practice now 0/3
Build the transition to the next shot
About 10 minutes of active work. Generation queues do not count. You’re done when a continuation plan identifies the reference, method, and three transition criteria.
Use files you own or have permission to use. Generation may require an account and credits. Leave uncompleted activities pending and keep the originals.
Source: <your own file>
Method: starting frame / linked video
Actual link: <file or identifier>
Next shot: the hand finishes closing the zipper and leaves the frame.
Previous shot: the hand moves toward the zipper.
Check: position, light direction, and gesture continuity
Status: planned / tested with files
After these steps, you can plan a continuation and its continuity criteria.
Lesson cheat sheet
Build the transition to the next shot
Source: your own file and its last usable moment
Continuity: position, light, and gesture
Method: starting frame or linked video
Your next step
You now have criteria for planning a continuation and checking continuity.
Save this lesson’s work in the project folder. You will use it in the next step.
Next: Organize the lab and deliver the sequence
Production and documentation continuation · module 5Production notes and care tips for returning after the short practice.
The last frame can set up the next entrance
Experiment at your own pace
Take a frame from your own video and note which conditions need to carry over.
What to observe
A blurry frame can carry the problem forward. Choose a usable moment or reshoot the shot.
A video reference offers another path
Experiment at your own pace
Follow-up: test the next or previous shot in a compatible mode, then watch both files in sequence.
What to observe
If you use only the last frame, record image-to-video; do not label it as a video reference.
Check features, languages, and costs in your current account. Older guides may show different settings.
Lesson 14 · Kling AI v6.2 · INEMA.CLUB PRO
Module 5 · Lesson 15 of 15
Organize the lab and deliver the sequence
You can audit the files and decide what is ready or pending.
Reading: about 15 minutes. The practice takes 10 active minutes; generation and extra production depend on queues and tests.
A set of prompts is not a portfolio of videos. The delivery should show what you generated, reviewed, and learned.
In 1 minute
Record: settings, cost, and file for each test
Delivery: reviewed short sequence
Limits: unavailable feature or pending test
1Every experiment should leave evidence
Make a table with operation, settings, file, review, and decision.
Include text-to-video, image-to-video, four cameras, start and end frames, Elements, and Multi-Shot.
Also record audio, editing, and movement if you were able to use those features.
Mark unavailable access separately from a failed result.
The final project uses a short product sequence with the table.
Short practices prepare decisions; production tests take extra time.
Set aside sessions to complete pending work within your limit.
Do not claim mastery of an operation you have not tested.
Luiza keeps rejected files to explain her correction decision.
Weak decision
A folder full of versions with no record of approval or cost.
Verifiable decision
A test table, a reviewed sequence, and clearly recorded pending work.
Notice which characteristics make the second decision easy to check.
2Approval combines image, movement, and use
Watch the whole sequence and check the product, action, cuts, and audio, if present.
Check whether the format and duration fit the planned use.
Keep the final file separate from the tests.
Add a short note with the settings and limitations you observed.
For Rota, approval requires recognizing the same backpack across shots.
For a real product, compare its appearance with your own photos.
If there is a meaningful flaw, simplify the shot or replace it with authorized real footage.
No effect can make it right to present a different product.
Davi approves the sequence only after comparing the product with the reference.
Completed brief · lesson example
1Record: settings, cost, and file for each test
2Delivery: reviewed short sequence
3Limits: unavailable feature or pending test
Use this sheet as a reference. Replace the example with your own project.
3Check the decision against its use
Mark the final project complete only when a reviewed video exists. Your audit can be ready while production is still pending.
Davi uses the sheet to check: limits: unavailable feature or pending test.
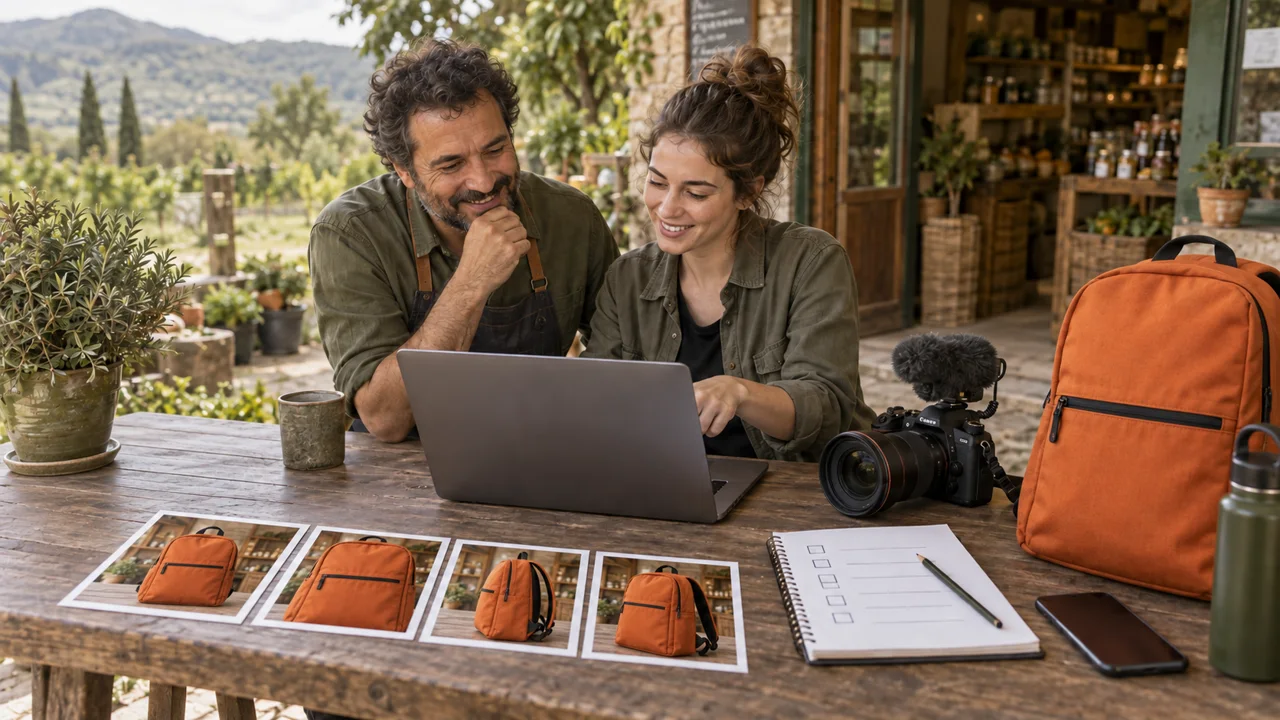
Didactic illustration created in Codex: The backpack and cards represent delivery organization. These are teaching illustrations, not results made in Kling.
Test yourself
The table is ready, but no video was generated. Which status is accurate?
It’s normal to get stuck hereDivide pending work into sessions. Start with what blocks the main sequence and stay within your spending limit.
Practice now 0/3
Organize the lab and deliver the sequence
About 10 minutes of active work. Generation queues do not count. You’re done when the table and note distinguish approved files, pending tests, and unavailable features.
Use files you own or have permission to use. Generation may require an account and credits. Leave uncompleted activities pending and keep the originals.
Operation | settings | cost | file | review | status
Text-to-video | ...
Image-to-video | ...
Four cameras | ...
Start and end | ...
Elements | ...
Multi-Shot | ...
Continuity | ...
Audio, editing, and movement | ...
Final sequence: <file or pending>
Note: goal, decisions, and limits
After these steps, you can audit the files and decide what is ready or pending.
Lesson cheat sheet
Organize the lab and deliver the sequence
Record: settings, cost, and file for each test
Delivery: reviewed short sequence
Limits: unavailable feature or pending test
Your next step
You now have criteria for auditing files and deciding what is ready or pending.
Save this lesson’s work in the project folder. You will use it in the next step.
Next: Apply the method to a new video with a different goal.
Production and documentation continuation · module 5Production notes and care tips for returning after the short practice.
Every experiment should leave evidence
Experiment at your own pace
Follow-up: complete pending tests for your delivery, save the files, and update the table.
What to observe
An inaccessible feature can stay out of the final project, but the limitation must appear in the presentation.
Approval combines image, movement, and use
Experiment at your own pace
Repeat one test with a single change and record what improved or remains uncertain.
What to observe
The course does not prove revenue, savings, or perfect fidelity. Your evidence is the reviewed files.