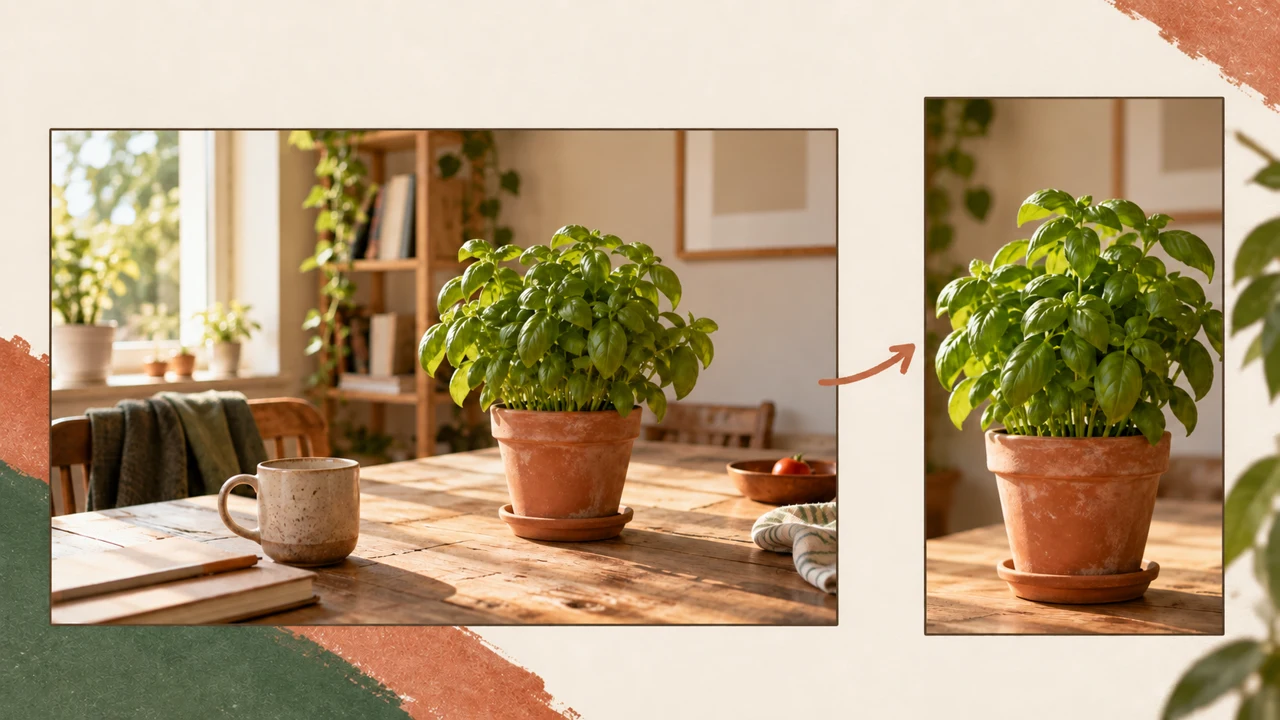
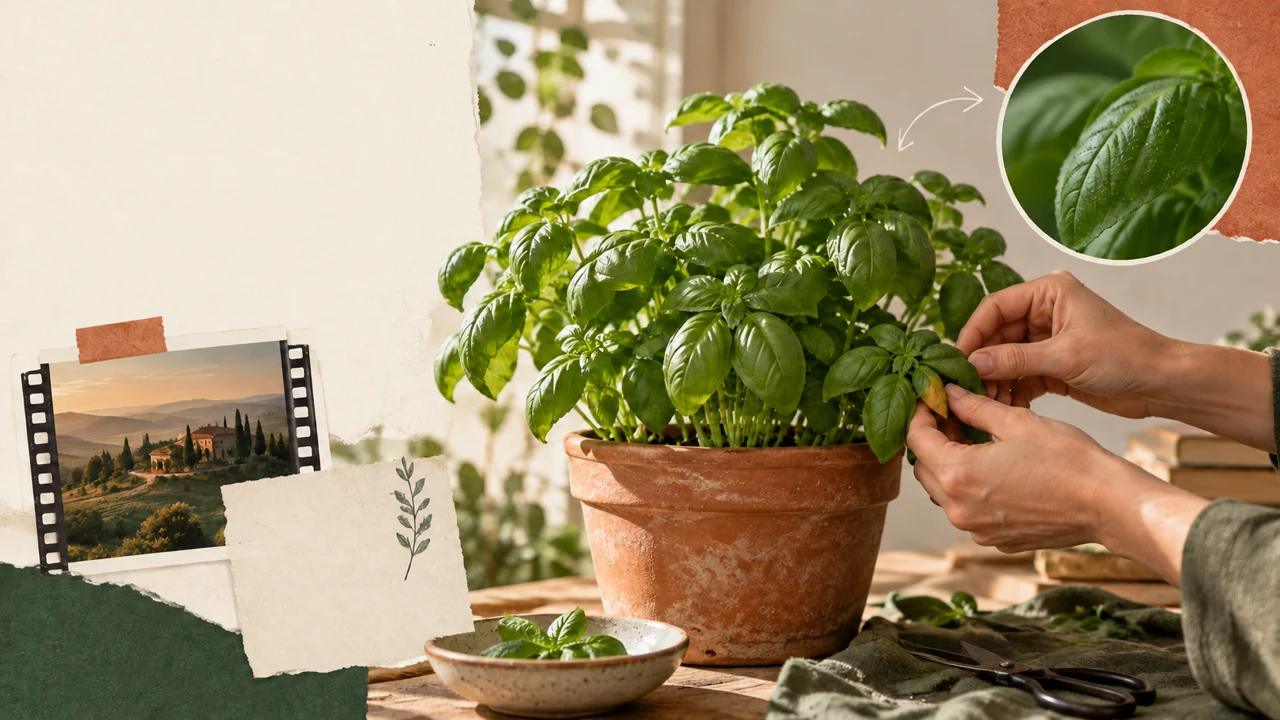
Four Codex images animated with a zoom. Each clip is five seconds, with no audio; they are not filmed actions or real plant growth.
2Open the editor with a short test
In CapCut desktop, choose New project or Create project.
Under Media, choose Import and select the four clips.
Name the project Verde Perto.
After returning to the home screen, look for the project name and reopen it to confirm it was saved.
This course uses the desktop app as its reference.
Mobile and browser versions may have different controls.
If a charge appears, identify the feature before continuing.
In lesson 3, we will make a short export to check your account’s terms.
Jorge writes down the folder location so he can find it without relying on memory.
Completed brief · lesson example
1Sources: four clips from the kit
2Project: Verde Perto
3Test: close the project screen and reopen it
Use this sheet as a reference. Replace the example with your own project.
3Check the decision against its use
Keep sources in a stable folder and confirm the project reopens.
Jorge uses the checklist to confirm: test: close the project screen and reopen it.
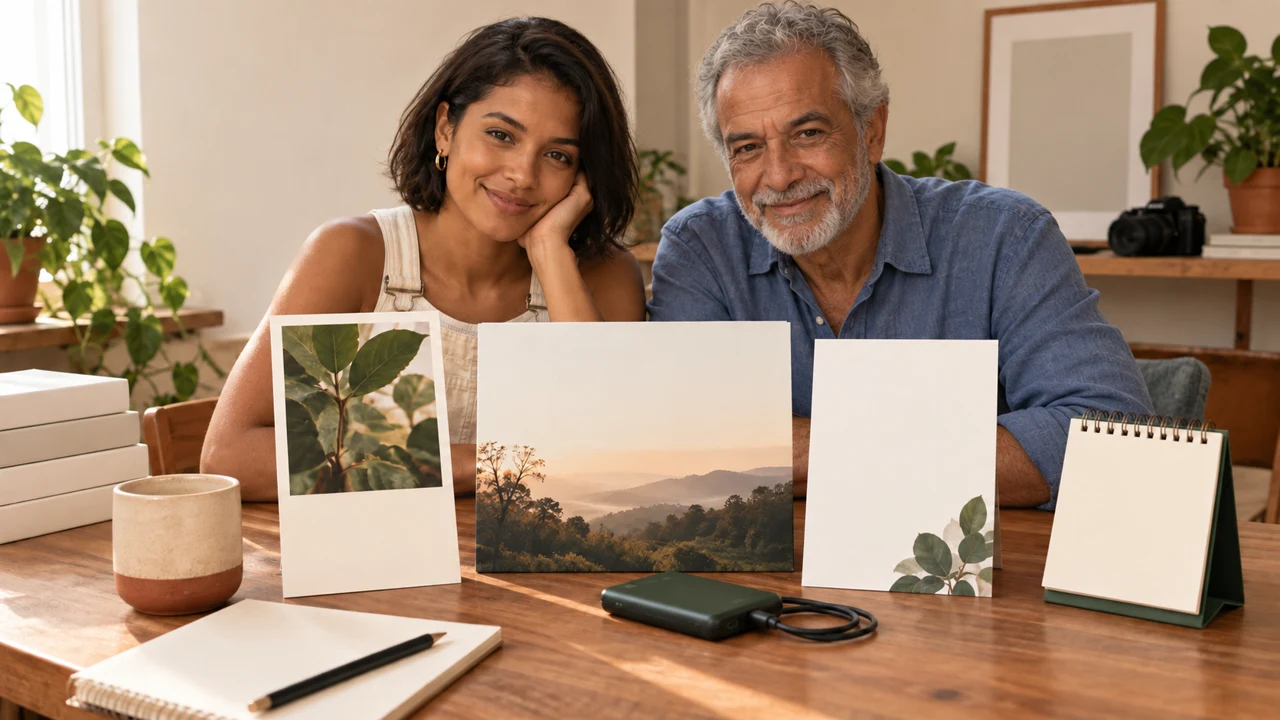
Educational illustration created in Codex: Nanda and Jorge organize cards showing four scenes on a desk. This depicts preparation; it does not reproduce the CapCut interface.
Test yourself
The editor says a source is missing. What should you do first?
It’s normal to get stuck hereIf you cannot open the editor, leave this practice pending. Reading the steps does not replace reopening the project.
Practice now 0/3
Set up your editing desk
Set aside about 10 minutes of active work for this section. Processing time is not included. Done when the project reopens and shows all four imported files.
Use files you own or are authorized to use. Editor features may depend on your account and plan. Keep steps you have not done marked as pending, and preserve originals.
Project: Verde Perto
Lesson: Set up your editing desk
Sources: four kit clips — <your choice>
Project: Verde Perto — <your choice>
Test: close the project screen and reopen it — <your choice>
File or project checked: <actual name>
Needed change: <describe it or none>
After these steps, you can open a project and import four organized clips.
Lesson cheat sheet
Set up your editing desk
Sources: four clips from the kit
Project: Verde Perto
Test: close the project screen and reopen it
Your next step
You now have criteria to open a project and import four organized clips.
Save this lesson’s deliverable in the project folder. You will use it in the next step.
Next: Recognize media, preview, and timeline
Supplemental material · Module 1Production notes and safeguards for continuing after the short practice.
The project is the edit; sources are the materials
Experiment at your own pace
Repeat the process on a copy, changing only one choice. Compare the result before keeping the change.
What to observe
Control names and availability may vary. Check the feature in your version before relying on it.
Open the editor with a short test
Experiment at your own pace
Repeat the process on a copy, changing only one choice. Compare the result before keeping the change.
What to observe
Control names and availability may vary. Check the feature in your version before relying on it.
Check features and costs in your current account. Guides may show different steps depending on the version and device.
Lesson 1 · CapCut for Creators v6.2 · INEMA.CLUB PRO
Module 1 · Lesson 2 of 18
Recognize media, preview, and timeline
You can find the areas used to select and adjust a clip.
Changing the wrong object can seem like a program bug. Check what is selected before changing the panel.
In 1 minute
Library: available files
Preview: result at the current point
Timeline: order, layers, and duration
1Three areas and one selection
The library gathers available files.
The preview shows the frame at the current point.
The timeline organizes duration and order.
Drag cena-1 to the timeline.
Click the clip and look at the side panel with video properties.
The properties panel follows the selected item.
This panel may also be called the inspector.
Select text to see text controls; select audio to see sound controls.
Before looking for a button, check what type of item is selected.
Nanda selects the video before changing its scale.
Prompts to compare · teaching example
PromptLook for image controls while an audio track is selected.
There are no observable limits to check the work against.
PromptSelect the item you want and check the preview after each change.
There are clear criteria for checking the decision.
Compare the two instructions. They are examples written for this lesson, with no simulated tool response.
2Layers show what appears in front
Add cena-2 above the first track and align their starts.
The upper image usually covers the lower one.
Reduce its scale in the Video, Basic, or Transform panel, depending on the version.
The lower layer becomes visible around the edges.
Scale changes the size inside the frame; aspect ratio sets the shape of the whole frame.
Do not confuse the two.
After the test, remove the overlay and keep the clips in sequence.
Use Undo if the result is not what you expected.
Jorge uses a short overlay to understand which layer is in front.
Completed brief · lesson example
1Library: available files
2Preview: result at the current point
3Timeline: order, layers, and duration
Use this sheet as a reference. Replace the example with your own project.
3Check the decision against its use
Select the item you want and check the preview after each change.
Jorge uses the checklist to confirm: timeline: order, layers, and duration.
Educational illustration created in Codex: The stack represents the library; the upright frame represents the preview; the row of cards represents the timeline. It is an analogy, not the exact location of buttons.
Test yourself
Text controls appear when you want to resize the plant pot. What should you check?
It’s normal to get stuck hereIf the panel is collapsed, select the clip and look for Video or Properties. Do not change other items by trial and error.
Practice now 0/3
Recognize media, preview, and timeline
Set aside about 10 minutes of active work for this section. Processing is not included. Done when you can identify the three areas and have undone an overlay test.
Use files you own or are authorized to use. Editor features may depend on your account and plan. Keep steps you have not done marked as pending, and preserve originals.
Project: Verde Perto
Lesson: Recognize media, preview, and timeline
Library: available files — <your choice>
Preview: result at the current point — <your choice>
Timeline: order, layers, and duration — <your choice>
File or project checked: <actual name>
Needed change: <describe it or none>
After these steps, you can find the areas used to select and adjust a clip.
Lesson cheat sheet
Recognize media, preview, and timeline
Library: available files
Preview: result at the current point
Timeline: order, layers, and duration
Your next step
You now have criteria to find the areas used to select and adjust a clip.
Save this lesson’s deliverable in the project folder. You will use it in the next step.
Next: Build twenty seconds in 9:16
Supplemental material · Module 1Production notes and safeguards for continuing after the short practice.
Three areas and one selection
Experiment at your own pace
Repeat the process on a copy, changing only one choice. Compare the result before keeping the change.
What to observe
Control names and availability may vary. Check the feature in your version before relying on it.
Layers show what appears in front
Experiment at your own pace
Repeat the process on a copy, changing only one choice. Compare the result before keeping the change.
What to observe
Control names and availability may vary. Check the feature in your version before relying on it.
Four Codex images animated with a zoom. Each clip is five seconds, with no audio; they are not filmed actions or real plant growth.
2Framing is choosing what stays in view
To adapt another aspect ratio, select the clip and adjust scale and position.
Filling the frame may crop the edges.
Watch the subject throughout the clip, especially if it moves.
Do not stretch the image to make it look like a different shape.
Set 1080 by 1920 as the output target.
Check the frame rate during export.
The kit clips are thirty frames per second; keeping that rate avoids an unnecessary conversion in this exercise.
For the test, click Export.
Choose a name and folder you can find.
If available, select MP4, 1080p, and thirty frames per second.
Review any warnings and confirm.
Wait for it to finish, then open the saved file.
Jorge checks the leaf tips at the start and end of the shot.
Completed brief · lesson example
1Frame: 9:16
2Sequence: four shots, about 20 seconds
3Planned output: 1080 × 1920, 30 frames per second
Use this sheet as a reference. Replace the example with your own project.
3Check the decision against its use
Fill the frame while keeping proportions, and check the subject throughout the clip.
Jorge uses the checklist to confirm: planned output: 1080 × 1920, 30 frames per second.
Educational illustration created in Codex: A vertical frame highlights a plant pot, while a horizontal frame shows more space. This drawing explains cropping, not a measured setting.
Test yourself
How can you adapt a horizontal shot while keeping the pot’s shape?
It’s normal to get stuck hereIf the test export does not finish, leave the practice pending. Resolve the warning before spending time on effects.
Practice now 0/3
Build twenty seconds in 9:16
Set aside about 10 minutes of active work for this section. Processing time is not included. Done when the vertical sequence plays without gaps and a test export exists.
Use files you own or are authorized to use. Editor features may depend on your account and plan. Keep steps you have not done marked as pending, and preserve originals.
Project: Verde Perto
Lesson: Build twenty seconds in 9:16
Frame: 9:16 — <your choice>
Sequence: four shots, about 20 seconds — <your choice>
Planned output: 1080 × 1920, 30 frames per second — <your choice>
File or project checked: <actual name>
Needed change: <describe it or none>
After these steps, you can arrange four shots in a vertical frame with no empty tracks.
Lesson cheat sheet
Build twenty seconds in 9:16
Frame: 9:16
Sequence: four shots, about 20 seconds
Planned output: 1080 × 1920, 30 frames per second
Your next step
You now have criteria to arrange four shots in a vertical frame with no empty tracks.
Save this lesson’s deliverable in the project folder. You will use it in the next step.
Next: Cut with purpose and preserve the source
Supplemental material · Module 1Production notes and safeguards for continuing after the short practice.
Frame and sequence
Experiment at your own pace
Repeat the process on a copy, changing only one choice. Compare the result before keeping the change.
What to observe
Control names and availability may vary. Check the feature in your version before relying on it.
Framing is choosing what stays in view
Experiment at your own pace
Repeat the process on a copy, changing only one choice. Compare the result before keeping the change.
What to observe
Control names and availability may vary. Check the feature in your version before relying on it.
Check features and costs in your current account. Guides may show different steps depending on the version and device.
Lesson 3 · CapCut for Creators v6.2 · INEMA.CLUB PRO
Module 2 · Lesson 4 of 18
Cut with purpose and preserve the source
You can split and shorten a clip without deleting the original file.
An impulsive cut can leave a sentence or gesture unfinished. Choose the point before deleting.
In 1 minute
Point: playhead at the desired position
Action: split or trim an edge
Review: transition and sync
1The playhead marks the cut point
Move the playhead to the desired point.
Select the clip and choose Split, usually shown as a blade.
This creates two sections in the edit.
Delete only the unwanted section and play the transition.
Dragging a clip edge shortens its duration on the timeline.
The original source stays in its folder.
To restore a section, extend the edge if media remains, or use Undo.
Do not delete the file from its folder to shorten the edit.
Nanda cuts the section that repeats information.
Weak decision
Delete a section and assume every layer moved with it.
Verifiable decision
Play the transition and check image, text, and audio after the cut.
Notice which characteristics make the second decision easy to check.
2Shortcuts come after the gesture
Open your CapCut shortcut list and look for Split and trim left or right of the playhead.
Q and W appear in some shortcut maps.
Check the actual command in your version before using those keys.
The visible button is still a valid option.
After deleting, check whether later clips moved closer automatically.
Track snapping and closing gaps vary by setting.
Check titles and audio too: an edit without gaps can still lose sync.
Jorge plays the transition instead of judging it from thumbnails alone.
Completed brief · lesson example
1Point: playhead at the desired position
2Action: split or trim an edge
3Review: transition and sync
Use this sheet as a reference. Replace the example with your own project.
3Check the decision against its use
Play the transition and check image, text, and audio after the cut.
Jorge uses the checklist to confirm: review: transition and sync.
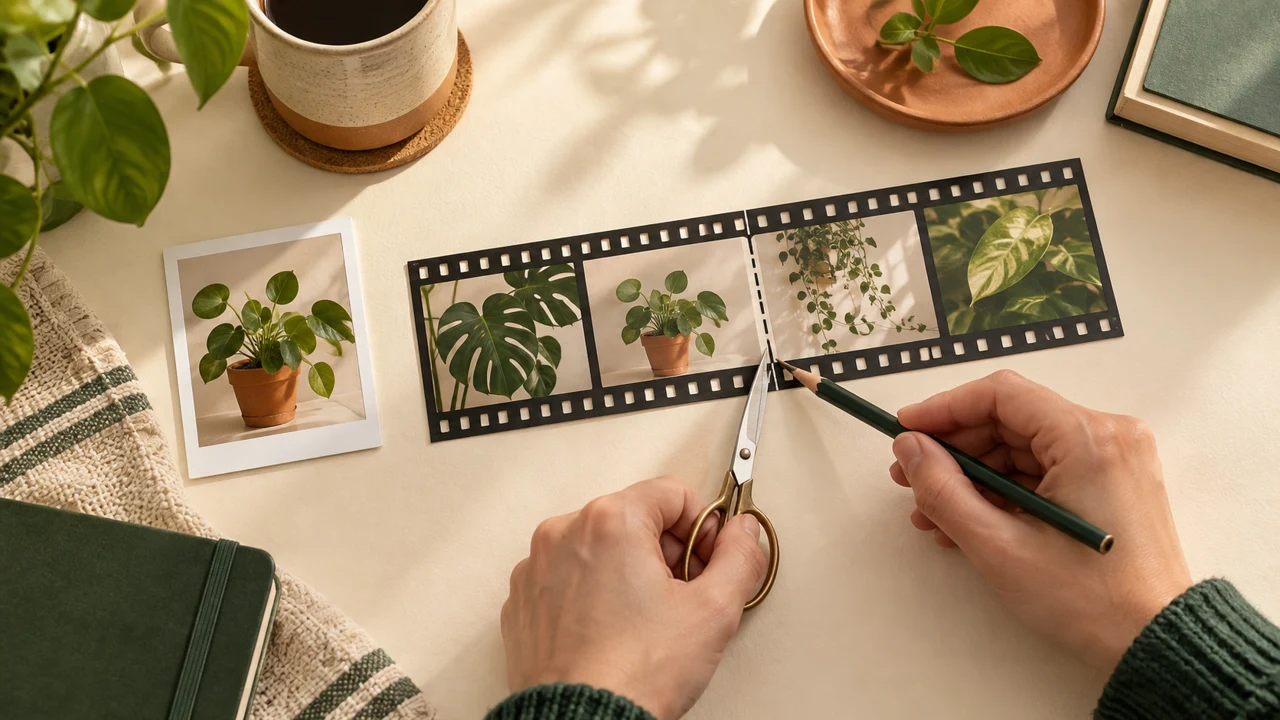
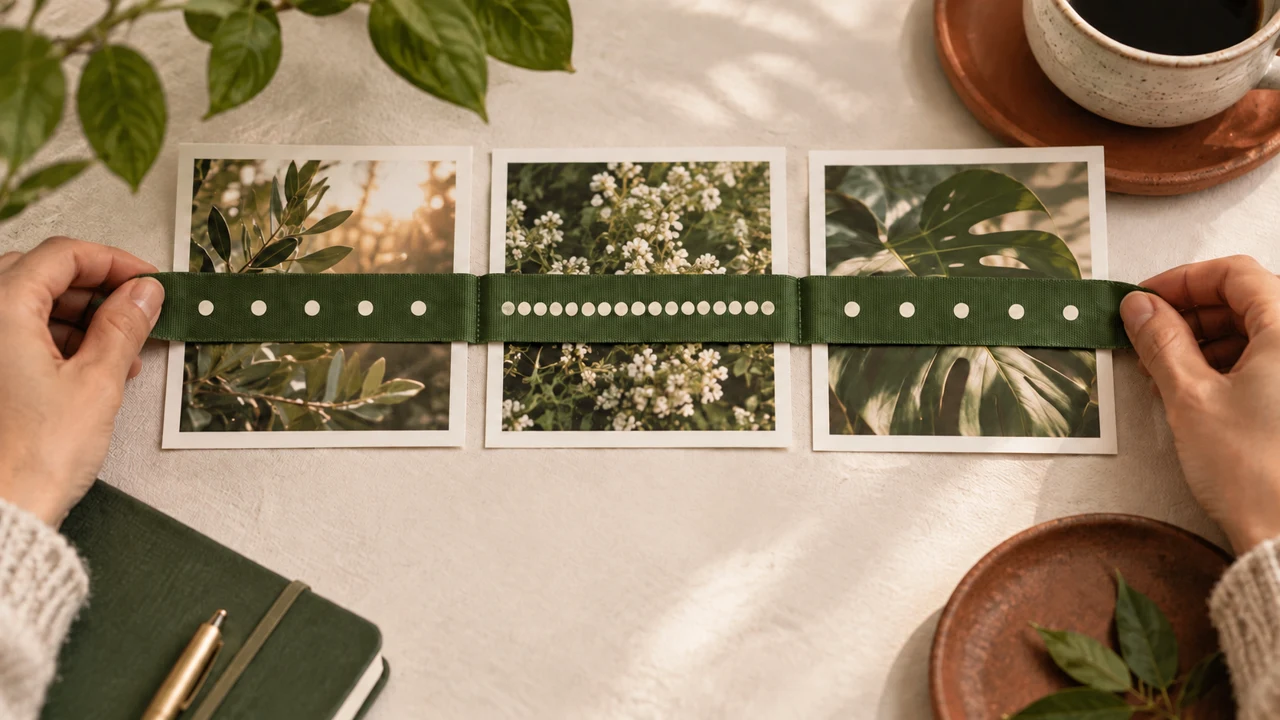
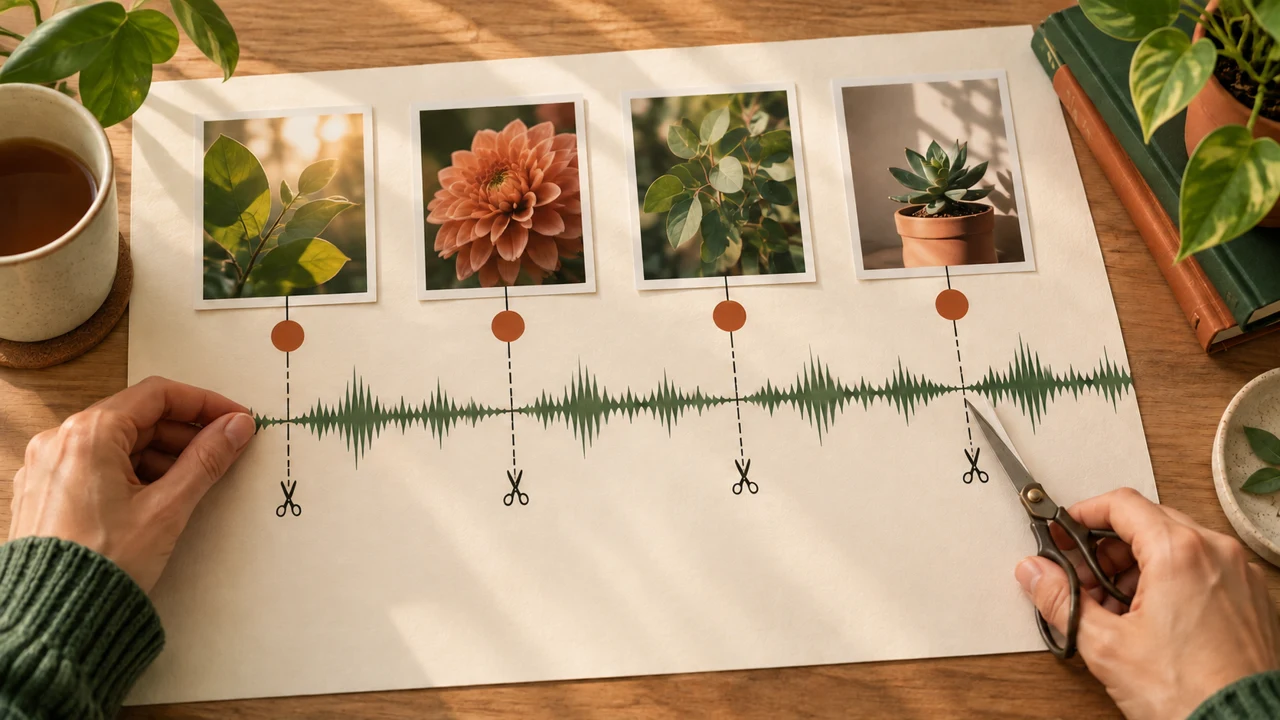
Educational illustration created in Codex: A strip of four images has a marked cut. The diagram represents an editing decision and preserving the source.
Test yourself
After you delete a section, the title appears in the wrong scene. What should you do?
It’s normal to get stuck herePractice on a copy. If you lose your place, use Undo and return to the last checked point.
Practice now 0/3
Cut with purpose and preserve the source
Set aside about 10 minutes of active work for this section. Processing is not included. Done when one cut is applied, checked, and restored with Undo.
Use files you own or are authorized to use. Editor features may depend on your account and plan. Keep steps you have not done marked as pending, and preserve originals.
Project: Verde Perto
Lesson: Cut with purpose and preserve the source
Point: playhead at the desired position — <your choice>
Action: split or trim an edge — <your choice>
Review: transition and sync — <your choice>
File or project checked: <actual name>
Needed change: <describe it or none>
After these steps, you can split and shorten a clip without deleting the original file.
Lesson cheat sheet
Cut with purpose and preserve the source
Point: playhead at the desired position
Action: split or trim an edge
Review: transition and sync
Your next step
You now have criteria to split and shorten a clip without deleting the original file.
Save this lesson’s deliverable in the project folder. You will use it in the next step.
Next: Use freeze and reverse with a reason
Supplemental material · Module 2Production notes and safeguards for continuing after the short practice.
The playhead marks the cut point
Experiment at your own pace
Repeat the process on a copy, changing only one choice. Compare the result before keeping the change.
What to observe
Control names and availability may vary. Check the feature in your version before relying on it.
Shortcuts come after the gesture
Experiment at your own pace
Repeat the process on a copy, changing only one choice. Compare the result before keeping the change.
What to observe
Control names and availability may vary. Check the feature in your version before relying on it.
Check features and costs in your current account. Guides may show different steps depending on the version and device.
Lesson 4 · CapCut for Creators v6.2 · INEMA.CLUB PRO
Module 2 · Lesson 5 of 18
Use freeze and reverse with a reason
You can create two short variations and choose one based on its purpose.
A timing effect can draw attention and also confuse the action. Compare before adding it.
In 1 minute
Freeze: pause for a set duration
Reverse: check the direction in playback
Choice: record the effect’s purpose
1Freeze gives viewers time to understand
Select a clip and place the playhead on the desired frame.
Look for Freeze.
The editor creates a still section; adjust its duration by dragging the edge.
Try about one second, but do not treat that as a universal rule.
A pause can give viewers time to read an invitation.
In the kit, the plant already comes from an animated image.
Freeze stops the zoom; it does not reveal real leaf movement.
Check whether the pause feels intentional or like a playback glitch.
Nanda uses a pause only where there is information to read.
Prompts to compare · teaching example
PromptReverse any action just because the movement looks different.
There are no observable limits to check the work against.
PromptUse a timing change when it helps viewers read and does not falsify a demonstration.
There are clear criteria for checking the decision.
Compare the two instructions. They are examples written for this lesson, with no simulated tool response.
2Reverse changes the direction of time
Duplicate a short section and apply Reverse.
Wait for processing to finish.
In the kit, the zoom becomes a pullback.
In filmed footage, liquids, smoke, and gestures may reveal the reversal.
Check the sound too before keeping the version.
If the tool can export a still frame from the preview, save an image for reference.
Check the available format and resolution.
If that command is unavailable, use a screenshot only as a note; it is not a delivery-quality still.
Jorge notices that reversing the kit changes the zoom direction, not the plant’s state.
Completed brief · lesson example
1Freeze: pause for a set duration
2Reverse: check the direction in playback
3Choice: record the effect’s purpose
Use this sheet as a reference. Replace the example with your own project.
3Check the decision against its use
Use a timing change when it helps viewers read and does not falsify a demonstration.
Jorge uses the checklist to confirm: choice: record the effect’s purpose.
Educational illustration created in Codex: A sequence shows zoom-in, pause, and pullback as distinct moves. These are editing concepts applied to an image.
Test yourself
When should you keep a freeze?
It’s normal to get stuck hereIf the command is unavailable, leave that test pending and continue with the version without the effect.
Practice now 0/3
Use freeze and reverse with a reason
Set aside about 10 minutes of active work for this section. Processing time is not included. Done when both variations have been played and a decision recorded.
Use files you own or are authorized to use. Editor features may depend on your account and plan. Keep steps you have not done marked as pending, and preserve originals.
Project: Verde Perto
Lesson: Use freeze and reverse with a reason
Freeze: pause for a set duration — <your choice>
Reverse: check the direction in playback — <your choice>
Choice: record the effect’s purpose — <your choice>
File or project checked: <actual name>
Needed change: <describe it or none>
After these steps, you can create two short variations and choose one based on its purpose.
Lesson cheat sheet
Use freeze and reverse with a reason
Freeze: pause for a set duration
Reverse: check the direction in playback
Choice: record the effect’s purpose
Your next step
You now have criteria to create two short variations and choose one based on its purpose.
Save this lesson’s deliverable in the project folder. You will use it in the next step.
Next: Control a zoom with two key points
Supplemental material · Module 2Production notes and safeguards for continuing after the short practice.
Freeze gives viewers time to understand
Experiment at your own pace
Repeat the process on a copy, changing only one choice. Compare the result before keeping the change.
What to observe
Control names and availability may vary. Check the feature in your version before relying on it.
Reverse changes the direction of time
Experiment at your own pace
Repeat the process on a copy, changing only one choice. Compare the result before keeping the change.
What to observe
Control names and availability may vary. Check the feature in your version before relying on it.
Four Codex images animated with a zoom. Each clip is five seconds, with no audio; they are not filmed actions or real plant growth.
2Movement needs room
Use a small zoom-in and watch the leaves, pot, and text space.
The kit clips already move; a second zoom may be too much.
For a clean test, use the still image in the kit and extend its duration in the edit.
When available, an easing curve changes the acceleration between points.
Check the simple version first.
Do not add shake, zoom, and animated entry before you know which movement guides attention.
Jorge uses the diamonds as evidence that he saved two states.
Completed brief · lesson example
1Starting state: scale and point saved
2Ending state: slight zoom-in
3Review: subject stays in frame
Use this sheet as a reference. Replace the example with your own project.
3Check the decision against its use
Set two clear states and watch the full interval before adjusting the intensity.
Jorge uses the checklist to confirm: review: subject stays in frame.
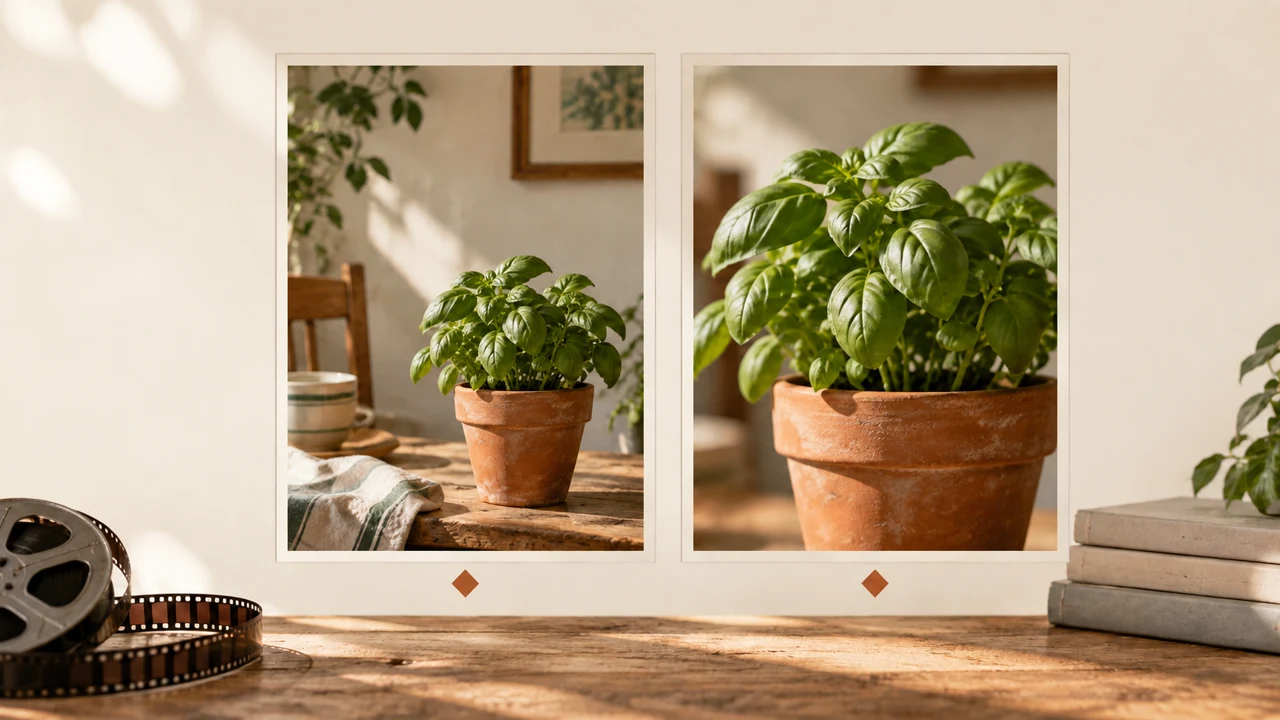
Educational illustration created in Codex: Two framings of the pot show the start and end of a zoom-in. The diagram does not depict filmed camera movement.
Test yourself
What evidence confirms the scale is set to change over time?
It’s normal to get stuck hereStart with scale only. Add position after the basic movement works.
Practice now 0/3
Control a zoom with two key points
Set aside about 10 minutes of active work for this section. Processing is not included. Done when one image has two scale points and the zoom has been checked.
Use files you own or are authorized to use. Editor features may depend on your account and plan. Keep steps you have not done marked as pending, and preserve originals.
Project: Verde Perto
Lesson: Control a zoom with two key points
Starting state: scale and point saved — <your choice>
Ending state: slight zoom-in — <your choice>
Review: subject stays in frame — <your choice>
File or project checked: <actual name>
Needed change: <describe it or none>
After these steps, you can create a gradual scale change and check the framing.
Lesson cheat sheet
Control a zoom with two key points
Starting state: scale and point saved
Ending state: slight zoom-in
Review: subject stays in frame
Your next step
You now have criteria to create a gradual scale change and check the framing.
Save this lesson’s deliverable in the project folder. You will use it in the next step.
Next: Choose among color, removal, and crop
Supplemental material · Module 2Production notes and safeguards for continuing after the short practice.
Two states define the change
Experiment at your own pace
Repeat the process on a copy, changing only one choice. Compare the result before keeping the change.
What to observe
Control names and availability may vary. Check the feature in your version before relying on it.
Movement needs room
Experiment at your own pace
Repeat the process on a copy, changing only one choice. Compare the result before keeping the change.
What to observe
Control names and availability may vary. Check the feature in your version before relying on it.
Check features and costs in your current account. Guides may show different steps depending on the version and device.
Lesson 6 · CapCut for Creators v6.2 · INEMA.CLUB PRO
Module 3 · Lesson 7 of 18
Choose among color, removal, and crop
You can compare ways to separate a subject and record their limits.
Cutting out leaves or fine hair can create rough edges. Inspect automatic options.
In 1 minute
Source: plain or varied background
Method: color, automatic removal, or full image
Review: leaves, gaps, shadow, and stability
1Each method depends on the image
Chroma key removes a selected color.
It works best when the background has one color that differs from the subject.
In the video panel, look for Remove background and Chroma key.
Use the eyedropper to select a color and adjust intensity while checking the edges.
The kit background is not uniform, so chroma key is not the first choice.
Automatic removal tries to recognize the subject.
Custom cutout lets you adjust an area, when available.
These features may depend on the version or plan.
Nanda avoids chroma key when the background color also appears in the plant.
Weak decision
Remove the background and approve it from a small thumbnail.
Verifiable decision
Check the edges against a contrasting background; keep the full image if cropping harms the subject.
Notice which characteristics make the second decision easy to check.
2Check it against a contrasting background
To test the edge, place a different color or image on the lower track.
Apply the separation to a short copy.
Check the leaves, gaps, shadow, and pot base.
If important parts disappear, lower the intensity or return to the full image.
Do not approve it from a single frame.
Play the clip and look for edges that flicker.
If the feature is not in your account, use the full image and record that choice.
The goal is to choose a workable method, not buy a feature to finish the lesson.
Jorge prefers the full shot when separation removes leaves.
Completed brief · lesson example
1Source: plain or varied background
2Method: color, automatic removal, or full image
3Review: leaves, gaps, shadow, and stability
Use this sheet as a reference. Replace the example with your own project.
3Check the decision against its use
Check the edges against a contrasting background; keep the full image if cropping harms the subject.
Jorge uses the checklist to confirm: review: leaves, gaps, shadow, and stability.
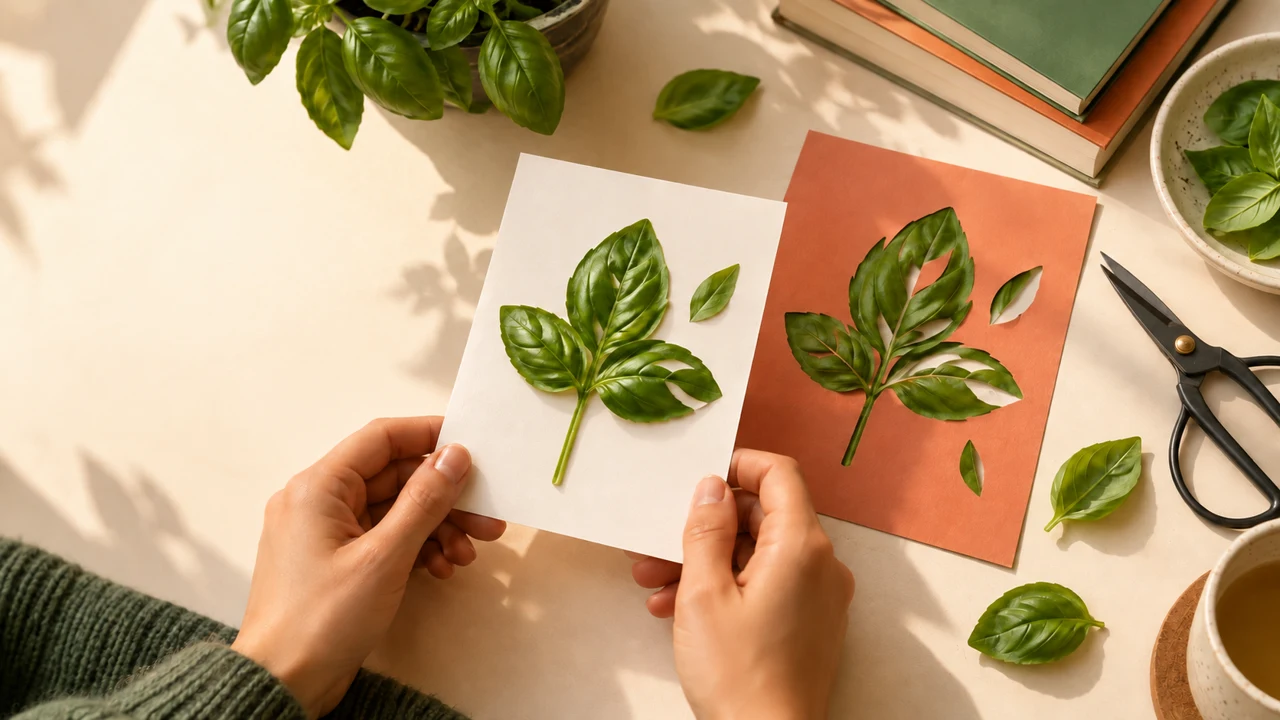
Educational illustration created in Codex: Leaves and background appear as separate pieces with visible edges. This metaphor helps inspect cutouts; it does not prove perfect automatic removal.
Test yourself
Green leaves disappear along with a green background. Which explanation makes sense?
It’s normal to get stuck hereKeeping the full image is a valid choice in this lesson. Do not mark removal as done if it did not happen.
Practice now 0/3
Choose among color, removal, and crop
Set aside about 10 minutes of active work for this section. Processing is not included. Done when a workable background choice has a reason and review recorded.
Use files you own or are authorized to use. Editor features may depend on your account and plan. Keep steps you have not done marked as pending, and preserve originals.
Project: Verde Perto
Lesson: Choose among color, removal, and crop
Source: plain or varied background — <your choice>
Method: color, automatic removal, or full image — <your choice>
Review: leaves, gaps, shadow, and stability — <your choice>
File or project checked: <actual name>
Needed change: <describe it or none>
After these steps, you can compare ways to separate a subject and record their limits.
Lesson cheat sheet
Choose among color, removal, and crop
Source: plain or varied background
Method: color, automatic removal, or full image
Review: leaves, gaps, shadow, and stability
Your next step
You now have criteria to compare ways to separate a subject and record their limits.
Save this lesson’s deliverable in the project folder. You will use it in the next step.
Next: Use a mask to reveal part of an image
Supplementary material · module 3Production notes and care tips for returning after the short practice.
Each method depends on the image
Experiment at your own pace
Repeat the process on a copy, changing only one choice. Compare the result before keeping the change.
What to observe
Control names and availability may vary. Check the feature in your version before relying on it.
Check against a contrasting background
Experiment at your own pace
Repeat the process on a copy, changing only one choice. Compare the result before keeping the change.
What to observe
Control names and availability may vary. Check the feature in your version before relying on it.
Check features and costs in your current account. Guides may show different steps depending on the version and device.
Lesson 7 · CapCut for Creators v6.2 · INEMA.CLUB PRO
Module 3 · Lesson 8 of 18
Use a mask to reveal part of an image
You can create a visual window with a controlled edge.
Masks and background removal solve different problems. A geometric shape may be enough for the comparison.
In 1 minute
Upper layer: revealed area
Shape: position and size
Edge: contrast and softness
1A mask limits the visible area
Place a copy of the clip on an upper track.
Select that copy and look for Mask in the video panel.
Choose a simple shape, such as a rectangle or circle.
Adjust the size and position to show only the area you want.
The mask does not necessarily follow the plant’s outline.
It reveals an area defined by the shape.
To compare detail and context, show a detail window over a wider image.
Leave space between the window and the main subject.
Nanda uses a window to compare viewing scales.
Prompts to compare · teaching example
PromptApply a shape and expect it to follow every leaf.
There are no observable limits to check the work against.
PromptPlace a simple window and adjust its edge by checking the final frame.
There are clear criteria for checking the decision.
Compare the two instructions. They are examples written for this lesson, with no simulated tool response.
2Softness is an edge choice
The edge-softening control, called feather in some versions, makes the transition less sharp.
Use a small amount for a clear cutout.
Too much softness can erase the edge and create a blur.
Check the window at phone size.
If you animate it, check what is selected: the mask or the video transform.
Moving one does not always move the other.
Start with a still window.
Add movement only when it helps the comparison.
Jorge keeps the window away from the written invitation.
Completed brief · lesson example
1Upper layer: revealed area
2Shape: position and size
3Edge: contrast and softness
Use this sheet as a reference. Replace the example with your own project.
3Check the decision against its use
Place a simple window and adjust its edge by checking the final frame.
Jorge uses the checklist to confirm: edge: contrast and softness.
Educational illustration created in Codex: A circular window shows a leaf detail over a wide shot. It illustrates area selection; it does not mimic an editor screenshot.
Test yourself
What does a circular mask do in this exercise?
It’s normal to get stuck hereIf the edge looks unclear, remove the softness and return to a simple shape. More effects do not fix a lack of space.
Practice now 0/3
Use a mask to reveal part of an image
Set aside about 10 minutes of active work for this section. Processing is not included. Done when a masked window has been played without hiding the main subject.
Use files you own or are authorized to use. Editor features may depend on your account and plan. Keep steps you have not done marked as pending, and preserve originals.
Project: Verde Perto
Lesson: Use a mask to reveal part of an image
Upper layer: revealed area — <your choice>
Shape: position and size — <your choice>
Edge: contrast and softness — <your choice>
File or project checked: <actual name>
Needed change: <describe it or none>
After these steps, you can create a visual window with a controlled edge.
Lesson cheat sheet
Use a mask to reveal part of an image
Upper layer: revealed area
Shape: position and size
Edge: contrast and softness
Your next step
You now have criteria to create a visual window with a controlled edge.
Save this lesson’s deliverable in the project folder. You will use it in the next step.
Next: Change speed without losing meaning
Supplementary material · module 3Production notes and care tips for returning after the short practice.
A mask limits the visible area
Experiment at your own pace
Repeat the process on a copy, changing only one choice. Compare the result before keeping the change.
What to observe
Control names and availability may vary. Check the feature in your version before relying on it.
Softness is an edge choice
Experiment at your own pace
Repeat the process on a copy, changing only one choice. Compare the result before keeping the change.
What to observe
Control names and availability may vary. Check the feature in your version before relying on it.
Check features and costs in your current account. Guides may show different steps depending on the version and device.
Lesson 8 · CapCut for Creators v6.2 · INEMA.CLUB PRO
Module 3 · Lesson 9 of 18
Change speed without losing meaning
You can compare constant speed with a short speed change.
Speeding everything up can shorten the video and undermine its purpose. The subject must remain clear.
In 1 minute
Version A: constant speed
Version B: brief speed change
Review: duration and clarity
1Speed also changes duration
Select a short copy and look for Speed.
In Normal mode, a higher value speeds up and shortens the clip.
A lower value slows it down and extends it.
Play it and check the resulting duration on the timeline.
The kit contains zooms on still images.
Speed changes that movement; it does not create a new action.
To evaluate a filmed gesture, use a clip you own or are authorized to use.
Slow motion on footage with a low frame rate may look uneven.
Nanda makes a short change for comparison without changing the whole project.
Weak decision
Speed up every shot and ignore the speech that was cut off.
Verifiable decision
Make a small speed change, then review duration, motion, and sync.
Notice which characteristics make the second decision easy to check.
2Curves spread the change over time
In Curve mode, if available, choose Custom and adjust a few points.
Create a normal section, a faster section, then return to normal.
The curve controls speed; it does not fix image content.
Compare it with the constant-speed version.
Duration changes shift later cuts.
Check voice, music, and titles again after the test.
Smoothing features may require processing or a specific plan.
If the result jitters, reduce the change or keep normal speed.
Jorge notices that the new duration shifts the title’s entrance.
Completed brief · lesson example
1Version A: constant speed
2Version B: brief speed change
3Review: duration and clarity
Use this sheet as a reference. Replace the example with your own project.
3Check the decision against its use
Make a small speed change, then review duration, motion, and sync.
Jorge uses the checklist to confirm: review: duration and clarity.
Educational illustration created in Codex: The track has sparse, dense, then sparse marks: a metaphor for normal, fast, then normal. The dots do not measure frames or show an editor curve.
Test yourself
After speeding up a shot, what should you review?
It’s normal to get stuck hereIf custom curves are unavailable, three sections with different speeds can show the principle. The transition may be more abrupt.
Practice now 0/3
Change speed without losing meaning
Set aside about 10 minutes of active work for this section. Processing is not included. Done when two speed variations have been played and compared.
Use files you own or are authorized to use. Editor features may depend on your account and plan. Keep steps you have not done marked as pending, and preserve originals.
Project: Verde Perto
Lesson: Change speed without losing meaning
Version A: constant speed — <your choice>
Version B: brief speed change — <your choice>
Review: duration and clarity — <your choice>
File or project checked: <actual name>
Needed change: <describe it or none>
After these steps, you can compare constant speed with a short speed change.
Lesson cheat sheet
Change speed without losing meaning
Version A: constant speed
Version B: brief speed change
Review: duration and clarity
Your next step
You now have criteria to compare constant speed with a short speed change.
Save this lesson’s deliverable in the project folder. You will use it in the next step.
Next: Tell transitions, animation, and effects apart
Supplementary material · module 3Production notes and care tips for returning after the short practice.
Speed also changes duration
Experiment at your own pace
Repeat the process on a copy, changing only one choice. Compare the result before keeping the change.
What to observe
Control names and availability may vary. Check the feature in your version before relying on it.
Curves spread the change over time
Experiment at your own pace
Repeat the process on a copy, changing only one choice. Compare the result before keeping the change.
What to observe
Control names and availability may vary. Check the feature in your version before relying on it.
Check features and costs in your current account. Guides may show different steps depending on the version and device.
Lesson 9 · CapCut for Creators v6.2 · INEMA.CLUB PRO
Module 4 · Lesson 10 of 18
Tell transitions, animation, and effects apart
You can choose one visual feature with a clear purpose.
Stacking three features can hide what a scene should show. Separate their roles before choosing.
In 1 minute
Transition: between two shots
Animation: how an item behaves
Effect: appearance during a section
1Where the change happens matters
A transition connects two shots.
Animation controls an item’s entrance, exit, or behavior.
An effect changes the appearance during a section.
To test a transition, open Transitions and apply a simple option at the join between two clips.
Play before and after the edit point.
A long transition can use up the important moment in both scenes.
First compare it with a direct cut.
Not every change of shot needs an effect to make sense.
Nanda prefers a direct cut when the shots already connect.
Weak decision
Add shake, spin, and dissolve to make the edit look complex.
Verifiable decision
Compare one feature at a time and keep only what improves understanding.
Notice which characteristics make the second decision easy to check.
2Try one item at a time
Open Text and add a temporary default text item.
Type Verde Perto and select that track.
Under Animation, try a short entrance.
On a clip copy, open Effects and apply a brief option.
Adjust the duration on the matching track, depending on the version.
Remove anything that does not guide attention.
Check for paid-feature labels before relying on a feature.
Shake, called shake in some menus, can accent an impact.
In this calm invitation, it may work against the mood.
Stickers can also inform or decorate: choose a purpose and check that they do not cover a leaf, face, or text.
Jorge removes a sticker that covered the plant without adding information.
Completed brief · lesson example
1Transition: between two shots
2Animation: how an item behaves
3Effect: appearance during a section
Use this sheet as a reference. Replace the example with your own project.
3Check the decision against its use
Compare one feature at a time and keep only what improves understanding.
Jorge uses the checklist to confirm: effect: appearance during a section.
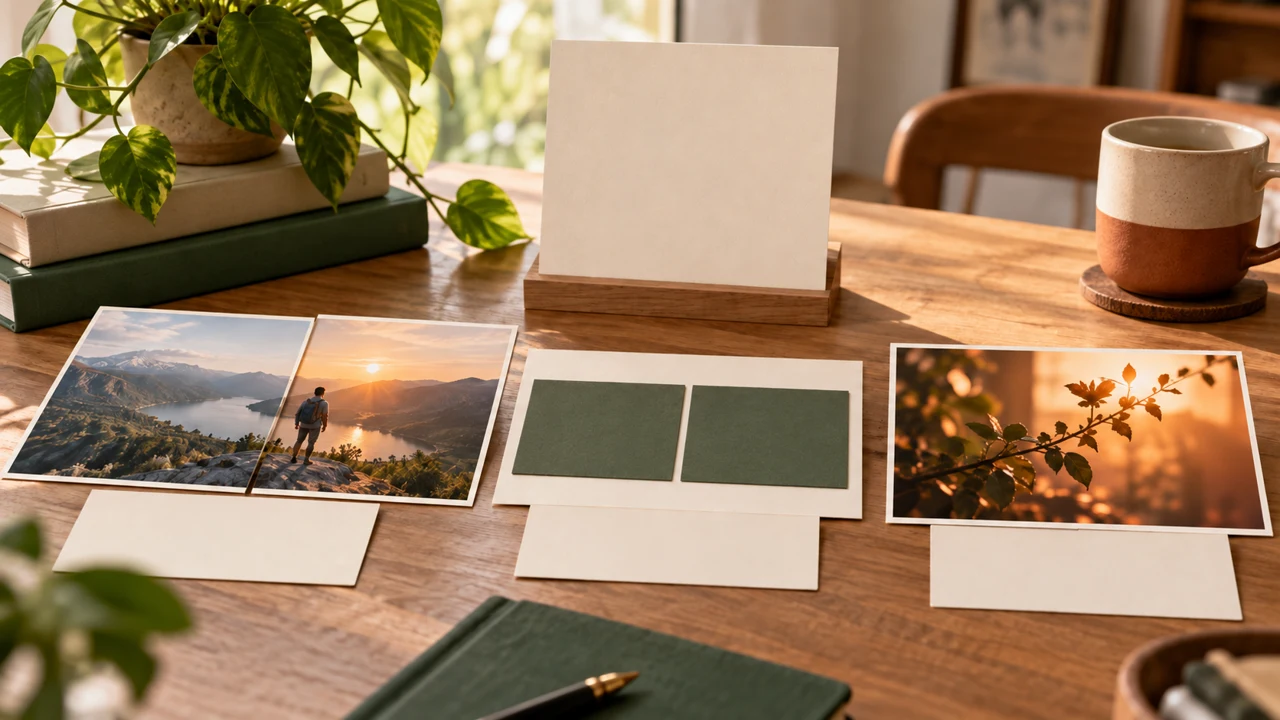
Educational illustration created in Codex: Analogy: overlapping photos suggest a change between shots; green cards represent an item that could appear; the warm photo represents appearance. The still image does not show motion.
Test yourself
Which example is a transition?
It’s normal to get stuck hereIf the edit works without an effect, that is a useful conclusion. This exercise measures choice, not the number of features.
Practice now 0/3
Tell transitions, animation, and effects apart
Set aside about 10 minutes of active work for this section. Processing is not included. Done when you have tested all three roles and explained what you kept or removed.
Use files you own or are authorized to use. Editor features may depend on your account and plan. Keep steps you have not done marked as pending, and preserve originals.
Project: Verde Perto
Lesson: Tell transitions, animation, and effects apart
Transition: between two shots — <your choice>
Animation: how an item behaves — <your choice>
Effect: appearance during a section — <your choice>
File or project checked: <actual name>
Needed change: <describe it or none>
After these steps, you can choose one visual feature with a clear purpose.
Lesson cheat sheet
Tell transitions, animation, and effects apart
Transition: between two shots
Animation: how an item behaves
Effect: appearance during a section
Your next step
You now have criteria to choose one visual feature with a clear purpose.
Save this lesson’s deliverable in the project folder. You will use it in the next step.
Next: Write an invitation that reads well on a phone
Supplementary material · module 4Production notes and care tips for returning after the short practice.
Where the change happens matters
Experiment at your own pace
Repeat the process on a copy, changing only one choice. Compare the result before keeping the change.
What to observe
Control names and availability may vary. Check the feature in your version before relying on it.
Try one item at a time
Experiment at your own pace
Repeat the process on a copy, changing only one choice. Compare the result before keeping the change.
What to observe
Control names and availability may vary. Check the feature in your version before relying on it.
Check features and costs in your current account. Guides may show different steps depending on the version and device.
Lesson 10 · CapCut for Creators v6.2 · INEMA.CLUB PRO
Module 4 · Lesson 11 of 18
Write an invitation that reads well on a phone
You can create a title and closing invitation that remain clear in a small frame.
Text that fits on a large screen may be hard to read on a phone. Edit the message and its presentation together.
In 1 minute
Title: one short message
Position: away from the destination’s controls
Test: read without pausing
1One message at a time
Open Text and add a default text item.
Write a short title: Verde Perto.
At the end, add an invitation such as “Visit the workshop.”
Adjust the duration by dragging the text track edges.
Do not keep two competing messages on screen without a reason.
Choose a readable font and contrast with the background.
If leaf colors vary a lot, add a subtle box behind the text.
Avoid the edges, where platform controls may cover the message.
Safe areas vary by destination.
Nanda shortens the call to action instead of making the text too small.
Prompts to compare · teaching example
PromptShrink the text until a whole paragraph fits in the corner.
There are no observable limits to check the work against.
PromptShorten the message and test contrast, duration, and phone placement.
There are clear criteria for checking the decision.
Compare the two instructions. They are examples written for this lesson, with no simulated tool response.
2Read it at its actual viewing size
Reduce the preview or open the test export on a phone.
Read it without pausing.
If there is not enough time, shorten the text or keep it on screen longer.
Do not try to solve everything by shrinking the letters.
Copying a style can save work.
In the item menu, look for copy and paste attributes or properties, depending on the version.
Check what will be transferred.
If the command is unavailable, duplicate the title and change only the text, then review timing and position.
Jorge can read the invitation during normal playback.
Completed brief · lesson example
1Title: one short message
2Position: away from destination controls
3Test: read without pausing
Use this sheet as a reference. Replace the example with your own project.
3Check the decision against its use
Shorten the message and test contrast, duration, and phone placement.
Jorge uses the checklist to confirm: test: read without pausing.
Educational illustration created in Codex: A title and invitation appear together as a style sample. In practice, place them at different times. The image does not prove the platform’s safe area.
Test yourself
The sentence can be read only when the video is paused. What should you try?
It’s normal to get stuck hereIf you do not have a phone, reduce the preview for an initial check. Review on a device before final delivery.
Practice now 0/3
Write an invitation that reads well on a phone
Set aside about 10 minutes of active work for this section. Processing is not included. Done when both texts have been checked at a reduced size and stay readable long enough.
Use files you own or are authorized to use. Editor features may depend on your account and plan. Keep steps you have not done marked as pending, and preserve originals.
Project: Verde Perto
Lesson: Write an invitation that reads well on a phone
Title: one short message — <your choice>
Position: away from destination controls — <your choice>
Test: read without pausing — <your choice>
File or project checked: <actual name>
Needed change: <describe it or none>
After these steps, you can create a title and closing invitation that remain clear in a small frame.
Lesson cheat sheet
Write an invitation that reads well on a phone
Title: one short message
Position: away from destination controls
Test: read without pausing
Your next step
You now have criteria to create a title and closing invitation that remain clear in a small frame.
Save this lesson’s deliverable in the project folder. You will use it in the next step.
Next: Adjust color while preserving the plant
Supplementary material · module 4Production notes and care tips for returning after the short practice.
One message at a time
Experiment at your own pace
Repeat the process on a copy, changing only one choice. Compare the result before keeping the change.
What to observe
Control names and availability may vary. Check the feature in your version before relying on it.
Read it at its actual viewing size
Experiment at your own pace
Repeat the process on a copy, changing only one choice. Compare the result before keeping the change.
What to observe
Control names and availability may vary. Check the feature in your version before relying on it.
Check features and costs in your current account. Guides may show different steps depending on the version and device.
Lesson 11 · CapCut for Creators v6.2 · INEMA.CLUB PRO
Module 4 · Lesson 12 of 18
Adjust color while preserving the plant
You can bring two shots closer in appearance without overdoing a filter.
A strong filter can unify the look but erase detail. Compare shots before choosing a finish.
In 1 minute
Correction: consistent exposure and color
Style: controlled intensity
Review: preserve leaves and texture
1Correction and styling are different choices
Correction seeks consistency in exposure, color, and contrast.
Style adds a visual intention.
Select the clip and open Adjustments.
Start with a small change to brightness or exposure, watching bright leaves and the pot’s shadows.
Then compare temperature and saturation across shots.
Do not use one setting for every image.
Lighting varies intentionally across the four files.
Bringing shots closer does not mean making them identical; preserve the natural-light feel.
Nanda brings the shots closer without forcing the same number on each one.
Weak decision
Apply maximum saturation because plants should look vivid.
Verifiable decision
Compare the effect on and off while preserving texture, light, and differences between leaves.
Notice which characteristics make the second decision easy to check.
2One layer can affect several shots
If your version has an adjustment layer, place it above the intended sections and check its duration.
It applies a shared choice.
Each shot’s own adjustments still need individual review.
A single filter can also work as a consistency test.
Lower the filter intensity and compare it on and off.
Check that leaves remain distinct and the pot keeps its texture.
Do not use sharpening or enhancement as an automatic fix for poor framing.
Jorge looks for visible leaf veins before approving the color.
Completed brief · lesson example
1Correction: consistent exposure and color
2Style: controlled intensity
3Review: preserve leaves and texture
Use this sheet as a reference. Replace the example with your own project.
3Check the decision against its use
Compare the effect on and off while preserving texture, light, and differences between leaves.
Jorge uses the checklist to confirm: review: preserve leaves and texture.
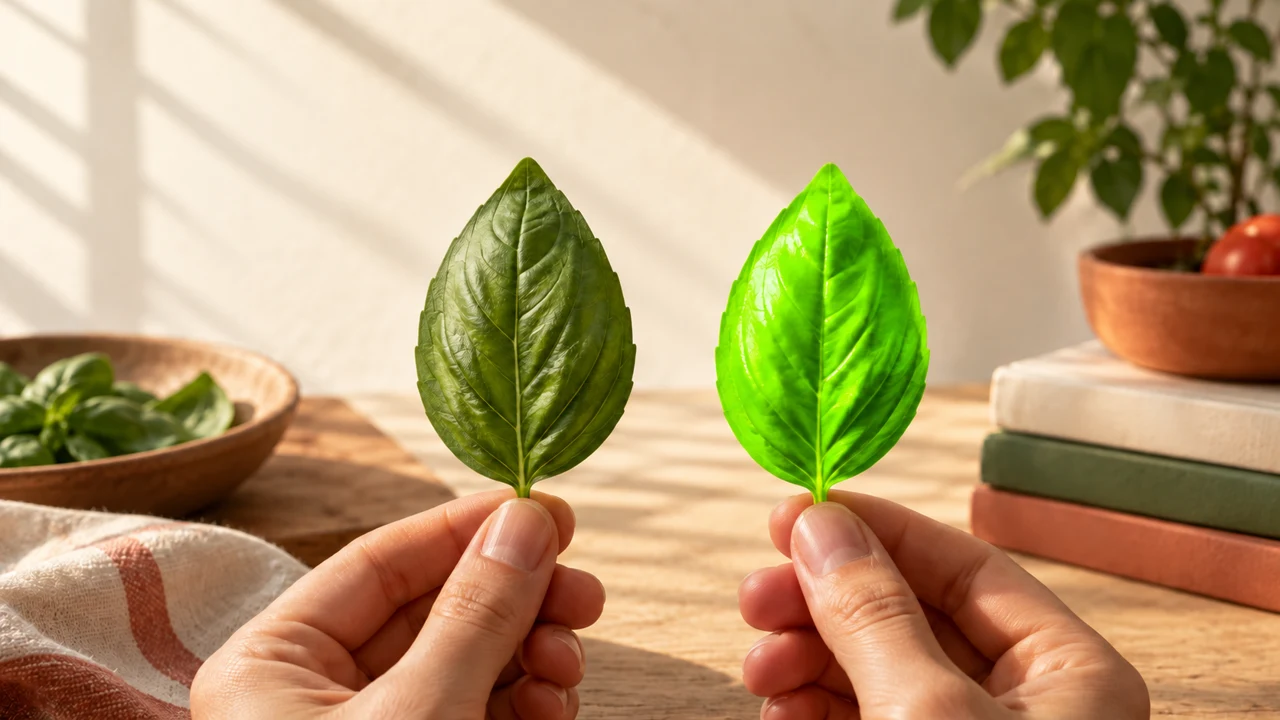
Educational illustration created in Codex: Two leaf samples compare moderate and exaggerated treatment as a concept. They are not app correction measurements.
Test yourself
The leaves lost texture after the filter. What is the better choice?
It’s normal to get stuck hereIf you are unsure, keep the lighter version. You can revisit the look once the edit is clear.
Practice now 0/3
Adjust color while preserving the plant
Set aside about 10 minutes of active work for this section. Processing is not included. Done when two shots have been compared and the chosen adjustment preserves detail.
Use files you own or are authorized to use. Editor features may depend on your account and plan. Keep steps you have not done marked as pending, and preserve originals.
Project: Verde Perto
Lesson: Adjust color while preserving the plant
Correction: consistent exposure and color — <your choice>
Style: controlled intensity — <your choice>
Review: preserve leaves and texture — <your choice>
File or project checked: <actual name>
Needed change: <describe it or none>
After these steps, you can bring two shots closer in appearance without overdoing a filter.
Lesson cheat sheet
Adjust color while preserving the plant
Correction: consistent exposure and color
Style: controlled intensity
Review: preserve leaves and texture
Your next step
You now have criteria to bring two shots closer in appearance without overdoing a filter.
Save this lesson’s deliverable in the project folder. You will use it in the next step.
Next: Use the voice as the invitation’s structure
Supplementary material · module 4Production notes and care tips for returning after the short practice.
Correction and styling are different choices
Experiment at your own pace
Repeat the process on a copy, changing only one choice. Compare the result before keeping the change.
What to observe
Control names and availability may vary. Check the feature in your version before relying on it.
One layer can affect several shots
Experiment at your own pace
Repeat the process on a copy, changing only one choice. Compare the result before keeping the change.
What to observe
Control names and availability may vary. Check the feature in your version before relying on it.
Add your own or authorized music on a separate track.
Lower the volume while someone is speaking.
If volume keyframes are available, lower it before the voice and raise it afterward.
Alternatively, split the music and adjust its volume with gentle fades.
A brief effect can mark a shot change.
If the beginning clicks, add a short volume fade-in and listen again.
Do not cut off the entire attack if it identifies the sound.
Record sources and credits.
The audio course offers a kit with documented usage terms.
Jorge listens at a normal volume to check the words.
Completed brief · lesson example
1Voice: recorded file listened to
2Music: lower than the speech
3Effects: brief and source recorded
Use this sheet as a reference. Replace the example with your own project.
3Check the decision against its use
Listen to the voice alone, then add the other layers without covering words.
Jorge uses the checklist to confirm: effects: brief and source recorded.
Educational illustration created in Codex: One main track and two smaller tracks represent sound hierarchy. The drawing does not show measured volume values.
Test yourself
The speech becomes unclear when the music starts. What should you test first?
It’s normal to get stuck hereIf you do not have authorized music, finish the voice first and leave music pending. Do not use a track with unknown terms.
Practice now 0/3
Use the voice as the invitation’s structure
Set aside about 10 minutes of active work for this section. Processing time is not included. Done when a recorded, edited voice is clear with the chosen music.
Use files you own or are authorized to use. Editor features may depend on your account and plan. Keep steps you have not done marked as pending, and preserve originals.
Project: Verde Perto
Lesson: Use the voice as the invitation’s structure
Voice: recorded file listened to — <your choice>
Music: lower than the speech — <your choice>
Effects: brief and source recorded — <your choice>
File or project checked: <actual name>
Needed change: <describe it or none>
After these steps, you can record and edit a short spoken line with music underneath.
Lesson cheat sheet
Use the voice as the invitation’s structure
Voice: recorded file listened to
Music: lower than the speech
Effects: brief and source recorded
Your next step
You now have criteria to record and edit a short spoken line with music underneath.
Save this lesson’s deliverable in the project folder. You will use it in the next step.
Next: Make four cuts guided by the beat
Extra material · module 5Production and care steps to resume after the short exercise.
Record a line that fits
Experiment at your own pace
Repeat the process on a copy, changing only one choice. Compare the result before keeping the change.
What to observe
Control names and availability may vary. Check the feature in your version before relying on it.
Music and effects support the message
Experiment at your own pace
Repeat the process on a copy, changing only one choice. Compare the result before keeping the change.
What to observe
Control names and availability may vary. Check the feature in your version before relying on it.
Check features and costs in your current account. Guides may show different steps depending on the version and device.
Lesson 13 · CapCut for Creators v6.2 · INEMA.CLUB PRO
Module 5 · Lesson 14 of 18
Make four cuts guided by the beat
You can compare a rhythm-led edit with one guided by meaning.
Cutting on every beat can become a rule without a reason. Use the beat when it helps guide attention.
In 1 minute
References: four beats identified
Cuts: heard in relation, not just measured
Comparison: rhythm versus spoken meaning
1Listen before marking
On a copy, use authorized instrumental music.
Listen for four low-beat starts, with a clear strong sound; use them as reference points.
Mark the beats if markers are available, or write down the times.
The waveform helps locate them, but listening decides.
Adjust the end of each of the four shots near those points.
The fourth point marks the end of the sequence.
Play it without looking at the numbers.
A cut can work slightly before or after the beat.
The goal is a sense of connection, not isolated numerical precision.
Nanda keeps a copy to compare two editing approaches.
Prompts to compare · teaching example
PromptCut every sentence in half to follow every beat.
There are no observable limits to check the work against.
PromptPrioritize the message and use the beat where it supports the transition.
There are clear criteria for checking the decision.
Compare the two instructions. They are examples written for this lesson, with no simulated tool response.
2Grouping and speed both need review
To move items together, select the clips that should stay aligned.
Select multiple items and look for Group or Link in their menu.
Move the group and play image and sound.
Check how this works in your version: selecting items together does not guarantee every relationship stays intact.
If the command is missing, mark the test as pending.
For a quick speed change, use a small peak and return near a musical beat.
Compare it without the effect.
Do not copy properties blindly; different framing may need different values.
A brief shake is optional, not a rhythm requirement.
Jorge chooses to hear the full sentence even when the beat suggests another cut.
Completed brief · lesson example
1References: four beats identified
2Cuts: heard in relation, not just measured
3Comparison: rhythm versus spoken meaning
Use this sheet as a reference. Replace the example with your own project.
3Check the decision against its use
Prioritize the message and use the beat where it supports the transition.
Jorge uses the checklist to confirm: comparison: rhythm versus spoken meaning.
Educational illustration created in Codex: Four marks under four shots represent beat references. They are not automatic music analysis or required timings.
Test yourself
A beat lands in the middle of the key word. What choice preserves the invitation?
It’s normal to get stuck hereIf you cannot identify four beats, use recorded claps as practice references. Choose the final music later.
Practice now 0/3
Make four cuts guided by the beat
Set aside about 10 minutes of active work for this section. Processing is not included. Done when a rhythm-led copy has been played and compared with the story-led edit.
Use files you own or are authorized to use. Editor features may depend on your account and plan. Keep steps you have not done marked as pending, and preserve originals.
Project: Verde Perto
Lesson: Make four cuts guided by the beat
References: four beats identified — <your choice>
Cuts: heard in relation, not just measured — <your choice>
Comparison: rhythm versus spoken meaning — <your choice>
File or project checked: <actual name>
Needed change: <describe it or none>
After these steps, you can compare a rhythm-led edit with one guided by meaning.
Lesson cheat sheet
Make four cuts guided by the beat
References: four beats identified
Cuts: heard in relation, not just measured
Comparison: rhythm versus spoken meaning
Your next step
You now have criteria to compare a rhythm-led edit with one guided by meaning.
Save this lesson’s deliverable in the project folder. You will use it in the next step.
Next: Review captions word by word
Extra material · module 5Production and care steps to resume after the short exercise.
Listen before marking
Experiment at your own pace
Repeat the process on a copy, changing only one choice. Compare the result before keeping the change.
What to observe
Control names and availability may vary. Check the feature in your version before relying on it.
Grouping and speed both need review
Experiment at your own pace
Repeat the process on a copy, changing only one choice. Compare the result before keeping the change.
What to observe
Control names and availability may vary. Check the feature in your version before relying on it.
Check features and costs in your current account. Guides may show different steps depending on the version and device.
Lesson 14 · CapCut for Creators v6.2 · INEMA.CLUB PRO
Module 5 · Lesson 15 of 18
Review captions word by word
You can create synced captions and correct the text and readability.
Automatic recognition can get names and punctuation wrong. Captions generated by the app still need review.
In 1 minute
Text: names and punctuation checked
Timing: entrances and exits follow the speech
Readability: contrast and margins
1Generate from speech or write captions by hand
With the voice track in place, open Captions or Text and look for Auto captions.
Choose Portuguese and the matching audio source.
Generate them if the feature is available in your account.
If not, create text blocks manually and set their timing by listening.
Listen to each section while following the captions.
Correct Verde Perto, omitted words, and punctuation.
Split long blocks into meaningful units.
Two short lines often help for a first test, but check real readability.
Nanda checks the workshop name before applying the style to every block.
Weak decision
Approve the automatic text because words appear on the screen.
Verifiable decision
Check words, timing, and readability on the device before keeping the style.
Notice which characteristics make the second decision easy to check.
2Style does not replace sync
Use a readable font and consistent contrast.
Check that each block appears with the speech and leaves after the idea ends.
Word-highlighting styles, called karaoke in some options, depend on the tool.
Use them only if the highlighting follows the words correctly.
Play it on a phone and watch for overlapping controls.
Also watch the video without sound: the message should still make sense.
If animated highlighting distracts, use simple captions.
Check again after changing a clip’s or voice track’s duration.
Jorge watches without sound to check if the invitation is clear.
Completed brief · lesson example
1Text: names and punctuation checked
2Timing: entrances and exits follow the speech
3Readability: contrast and margins
Use this sheet as a reference. Replace the example with your own project.
3Check the decision against its use
Check words, timing, and readability on the device before keeping the style.
Jorge uses the checklist to confirm: readability: contrast and margins.
Educational illustration created in Codex: Two short text blocks sit away from the edges of a vertical frame. This shows hierarchy, not completed automatic transcription.
Test yourself
The captions replace Verde Perto with another name. What should you do?
It’s normal to get stuck hereManual captions are a complete option for this exercise. You do not need to buy automatic recognition to learn syncing.
Practice now 0/3
Review captions word by word
Set aside about 10 minutes of active work for this section. Processing time is not included. Done when all captions have been checked against the speech and reviewed without sound.
Use files you own or are authorized to use. Editor features may depend on your account and plan. Keep steps you have not done marked as pending, and preserve originals.
Project: Verde Perto
Lesson: Review captions word by word
Text: names and punctuation checked — <your choice>
Timing: entrances and exits follow the speech — <your choice>
Readability: contrast and margins — <your choice>
File or project checked: <actual name>
Needed change: <describe it or none>
After these steps, you can create synced captions and correct text and readability.
Lesson cheat sheet
Review captions word by word
Text: names and punctuation checked
Timing: entrances and exits follow the speech
Readability: contrast and margins
Your next step
You now have criteria to create synced captions and correct text and readability.
Save this lesson’s deliverable in the project folder. You will use it in the next step.
Next: Review image and sound
Extra material · module 5Production and care steps to resume after the short exercise.
Generate from speech or write captions manually
Experiment at your own pace
Repeat the process on a copy, changing only one choice. Compare the result before keeping the change.
What to observe
Control names and availability may vary. Check the feature in your version before relying on it.
Style does not replace sync
Experiment at your own pace
Repeat the process on a copy, changing only one choice. Compare the result before keeping the change.
What to observe
Control names and availability may vary. Check the feature in your version before relying on it.
Check features and costs in your current account. Guides may show different steps depending on the version and device.
Lesson 15 · CapCut for Creators v6.2 · INEMA.CLUB PRO
Module 6 · Lesson 16 of 18
Review image and sound
You can find and fix a specific problem before exporting.
Watching repeatedly without a goal is tiring and lets errors slip through. Review in three passes.
In 1 minute
Image: continuity and readability
Sound: words and volume
Whole piece: meaning and sync
1Three passes, three different questions
First, watch the image without sound.
Look for gaps, awkward cuts, covered text, and plants out of frame.
Next, listen to the audio without watching the image.
Check words, noise, and sudden volume changes.
Finally, watch the whole piece.
Write down exact times and specific problems.
Instead of “it looks bad,” write “title disappears before the reading is done.”
If you find no problem, record “none observed” for that criterion.
Do not invent a problem to fill in the checklist.
Nanda notes the time so she can find the issue quickly.
Weak decision
Watch repeatedly and change effects without recording the problem.
Verifiable decision
Record the time, likely cause, and checked result of the fix.
Notice which characteristics make the second decision easy to check.
2Fix one cause at a time
Duplicate the version before a major change.
Fix the most important issue and replay that section.
Changing a title’s duration may require reviewing the nearby caption.
Changing speed may shift the music entrance.
Compare the fix with the previous version.
Do not add an effect to hide an editing continuity problem.
The final review includes authorized sources, correct text, and no unexpected paid items.
A simple, clear piece can be complete.
Jorge separates technical errors from personal style preferences.
Completed brief · lesson example
1Image: continuity and readability
2Sound: words and volume
3Whole piece: meaning and sync
Use this sheet as a reference. Replace the example with your own project.
3Check the decision against its use
Record the time, likely cause, and checked result of the fix.
Jorge uses the checklist to confirm: whole piece: meaning and sync.
Educational illustration created in Codex: Three review cards represent image, sound, and the whole piece. A magnifier points to a detail to show that a fix needs evidence.
Test yourself
Which note best helps you fix the piece?
It’s normal to get stuck hereIf you find no problem, record which criteria you checked. Reviewing does not mean changing something just to make a change.
Practice now 0/3
Review image and sound
Set aside about 10 minutes of active work for this section. Processing is not included. Done when the checklist records three passes and the actual review result.
Use files you own or are authorized to use. Editor features may depend on your account and plan. Keep steps you have not done marked as pending, and preserve originals.
Project: Verde Perto
Lesson: Review image and sound
Image: continuity and readability — <your choice>
Sound: words and volume — <your choice>
Whole piece: meaning and sync — <your choice>
File or project checked: <actual name>
Needed change: <describe it or none>
After these steps, you can find and fix a specific problem before export.
Lesson cheat sheet
Review image and sound
Image: continuity and readability
Sound: words and volume
Whole piece: meaning and sync
Your next step
You now have criteria to find and fix a specific problem before export.
Save this lesson’s deliverable in the project folder. You will use it in the next step.
Next: Export and open the final file
Extra material · module 6Production and care steps to resume after the short exercise.
Three passes, three different questions
Experiment at your own pace
Repeat the process on a copy, changing only one choice. Compare the result before keeping the change.
What to observe
Control names and availability may vary. Check the feature in your version before relying on it.
Fix one cause at a time
Experiment at your own pace
Repeat the process on a copy, changing only one choice. Compare the result before keeping the change.
What to observe
Control names and availability may vary. Check the feature in your version before relying on it.
Check features and costs in your current account. Guides may show different steps depending on the version and device.
Lesson 16 · CapCut for Creators v6.2 · INEMA.CLUB PRO
Module 6 · Lesson 17 of 18
Export and open the final file
You can save a vertical version and check the file outside the editor.
A correct preview does not prove the export is complete. Open and examine the final file.
In 1 minute
Output: vertical MP4, 1080 × 1920
Frame rate: 30 fps for this exercise
Evidence: file opened and checked
1Choose settings for the destination
Open Export and check the name and folder.
For the exercise, choose MP4, H.264 if available, 1080 by 1920, and thirty frames per second.
These values match the kit clips and the project’s vertical format.
Resolution gives dimensions; codec describes how the video is compressed.
Upscaling to 4K does not restore details missing from the source.
If an option is unavailable, check the version and choose a compatible output, recording the difference.
Nanda checks the folder so she does not deliver a test version by mistake.
Prompts to compare · teaching example
PromptMark the task complete as soon as you press Export.
There are no observable limits to check the work against.
PromptOpen the saved file and check image, sound, duration, and dimensions outside the editor.
There are clear criteria for checking the decision.
Compare the two instructions. They are examples written for this lesson, with no simulated tool response.
Review a source clip. This file is exercise material, not the student’s final edited project.
2Check the result outside the edit
Before confirming, look for notices about paid features.
A 1080p setting alone does not guarantee a free export if the project uses subscription items.
Remove or replace the listed item, or use authorized access.
Wait for the export to finish.
Open the MP4 in your system player.
Check the beginning, middle, ending, voice, and captions.
Check duration and dimensions in the file information.
Keep the editable project and source files; the final MP4 cannot restore all editing layers.
Jorge opens the MP4 on his phone to check whether the caption stays readable.
Completed brief · lesson example
1Output: vertical MP4, 1080 × 1920
2Frame rate: 30 fps for this exercise
3Evidence: file opened and checked
Use this sheet as a reference. Replace the example with your own project.
3Check the decision against its use
Open the saved file and check image, sound, duration, and dimensions outside the editor.
Jorge uses the checklist to confirm: evidence: file opened and checked.
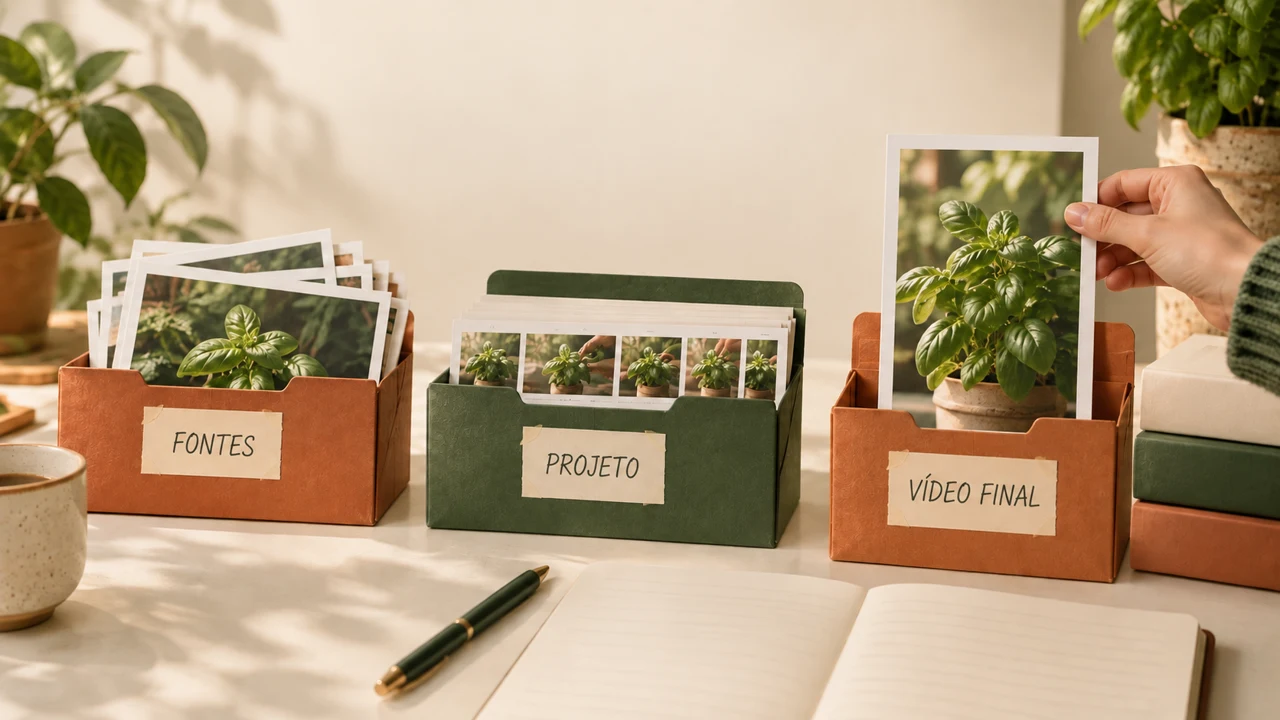
Educational illustration created in Codex: A final file appears beside the sources and project in separate containers. The illustration distinguishes delivery files from editing materials.
Test yourself
The export finished. What evidence is still missing?
It’s normal to get stuck hereIf export fails, production remains pending. Keep the warning and fix its cause before calling the file complete.
Practice now 0/3
Export and open the final file
Set aside about 10 minutes of active work for this section. Processing is not included. Done when an MP4 is saved, opened outside the editor, and checked from beginning to end.
Use files you own or are authorized to use. Editor features may depend on your account and plan. Keep steps you have not done marked as pending, and preserve originals.
Project: Verde Perto
Lesson: Export and open the final file
Output: vertical MP4, 1080 × 1920 — <your choice>
Frame rate: 30 fps for this exercise — <your choice>
Evidence: file opened and checked — <your choice>
File or project checked: <actual name>
Needed change: <describe it or none>
After these steps, you can save a vertical version and check the file outside the editor.
Lesson cheat sheet
Export and open the final file
Output: vertical MP4, 1080 × 1920
Frame rate: 30 fps for this exercise
Evidence: file opened and checked
Your next step
You now have criteria to save a vertical version and check the file outside the editor.
Save this lesson’s deliverable in the project folder. You will use it in the next step.
Next: Prepare the post and next project
Extra material · module 6Production and care steps to resume after the short exercise.
Choose settings for the destination
Experiment at your own pace
Repeat the process on a copy, changing only one choice. Compare the result before keeping the change.
What to observe
Control names and availability may vary. Check the feature in your version before relying on it.
Check the result outside the edit
Experiment at your own pace
Repeat the process on a copy, changing only one choice. Compare the result before keeping the change.
What to observe
Control names and availability may vary. Check the feature in your version before relying on it.
Check features and costs in your current account. Guides may show different steps depending on the version and device.
Lesson 17 · CapCut for Creators v6.2 · INEMA.CLUB PRO
Module 6 · Lesson 18 of 18
Prepare the post and next project
You can organize a delivery with a caption, credits, and a backup copy.
Posting the wrong file or losing the sources creates avoidable work. Finish with a clearly identified delivery.
In 1 minute
Delivery: final file and representative cover
Text: details checked and credits
Files: project and sources preserved
1Deliver a small, clear package
Set aside the final MP4, post text, and source credits.
Write a short description of what the workshop offers and how to learn more.
In the fictional example, do not invent a date, address, or promised result.
For real use, confirm these details with the person responsible.
Choose a cover from an approved frame or an image you own.
It should represent the piece.
If you use an exported frame, check its quality.
Do not treat a small screen capture as a print file or high-resolution cover.
Nanda identifies the final version and preserves the project for future corrections.
Weak decision
Send the first version you find and invent a date for the description.
Verifiable decision
Check the version, details, and credits before preparing the post draft.
Notice which characteristics make the second decision easy to check.
Review a source clip. This file is exercise material, not the student’s final edited project.
2Scheduling depends on the destination account
Use scheduling on the publishing platform when your account offers it.
Check the time zone, date, audience, and preview.
Do not assume every CapCut version can publish or schedule directly to every social network.
Saving a draft is a valid option.
Copy the sources, MP4, cover, and credits to another drive or protected folder.
Open the copied files.
In CapCut, reopen the local project and check its layers.
This checks the local project, not an independent copy.
Jorge checks the workshop’s real details before posting.
Completed brief · lesson example
1Delivery: final file and representative cover
2Text: details checked and credits
3Files: project and sources preserved
Use this sheet as a reference. Replace the example with your own project.
3Check the decision against its use
Check the version, details, and credits before preparing the post draft.
Jorge uses the checklist to confirm: files: project and sources preserved.
Educational illustration created in Codex: Cards, a calendar, and an external drive represent delivery, planning, and file copies. This is an illustration; it does not prove a post or project copy was made.
Test yourself
Scheduling is unavailable in the destination account. Which option still works?
It’s normal to get stuck hereThis exercise ends with an organized delivery. A public post happens only when you choose to publish and verify the real details.
Practice now 0/3
Prepare the post and next project
Set aside about 10 minutes of active work for this section. Processing is not included. Done when the delivery and sources are copied and opened, the local project reopens, and the status of extra protection is recorded.
Use files you own or are authorized to use. Editor features may depend on your account and plan. Keep steps you have not done marked as pending, and preserve originals.
Project: Verde Perto
Lesson: Prepare the post and next project
Delivery: final file and representative cover — <your choice>
Text: details checked and credits — <your choice>
Files: project and sources preserved — <your choice>
File or project checked: <actual name>
Needed change: <describe it or none>
Copy of sources and delivery: <location and opening checked>
Local project: <reopening checked>
Independent editable project copy: <checked or pending; do not confuse with MP4>
After these steps, you can organize a delivery with a post caption, credits, and a backup copy.
Lesson cheat sheet
Prepare the post and next project
Delivery: final file and representative cover
Text: details checked and credits
Files: project and sources preserved
Your next step
You now have criteria to organize a delivery with a post caption, credits, and a backup copy.
Save this lesson’s deliverable in the project folder. You will use it in the next step.
Next: Apply the method to a new video with a different goal.
Extra material · module 6Production and care steps to resume after the short exercise.
Deliver a small, clear package
Experiment at your own pace
Repeat the process on a copy, changing only one choice. Compare the result before keeping the change.
What to observe
Control names and availability may vary. Check the feature in your version before relying on it.
Scheduling depends on the destination account
Experiment at your own pace
To also protect the editable project, look for Save to cloud or upload to Space in the project menu. Check access, storage, and cost. Wait for it to finish; reopen it from Space and check layers and sources. If you cannot, mark editable-project protection as pending. Do not delete the original.
What to observe
An independent editable-project copy is an extra step. The MP4 does not replace your layers. Do not say protection is complete until you test reopening the copy.