You see a video with a look you love, but can't recreate it: every video you make comes out looking different, and your channel ends up with no identity. With the style-to-skill method, you can make as many videos as you want in the style of a video you admire, just by changing the topic. I'll show you how.

You see a video with a visual style you love, try to repeat it, and every video you make turns out looking different. style-to-skill is a free kit that studies the visual language of that video (colors, lettering, composition, movement) and saves everything in a skill, an instruction file that Claude Code or Codex follows. Then you just tell it the topic, and the skill makes the whole video with the same look: storyboard, animated scenes, narration in one voice, a soundtrack, and a review before it says “ready.” It’s for people who make short videos and don’t program; you need Claude Code or Codex, an image generation tool, and three free programs on your computer.
▶ Watch on YouTube · Vertical version (phone)
Also see the method's result in the demo video ↓ and learn how it works ↓.
Every request to AI starts from scratch. It doesn’t remember the colors, lettering, or framing from the previous video. You write “cordel style,” and each time it understands something different. The result: one video looks one way, the next looks another, and your channel has no identity.
Colors with each exact code, typeface, where the subject sits in the frame, texture, light, how the camera moves, how one scene transitions to the next, the rhythm, and what would break the style.
Characters, faces, logos, brands, text, dialogue, and the story from the reference video are left out. The subject and dialogue are always yours.
In a “style bible” inside the skill. Every image request uses the same description, so the tenth video looks like the first.
You create the style part once. After that, each new video starts with just the topic.
From the reference video, it automatically picks 5 to 8 different images and puts them all on one sheet.
You paste a ready-made prompt into Claude Code or Codex. It looks at the frames and describes the style without copying any of the content.
One command installs the skill with the bible inside, in Claude Code or Codex. You do this once for each style.
And four more details, with ready-made defaults: format (vertical, landscape, or square), duration, resolution, and engine.
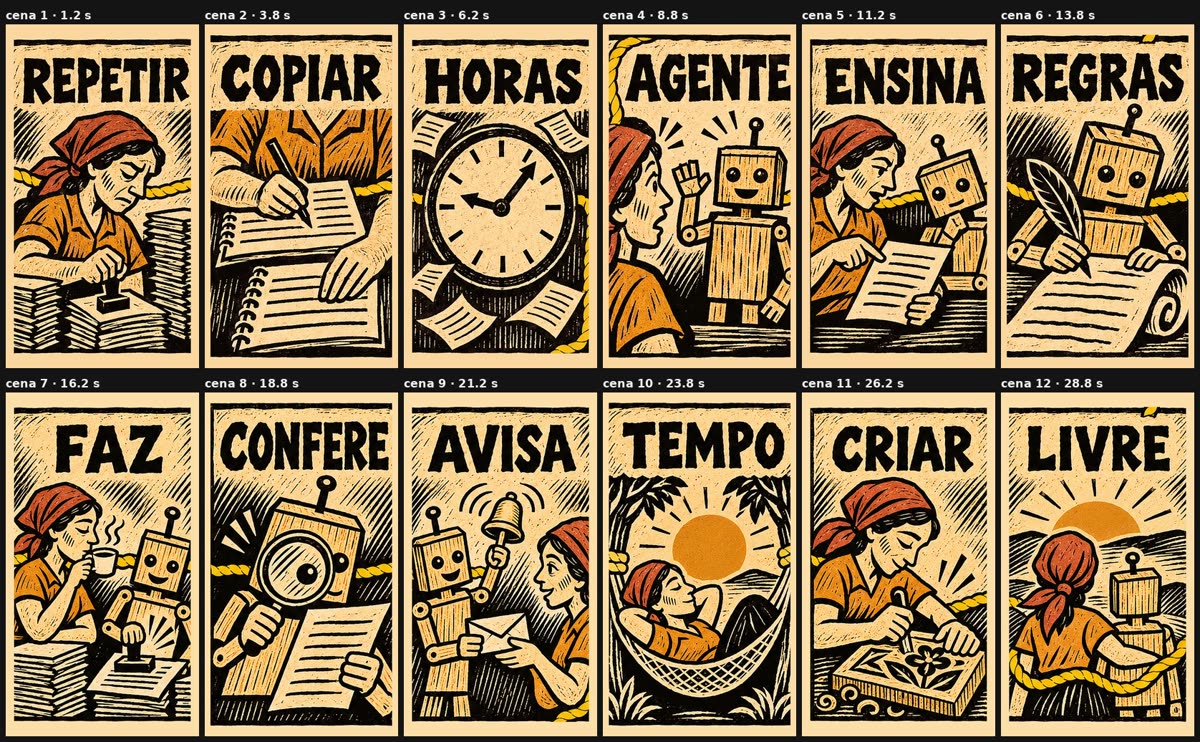
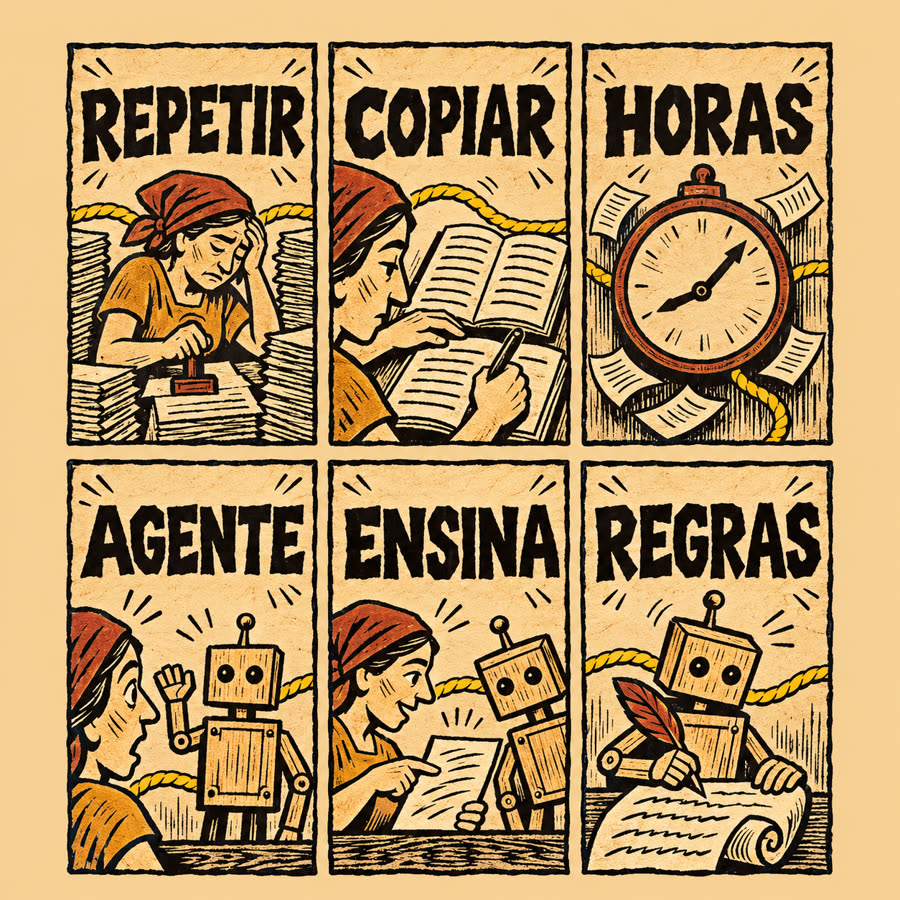
The skill writes the script (one large word and one short sentence per scene) and asks for the storyboard. The second storyboard uses the first as a reference to keep the same characters.
Each scene gets movement, the narration uses a single voice, one soundtrack plays from start to finish, and a script checks the video. Only then does it say "ready".
Each scene lasts 2.5 seconds, and each storyboard has up to 6 scenes (15 seconds). Longer videos use several storyboards, made one at a time. Durations that don't divide evenly into 2.5 are rounded to the nearest one, with a notice (17 s becomes 17.5 s).
| Duration | Scenes | Storyboards | Layout in vertical format (rows × columns) |
|---|---|---|---|
| 10 s | 4 | 1 | 2 × 2 |
| 15 s | 6 | 1 | 2 × 3 |
| 20 s | 8 | 2 | 2 × 2 + 2 × 2 |
| 30 s | 12 | 2 | 2 × 3 + 2 × 3 |
| 45 s | 18 | 3 | 2 × 3, three times |
In landscape format (16:9), the full layout is 3 rows × 2 columns. How to use ↓
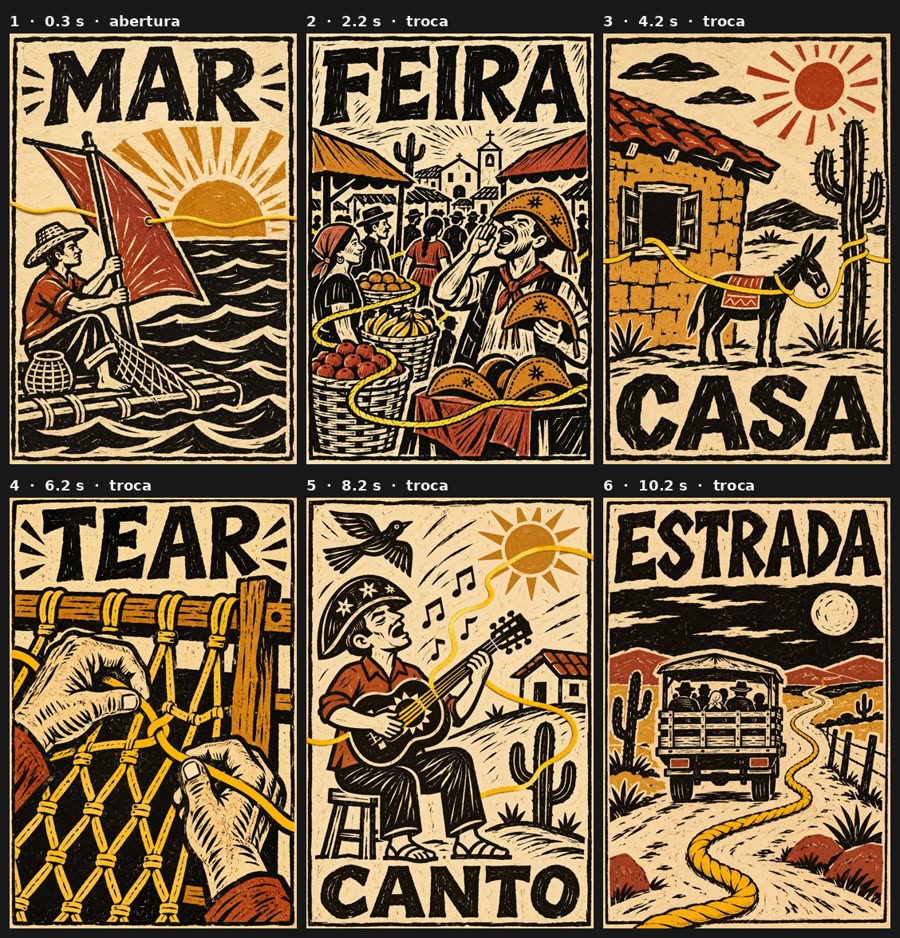
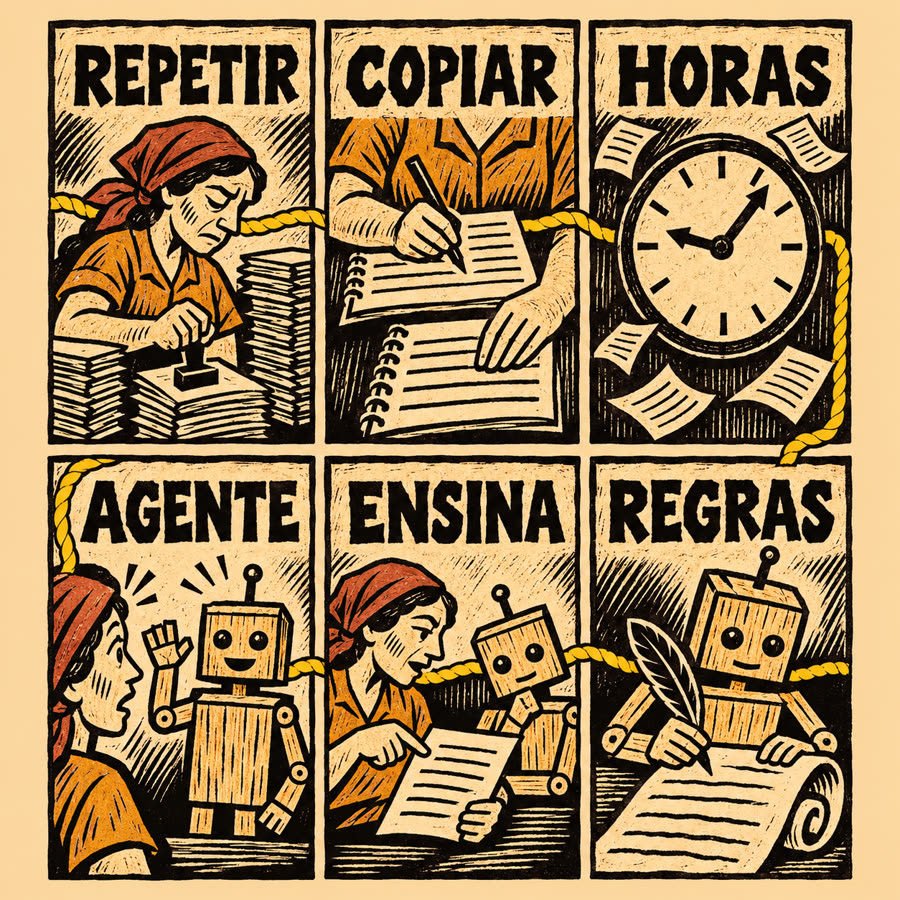
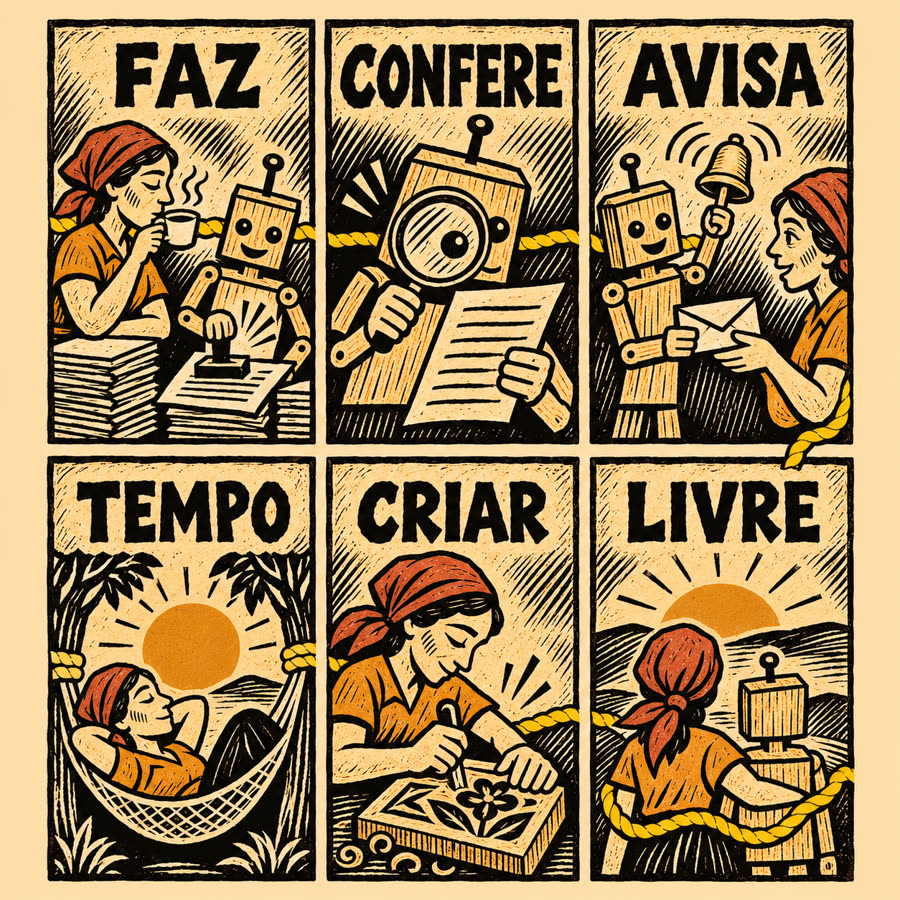
To avoid using anyone else’s video, the demo uses its own reference style: six cordel woodcut panels (cream paper, solid black, ochre, earthy red, carved letters, and a yellow string connecting the scenes), made for this kit and joined into a 12-second video. The whole workflow ran with a topic that has nothing to do with cordel: “How an AI agent takes repetitive work out of your day,” 30 seconds, vertical.


The skill doesn't come ready-made. After each video, you look at the final sheet, note what went wrong, and change the rule, not just the prompt. There were six changes in the demo.


It's best to know before choosing a style.
Each storyboard comes out at about 1254 × 1254 pixels; each scene is around 370 × 600 and is enlarged to 1080 × 1920. Flat styles (engraving, cutout, flat) hold up well.
The image tool may change letters. Check each word enlarged. Short words without accents are less likely to be wrong.
The local engine moves the camera across the illustration and connects the scenes with a dissolve. A walking character needs an AI video engine, which hasn't been tested in this kit.
The previous storyboard is used as a reference, but the same person may change a detail. Check before continuing.
The kit cuts out sounds that are much quieter than the speech. A loud sound without words can only be caught by listening or transcribing.
It looks at the frames and may get a color wrong. Check the colors and the list of things to avoid before using it.
References and music must be yours or licensed. The method copies the visual language, never characters, logos, or text.
The kit was built and tested on Linux (Ubuntu). On Mac, install the skill using the guide's manual method.
From here on, it gets technical: install, extract the frames, create the skill, and request the video. You don't need this section to understand what came before.
An open kit (MIT) that turns a video’s style into a skill. It doesn’t call any API: everything runs on your computer, and the storyboard image comes from the tool you already use.
| Folder or file | What it does |
|---|---|
scripts/quadros.py | takes 5 to 8 different frames from the reference video (scene changes + removes similar ones) and creates the folha.jpg |
prompts/criar-skill.md | the prompt you paste into Claude Code or Codex to write the style bible |
scripts/instalar.sh | installs the skill in Claude Code (.claude/skills/) or Codex (.agents/skills/) |
molde/estilo-em-skill/ | the skill template: SKILL.md, references/ (bible, storyboard and video rules, lessons), modelos/ (storyboard and video requests) and scripts/ (cenas.py, pedido_storyboard.py, recortar.py, animar.py, narrar.py, montar.py, validar.py, folha.py) |
tests/rodar.sh | the kit’s tests, without pytest |
exemplos/cordel/ | the complete demo: reference, frames, style bible, installed skill, storyboards, script, panels, final video, manifest and LICOES.md |
You don’t write code: you copy commands and talk to the AI.
To review the frames, write the style bible, and run the skill. Open it in the terminal, in the kit folder, with claude or codex.
For the storyboard. In Codex, use image_gen with your subscription. In Claude Code, use whichever tool you have; or generate the images yourself and save them where the skill asks.
ffmpeg cuts, animates, and joins (it includes ffprobe). Python 3 runs the scripts. Pillow works with images. All three are free.
Record the narration, or use a computer voice that runs on your machine.
Yours or properly licensed, in .mp3 or .wav format. Without a soundtrack, the skill stops and asks.
To download the kit from GitHub.
sudo apt update sudo apt install -y ffmpeg python3 python3-pil git
brew install ffmpeg python pillow git
Not tested on Mac. If the skill’s automatic installation fails, use the manual method in step 4.
Check (on both systems) and download the kit:
ffmpeg -version python3 --version python3 -c "import PIL; print('Pillow ok')" git clone https://github.com/inematds/estilo-em-skill cd estilo-em-skill
You do steps 1 to 4 once for each style. From step 5 on, it's for each new video.
Confirm that ffmpeg, Python, and Pillow are in place. It takes a few minutes and ends with 24/24 testes passaram. The script uses the timeout command, which Mac doesn't include.
bash tests/rodar.sh
Choose the video whose style you want (one you can use) and save it in the kit folder as ref.mp4 (or replace ref.mp4 in the command with your file name). The script picks 5 to 8 different frames and creates a contact sheet. Open folha.jpg and check that the frames show the style.
python3 scripts/quadros.py ref.mp4 --n 8 --saida estilo/quadros/
Copy the bible template, open Claude Code (claude) or Codex (codex) in the kit folder, and paste the text from prompts/criar-skill.md (the part after the line of three dashes). AI looks at the frames, fills in the bible, and makes a test image with a new subject. Check the colors and the "what not to do" section. At the end, no PREENCHER should be left.
mkdir -p estilo cp molde/estilo-em-skill/references/estilo.md estilo/estilo.md # after AI fills it in, this number must be 0: grep -c PREENCHER estilo/estilo.md
Give the style a short name (e.g.: meu-estilo). Claude Code reads skills from the .claude/skills/ folder of the project you open; Codex reads .agents/skills/. Without --projeto, the skill goes in the current folder (the kit folder).
# Claude Code bash scripts/instalar.sh meu-estilo claude --estilo estilo/estilo.md # Codex bash scripts/instalar.sh meu-estilo codex --estilo estilo/estilo.md # install in another project folder bash scripts/instalar.sh meu-estilo claude --estilo estilo/estilo.md --projeto ~/meus-videos # Claude Code, for all projects bash scripts/instalar.sh meu-estilo claude --estilo estilo/estilo.md --destino ~/.claude/skills/meu-estilo
Manual method (Mac, or if the script fails): copy the template, add your bible, and change the name in the SKILL.md heading. For Codex, replace .claude/skills with .agents/skills.
mkdir -p .claude/skills/meu-estilo cp -R molde/estilo-em-skill/. .claude/skills/meu-estilo/ cp estilo/estilo.md .claude/skills/meu-estilo/references/estilo.md perl -pi -e 's/\{\{NOME_DO_ESTILO\}\}/meu-estilo/g' .claude/skills/meu-estilo/SKILL.md
After installing, open a new Claude Code or Codex session in that folder so it can see the skill.
In the folder where the skill is installed, open Claude Code or Codex and write your request. The skill asks about any missing details (subject, format, duration, resolution, engine), suggesting the defaults (vertical, 15 s, 1080 × 1920, local engine). Put a music file in assets/trilha/, inside the folder where you opened Claude Code or Codex, or say which one to use.
use a skill meu-estilo para um vídeo sobre como organizar a semana, 9:16, 15 segundos, motor local
It writes roteiro.json (one large word and a line of up to 6 words per scene), generates the storyboards in the image tool, checks each one, and runs the scripts. These are the commands, in order, from the project folder (tested with the demo files; the duration must match the number of scenes in the script):
S=.claude/skills/meu-estilo/scripts python3 $S/cenas.py --tema "Seu tema" --duracao 30 --formato 9:16 --resolucao 1080x1920 --motor local --roteiro roteiro.json python3 $S/pedido_storyboard.py # generate saida/storyboards/storyboard-1.png (and -2.png...) using each one's prompt python3 $S/recortar.py --plano saida/plano.json python3 $S/animar.py python3 $S/narrar.py --arquivo voz.wav python3 $S/montar.py --trilha minha-musica.mp3 python3 $S/validar.py --duracao 30 --resolucao 1080x1920 python3 $S/folha.py
Script format, if you want to write your own:
{"personagem": "quem aparece em várias cenas, descrito sempre igual",
"cenas": [{"texto_tela": "PALAVRA", "fala": "frase curta falada", "acao": "o que se vê", "camera": "zoom_in"}]}
Other ways to narrate: --falas-dir falas/ (one recording per scene), --comando '<tts> {texto} {saida}' (any voice that runs on your machine), and --refazer 3 (redo only scene 3). --edge uses an online service and hasn't been tested.

It's only "ready" when validar.py prints PASSOU and you check final/folha-final.jpg. Add what went wrong to the skill's references/licoes.md; if the error happens again, change the rule in the bible, in references/regras-storyboard.md, or in the script.
# the demo output
ok manifesto com status completo
ok 30 arquivos do manifesto existem
ok duração 30.00 s (pedido 30 s ± 0,5)
ok resolução 1080x1920
ok áudio do vídeo com som (média -20.2 dB, pico -3.9 dB)
ok narração com voz (média -18.9 dB)
PASSOU: vídeo conferido, pode dizer pronto.
The repository stores the final video, the manifest, and the demo voice, but not the intermediate files (PNG panels, clips, silent video). So in a clone, checking uses --sem-intermediarios and looks at 5 files instead of 30.
cd exemplos/cordel python3 skill/scripts/validar.py --sem-intermediarios --duracao 30 --resolucao 1080x1920
The kit doesn't call any API. For AI video engines, it only writes the prompts; you run them in your own account.
| Engine | Status | What it does |
|---|---|---|
local | tested | free, with no AI video: each scene gets a slow camera movement (slow zoom, 1.18× by default and at most 1.25×, or pan), and the scenes are joined with a dissolve, for the exact duration |
kling | not tested in this kit | animar.py --motor kling --so-prompts saves the kling image_to_video commands for each scene to saida/prompts-kling.sh; nothing is sent |
seedance / higgsfield | not tested in this kit | animar.py --motor seedance --so-prompts saves one prompt per storyboard to saida/prompts-seedance.md (scene timing, camera, text, transition, speech, no music) for you to paste into the site |
With kling or seedance, the clips you generate go back to saida/clipes/ and the skill continues from the narration onward.
bash tests/rodar.sh runs 24 tests with synthetic images and tones in place of voice and music (24/24 passing on 13/11/2026, on Ubuntu).
quadros.py uses ffmpeg’s scene change detection and discards similar frames (drawing and color); videos with few changes fall back to evenly spaced frames.
recortar.py finds the space between the panels (light or dark, even with the cord crossing it); if it can’t find it, it cuts on a fixed grid. It adds padding so the zoom doesn’t cut off a word.
animar.py doesn’t shorten the video with the dissolve: 30 seconds requested, 30 seconds delivered.
narrar.py cuts silence from the ends, speeds up by up to 15% if needed, warns when the speech doesn’t fit, and rejects silent voice.
montar.py uses the same music from beginning to end (volume 0.5, lowered under the voice, fade at the end). Without a soundtrack, it stops and asks.
validar.py checks the manifest files, duration ±0.5 s, resolution, audio and narration that aren’t silent, soundtrack, and status: completo. If it fails, it exits with an error and says what’s missing.
instalar.sh uses Linux sed).